7SR105 Rho Description of Operation
©2018 Siemens Protection Devices Chapter 1 Page 16 of 57
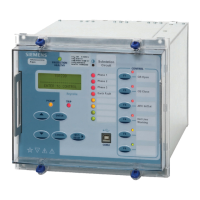
2.7.3 Standard Keys
The relay is supplied as standard with five push buttons. The buttons are used to navigate the menu structure and
control the relay functions. They are labelled:
Increases a setting or moves up menu.
▼ Decreases a setting or moves down menu.
TEST/RESET► Moves right, can be used to reset selected functionality and for LED test (at relay
identifier screen).
Used to initiate and accept settings changes.
CANCEL Used to cancel settings changes and/or move up the menu structure by one
NOTE:
All settings and configuration of LEDs, BI and BO can be accessed and set by the user using these keys.
Alternatively, the configuration/settings files can be loaded into the relay using ‘Reydisp’ software. When the
System Config > Setting Dependencies is ENABLED, only the functions that are enabled will appear in the
menu structure.
2.7.4 Protection Healthy LED
This green LED is steadily illuminated to indicate that auxiliary voltage has been applied to the relay power supply
and that the relay is operating correctly. If the internal relay watchdog detects an internal fault then the LED will
continuously flash.
2.7.5 Indication LEDs
Relays have 9 user programmable LED indicators. Each LED can be programmed to be illuminated as either
green, orange, or red. Where an LED is programmed to be lit both red and green, it will illuminate yellow. The
same LED can be assigned two different colours dependent upon whether a Start/Pickup or Operate condition
exists. LED’s can be assigned to the pickup condition and colour selected in the OUTPUT CONFIG > LED
CONFIG menu.
Functions are assigned to the LEDs in the OUTPUT CONFIG > OUTPUT MATRIX menu.
Each LED can be labelled by inserting a label strip into the pocket behind the front fascia. A ‘template’ is available
in the Reydisp software tool to allow users to create and print customised legends.
Each LED can be programmed as hand reset or self reset. Hand reset LEDs can be reset either by pressing the
TEST/RESET ► button, energising a suitably programmed binary input or by sending an appropriate command
over the data communications channel(s).
The status of hand reset LEDs is maintained by a back up storage capacitor in the event of an interruption to the
supply voltage.
 Loading...