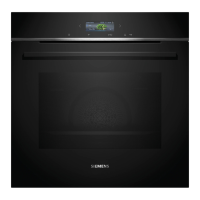
en Getting to know your appliance
8
*Getting to know your
appliance
Get t i ng to k now y our appl i ance
In this section, we will explain the indicators and
controls. You will also find out about the various
functions of your appliance.
Note: Depending on the appliance model, individual
details and colours may differ.
Control panel
In the control panel, you can use the various buttons,
touch fields and the rotary selector to set the required
function of the appliance. The current settings are
shown in the display.
Controls
The individual controls are adapted for the various
functions of your appliance. You can set your appliance
simply and directly.
Buttons and touch fields
Here you can find a short explanation of the various
buttons and touch fields.
--------
Rotary selector
Use the rotary selector to change the operating modes
and adjustment values shown in the display.
In most selection lists, e.g. types of heating, the first
selection follows the last. For temperature for example,
you must turn the rotary selector back when the
minimum or maximum temperature is reached.
Display
The display is structured so that the information can be
read at a glance.
The value that you can currently set is in focus. It is
displayed in white lettering with a dark background.
Status bar
The status bar is at the top of the display. The time and
set time functions are displayed here.
&
##
PO
PGG
NFOV TUBSUTUPQ
'KRWDLU
(
Buttons
The buttons to the left and right of the rotary
selector have a pressure point. Press these
buttons to activate them.
0
Rotary selector
You can turn the rotary selector clockwise and
anti-clockwise.
8
Display
You can see the current adjustment values,
options or notes in the display.
@
Touch fields
There are sensors under the touch fields to the left
¾ and right ¿ of the display. Touch the respective
arrow to select the function.
Buttons Meaning
on/off Switches the appliance on and off
menu Menu Opens the operating modes menu
l/
Information
Childproof lock
Displays notes
Activates/deactivates the child-
proof lock
0
Time-setting
options
Opens the time-setting options
menu
c
Rapid heat up Switches rapid heat up on and off
Start/Stop Starts, pauses or cancels opera-
tion
Touch fields
¾
Field to the left of
the display
Navigates left
¿
Field to the right of
the display
Navigates right
Getting to know your appliance en
9
Progress line
The progress line is under the status bar. The progress
line shows you how much time has elapsed, for
example. The line over the in-focus value progresses
from left to right, the longer the operation continues to
run.
Lapse of time
If you have started your appliance without a cooking
time, you can see how long the operation has already
been running for at the top on the right in the status bar.
Temperature check
The temperature indicator bars show the heating
phases in the cooking compartment.
Note: Due to thermal inertia, the temperature displayed
may be slightly different to the actual temperature inside
the oven. You can use the
² button to check the
current heating temperature when heating up.
Operating modes menu
The menu is divided into different operating modes. In
this way, you can quickly access the required function.
--------
Types of heating
To make sure that you always use the right type of
heating to cook your food, we have explained the
differences and applications below.
For temperature settings above 275 °C and grill
setting 3, the appliance reduces the temperature to
approx. 275 °C or grill setting 1 after approx.
40 minutes.
Heating indicator The heating indicator displays the rising tempera-
ture in the cooking compartment. When all bars
are complete, the optimum time for placing the
dish in the oven has been reached.
The bars do not appear when settings are applied
for grilling and cleaning.
Residual heat
indicator
When the appliance is switched off, a line appears
under the status bar which shows how much
residual heat is in the cooking compartment.
Once the temperature has dropped to approxi-
mately 60 °C, the display goes out.
Operating mode Use
Types of heating There are several finely tuned
types of heating for you to pre-
pare your dishes.
Self-cleaning ~ "Cleaning
function" on page 17
The self-cleaning function cleans
your oven automatically.
Settings ~ "Basic settings"
on page 15
You can adapt your appliance's
basic settings to suit your needs.
Types of heating Temperature Use
:
4D hot air 30-275 °C For baking and roasting on one or more levels.
The fan distributes the heat from the ring heating element in the back panel
evenly around the cooking compartment.
%
Top/bottom heating 30-300 °C For traditional baking and roasting on one level. Especially suitable for cakes with
moist toppings.
Heat is emitted evenly from above and below.
‘
Hot air eco 30-275 °C For gently cooking selected types of food on one level without preheating.
The fan distributes the heat from the ring-shaped heating element in the back
panel around the cooking compartment.
This heating function is most effective between 125 and 275 °C.
This heating function is used to measure both the energy consumption in air recir-
culation mode and the energy efficiency class.
+
Top/bottom heating eco 30-300 °C For gently cooking selected types of food on one level.
Heat is emitted from above and below.
This heating function is most effective between 150 and 250 °C.
This heating function is used to measure the energy consumption in the conven-
tional mode.
4
Hot air grilling 30-300 °C For roasting poultry, whole fish and larger pieces of meat.
The grill heating element and the fan switch on and off alternately. The fan circu-
lates the hot air around the food.
(
Grill, large area Grill settings:
1 = low
2 = medium
3 = high
For grilling flat items such as steaks, sausages or bread, and for browning food.
The whole area of the grill heating element becomes hot.
 Loading...