31
Installation
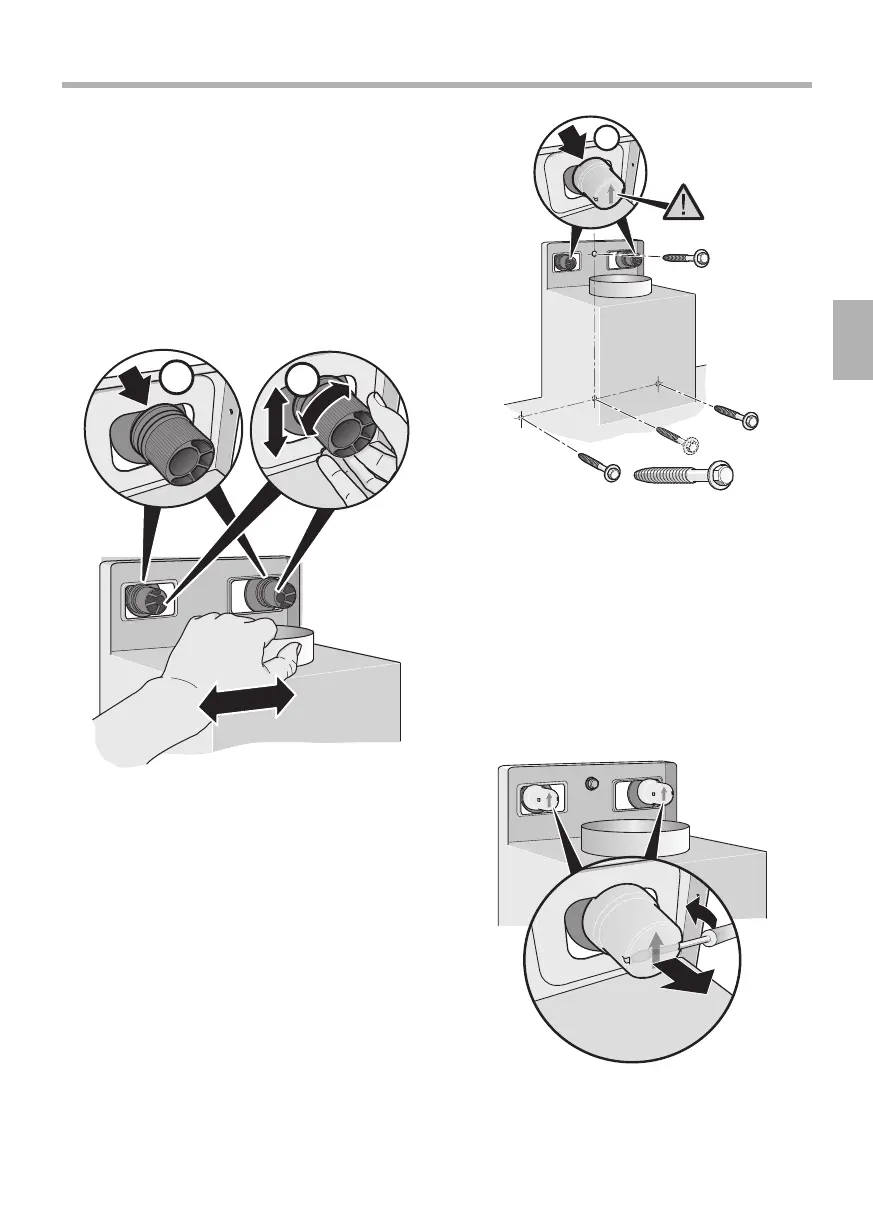
Attachment and alignment
1. Initially remove the protective foil from the
back of the extractor hood and, following
installation, remove foil completely.
2.
Mount the extractor hood, ensuring that the
back is attached firmly to the brackets
Ⓐ.
3. Align the extractor hood horizontally by
turning the brackets..
If required, the extractor hood can be
moved to the right or left
Ⓑ.
Locking screws and locking caps
1. Mark the holes for the safety screws. Detach
the extractor hood, drill holes for the safety
screws and press in wall plugs ush with
the wall.
2. Attach the extractor hood and screw in the
safety screws tightly.
3. Press the safety caps with the arrow upwards
onto the brackets until they click into
position
Ⓒ.
RISK OF INJURY
Check that all locking screws and locking caps
have been attached securely!
4. Connect the pipes (see ”Connecting pipes”).
5. Connect to the power supply (see ”Electrical
connection”).
Removing the safety caps
Remove the locking caps from the brackets
using a suitable tool, e.g. a at-blade
screwdriver.
 Loading...