Do you have a question about the Siemens RDE100 and is the answer not in the manual?
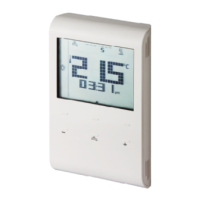
Symbol indicating that batteries need to be replaced on battery-powered versions.
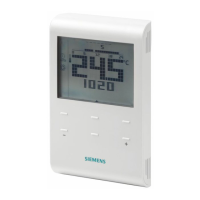
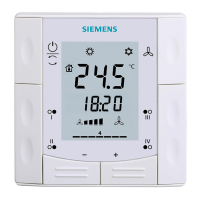
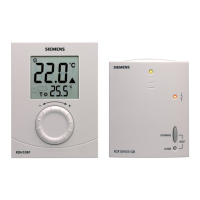
Displays the current time, often in 12 or 24-hour format.
Indicates when frost protection (heating) is active.
Shows 'am' and 'pm' for morning/afternoon in 12-hour format.
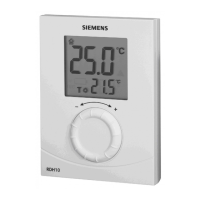
Displays room temperature in Fahrenheit (°F) or Celsius (°C).
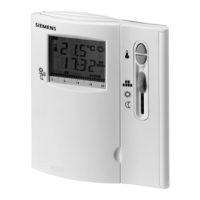
Indicates button lock, heating status, and current room temperature.
Shows the current day of the week, with '1' representing Monday.
Visual representation of programmed time intervals for operating modes.
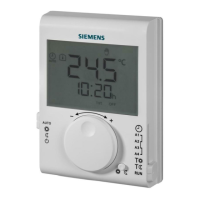
Manually change the thermostat's operating mode using the 'mode' button.
Initiates the process to set or adjust values like time, day, or temperature.
The 'OK' button confirms settings and moves to the next step.
Use '+' and '-' buttons to increase or decrease values.
Location for installing or replacing batteries.
Press 'set' to begin adjusting the time and day.
Press 'ok' after selecting 'set' to make the time digits flash.
Use '+' or '-' to select the correct day of the week.
Press 'ok' to confirm and save the set time and day.
Press 'mode' to exit the setting process or wait for auto-exit.
Press and hold the 'mode' button for at least 7 seconds to lock buttons.
Repeat the 'mode' button press sequence to unlock the buttons.
Unit operates normally with locked buttons, but changes are prevented.
Use '+' or '-' to temporarily adjust room temperature setpoint.
Temporary adjustments are reset when the operating mode changes.
Press 'ok', 'set', or 'mode' to save the temporary setpoint.
Set thermostat to a constant temperature for periods of absence.
Adjust the number of days for holidays (0 means Holiday mode OFF).
Remaining holiday days are displayed; 'mode' button deactivates the mode.
Maintains a constant Comfort temperature permanently.
Maintains a constant Economy temperature permanently.
Automatically changes modes based on programmed time switch settings.
Always active; heats if room temperature drops below 5°C.
Configure permanent temperature settings for Comfort or Economy modes.
Choose between Comfort or Economy mode for permanent settings.
Use '+' or '-' to adjust the permanent setpoint value.
Program operating modes and setpoints for each day individually.
Use a 24-hour bar to set operating modes at 15-minute intervals.
Choose days from Monday (1) to Sunday (7) for time switch programming.
Press 'ok' to save the programmed time switch configuration.
Set identical time switches for all seven days of the week.
Program separate time switches for weekdays (Mon-Fri) and weekends (Sat-Sun).
Includes selecting periods, modes, and adjusting time setpoints.
Symbol indicates low batteries; replace with 2 new AAA alkaline batteries.
Steps for replacing batteries within 1.5 minutes to retain settings.
Ensure exhausted batteries are disposed of correctly and environmentally.
Press '+' and '-' simultaneously for 5 seconds to enter parameter mode.
Use '+' or '-' to scroll through parameters, 'ok' to select.
Use '+' or '-' to change parameter values, 'ok' to confirm.
Set time format to 24-hour (default) or 12-hour AM/PM.
Select temperature display unit as Celsius (°C) or Fahrenheit (°F).
Enable or disable locking of the Comfort setpoint.
Configure time switch for individual days, all 7 days, or 5-2 day selection.
Option to reset all parameters to their default factory values.
| Type | Room Thermostat |
|---|---|
| Temperature Range | 5°C to 30°C |
| Display | LCD |
| Control Type | Electronic |
| Protection Class | IP30 |
| Mounting | Wall mounting |
| Output | Relay |
| Ambient Temperature Range | 0°C to 50°C |
| Operating Voltage | 3V (from batteries) |