PSA / PVA Installation Guide
April 20, 2023 Sifos Technologies Page 14
NOTE! The PSA LAN interface will not operate if the serial port to the PSA is open and the command menu is
visible as a result of pressing the ENTER key.
3.5.6. IP Address Set-Up via PowerShell Tcl or Wish
To alter the default IP address to another fixed address, users may use PowerShell Wish or PowerShell Tcl to
connect to 192.168.221.105, then use the psa_setipaddress command (see PSA-3000, PSL-3000, PSL-3424, or PVA-
3000 Technical Reference Manual section 5.13) in PowerShell Wish or Tcl to alter the address and IP mask to
another setup. This method of configuring IP address avoids the need to interface to the Console port, however, care
must be taken to change the address and mask to one that is compatible with the host PC’s subnet. For example, if
the subnet mask is 255.255.255.0, then the new IP address must remain in the 192.168.221.*** subnet. This will
enable re-connection to the new IP address after the change is made.
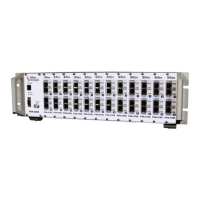
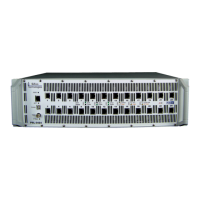
If setting up more than one instrument, as in the case of the PSA-3x48 RackPack, each PSA chassis must have a
unique IP Address that is on a common subnet. The default PSA-3x48 RackPack addresses are 192.168.221.105
and 192.168.221.106.
NOTE! Once you have changed the IP Address in PowerShell, you will need to use the PowerShell psa command to
re-connect to the instrument at its new IP address.
3.5.7. DHCP Address Option
When configuring an IP address, if DHCP is selected, the PSA will attempt to acquire an address from a network
DHCP server. Generally, this configuration is not advised for test laboratory environments where most instruments
operate with hard-coded addresses. Knowledge of the PSA address is critical in order to connect and control the
PSA from PSA Interactive or PowerShell, so if DHCP is utilized, the assigned address must be known and must be
stable over the course of instrument usage. (Note: The PSA console menu will display the acquired address if the
DHCP request is successful.)
If the Controller is unable to obtain an address, a message such as “No response to DHCP request” will be displayed.
At this point, you have the option of trying DHCP again, or configuring a static IP address. NOTE! The PSA must
have a valid IP address in order to be accessed by PowerShell.
3.5.8. IP Address Factory Default Restoration
PSA-3000, PSL-3000, PSL-3424 Chassis Based Instruments and PSA-3402 Compact PSA
Chassis-based instruments with USB console interfaces on the controller blade also include a recessed pushbutton, IP
Reset, that can be used to restore the factory default IP address of 192.168.221.105. To restore the factory default IP
address, press the recessed button for up to 30 seconds until the LAN LED blinks rapidly, then wait until the LAN
LED transitions to a steadily “OFF” state. (PSA-3402: Look for one or two blinks on the LAN control port LED’s.)
A similar ability exists for chassis-based instruments with RS-232 console interfaces if they are running PSA
controller firmware 3.0c or later. However, this requires a special intervention with the serial connector on the PSA
Controller Blade. The user is advised to contact Sifos support for further information and instructions related to
chassis instrument factory IP address restoration.
PSA-3002, PVA-3002 Compact Instruments
PSA-3002 and PVA-3002 instruments equipped with an On/Off power switch on the rear panel can reset IP address
to the factory default address 192.168.221.105 as follows: Turn power on to the instrument, then depress the On/Off
switch continuously for a period of 20 seconds or more. This will result in a flashing of the LED power indicator that
indicates the restoration of the original factory set address. PowerShell PSA can then be utilized to connect to the
instrument at the factory default address and then to modify that address using the psa_setipaddress command in
PowerShell PSA.
3.5.9. Connecting the Ethernet Port
The Ethernet Port on the instrument can be connected to any 10/100/1000BaseT Ethernet Switch or Hub.
Connections to a Hub or Switch will require a standard CAT5 (or better) UTP patch cable.
The Ethernet Port on the instrument can also be connected directly to a host PC. When connecting an instrument that
has the factory default IP address directly to a PC, the PC TCP/IP networking properties must initially include a
192.168.221.xxx fixed IP address with subnet mask bits 255.255.255.0. Direct Connections to a PC may require the
CAT5e Ethernet crossover cable if the PC LAN interface does not support auto-MDI.
If the instrument is to be used in a networking environment with multiple subnets, the host PC must be able to access
the subnet that the instrument is on, in order to communicate with it. If the instrument is located on a different subnet
from the PC, the routing table in the PC must describe how to route to that subnet (and a gateway must exist between
the subnets).