Version 04/2008, Rev. 1.18 of 07/06/2012 page 28 of 65
Translation of the original operating manual
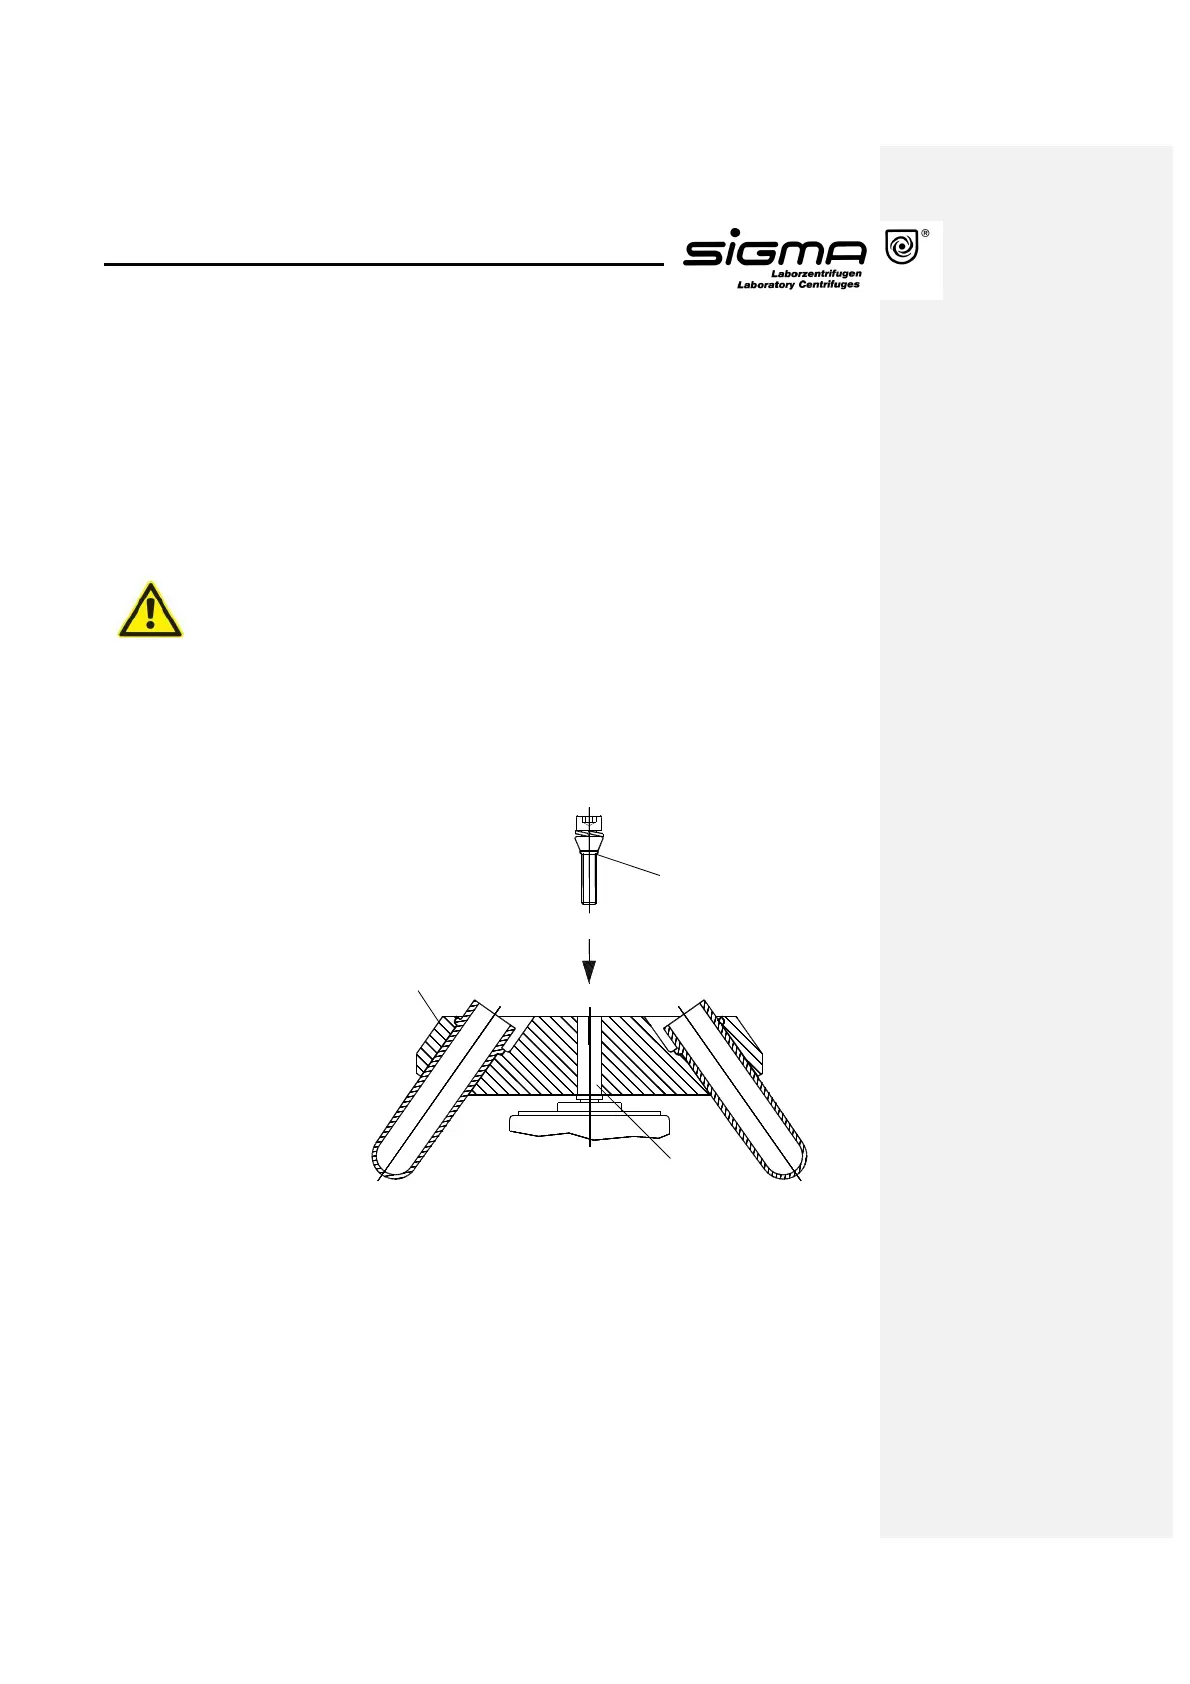
5.2.3 Installation of Rotors
• Open the centrifuge lid by pressing the lid key.
• Unscrew the rotor tie-down screw from the motor shaft (anti-clockwise).
• Lower the rotor with its central bore straight down onto the motor shaft.
• Tighten the rotor tie-down screw clockwise with the supplied rotor wrench
with 5 Nm. In doing so, hold the rotor at its outer rim.
• After frequent use, the rotor tie-down screw must be loosened by some turns
and fastened again. This must be done once a day or after 20 cycles. This
ensures a proper connection between the rotor and the motor shaft.
• The rotor tie-down screw should only be tightened when a rotor is installed in
order to prevent the collet chuck from being expanded.
3
1
2
1 Angle rotor
2 Rotor-tie down screw
3 Motor shaft
Fig. 5.5: Installation of a rotor