Do you have a question about the Silhouette Portrait and is the answer not in the manual?
Verify all components are present before setup.
Download and install the Silhouette Studio software for your operating system.
Connect the Silhouette Portrait to power and your computer via USB.
Open Silhouette Studio and review initial screen and page setup options.
The main area for creating projects with tools and design page.
Navigate the online store to browse and purchase digital designs.
Access and organize your saved designs locally or on the cloud.
Adjust cut settings and send jobs to your Silhouette machine.
Identifies key interface components like toolbars, panels, and work areas.
Learn the purpose of the white cut area and gray holding area.
Use document tabs to switch between and manage open projects.
Adjust panel visibility by collapsing and repositioning them freely.
Choose how panels open: Single, Flexible, or Multiple panel modes.
Use the Line tool and SHIFT key for precise horizontal, vertical, or 45° lines.
Draw rectangles and perfect squares using the Rectangle tool and modifier keys.
Enter your password to confirm and authorize the download of selected designs.
Activate your complimentary subscription using a provided trial card code.
View and access the 50 free designs and other installed designs in your library.
Use keywords in the search bar to quickly locate specific designs.
Double-click a design in the library to add it to your current project page.
Apply media to the cutting mat, ensuring proper alignment and adhesion.
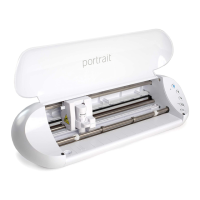
Power on the Portrait and load the prepared mat between the white rollers.
Recommended blade depth settings for various material types.
Manually set the AutoBlade depth using the indicator line and socket.
Proper procedure for inserting and locking blades or other tools into the machine carriage.
Set material, action (cut, sketch), and tool in the Simple tab for basic jobs.
Details on selecting material type, action, and specific tool settings.
Select from a list of materials or add custom material types and their settings.
Use advanced panels for intricate cut designs based on line color or layers.
Understand the LED light indicators for Bluetooth connection states.
Connect your Silhouette Portrait wirelessly to your computer using Bluetooth.
Locate the full user manual within the software or visit the official website for tutorials.
Find project ideas, product updates, and customer service contact information.
| Cutting Force | 210 gf |
|---|---|
| Connectivity | USB 2.0 |
| Software | Silhouette Studio |
| Cutting Width | 203 mm (8 inches) |
| Compatible Media Types | Vinyl, cardstock, fabric, heat transfer material |
| Blade Types | AutoBlade |
| Max Media Thickness | 2 mm |
| Maximum Cutting Area | 8 in x 12 in (20.3 cm x 30.5 cm) with a cutting mat 8 in x 60 in (20.3 cm x 152.4 cm) with roll feeder (some materials) |
| Power Supply | AC Adapter |
| Weight | 3.5 lbs (1.6 kg) |