TABLE OF CONTENTS
Product Identification… .............................................. Page 1
Table of Contents… ..................................................... Page 1
Warranty Statement ................................................... Page 2
Electrical Specifications ............................................... Page 3
Safety Information….................................................... Page 3
General ......................................................................... Page 3
Important ..................................................................... Page 3
Unpacking and Setup .................................................. Page 4
Installation… ................................................................ Page 5
Initial Cleaning and Sanitizing .....................................Page 6
Initial Start-Up… .......................................................... Page 6
Operation— General .................................................. Page 7
Operation — Dispensing Cream................................. Page 7
Cleaning and Refilling the Dispenser ......................... Page 8
Troubleshooting Guide ............................................... Page 9
Parts and Exploded View… ........................................ Page 11
Wiring Diagram .......................................................... Page 12
1600 Xenium Lane N. • Plymouth, MN 55441 USA
Telephone: 800-328-3329 • www.silverking.com
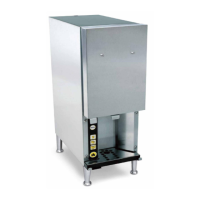
Manual
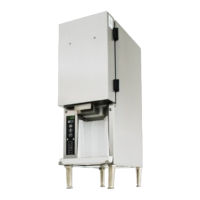
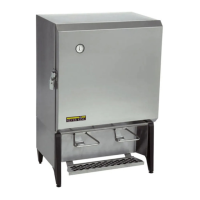
Cream Dispenser
Model SK-2
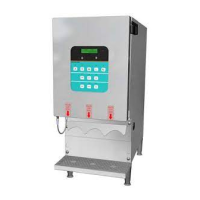
Product Identification
Control Panel
(1-10)