11GB
Initial start-up
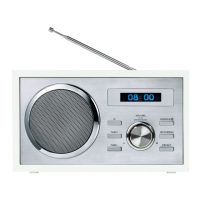
Set up the product on a level surface. Do not to cover the ventilation slots and
loudspeaker
[5]
on the top of the product.
Connect the coaxial power connector of the power adaptor [] to the power adaptor
port [3].
Plug the power adaptor into a properly installed mains socket.
The product first displays Time is not set and time 00:00.
A DAB station search is started in the background.
The date and time are set automatically.
After this installation routine, the product is in standby mode.
Fully lay out the antenna [4].
Switching the product on/off
Switching the product on/off
Switching on
Press [7]
Switching off
Press and hold [7] for 2 seconds (off = standby mode)
Mode selection
During operation, press the button [7] to switch between FM and DAB operation.
Volume adjustment
Volume
Increase
Press VOL+ []
Decrease
Press VOL– []
System settings
Switch on the product.
Press and hold MENU/INFO [8] for 2 seconds to display the menu.
Press TUNE– [] or TUNE+ [] to select <SYSTEM>.
Press SELECT/SCAN [] to confirm.
Press TUNE– [] or TUNE+ [] to select from:
System settings
Press TUNE– [] or TUNE+ [] = amend values | Press SELECT/SCAN [] = confirm
value or selection | MENU/INFO [8] = 1 step back
1. Alarm
9
AL 1 – AL 2 (Choose alarm 1 or alarm 2 to setup)
9
On time 00:00 (To set the alarm time)
9
Duration 15–30–45–60–90‒120 (To set the alarm duration)
9
Buzzer – DAB – FM (To set the alarm time)
9
Daily – Once –
Weekends – Weekdays (To set repeat frequency)
9
Volume: L1 – L16
9
Alarm off – Alarm on

 Loading...