8
GB
5. Assembly
• Remove all packing material.
• Check to ensure that all parts are pres-
ent and undamaged.
• Clean the device prior to its first
use (see “Cleaning” on page 15)!
DANGER! Risk of electric
shock!
~ Only plug the mains plug|3 into the wall
socket after the motor unit|1 and the ac-
cessories have been assembled.
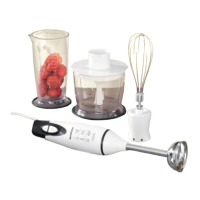
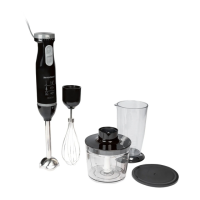
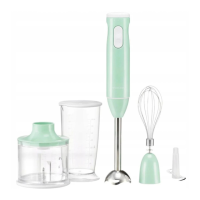
5.1 Hand blender
• Figure A: place the motor unit|1 on
the hand blender|24 and press the
parts together. The motor unit|1 must
engage audibly.
5.2 Whisk
1. Figure B: align the “blades” of the
whisk|6 such that they fit into the cross-
shaped holder of the whisk adapter|5.
Put the whisk|6 into the whisk adapt-
er|5 until it engages audibly.
2. Figure A: place the motor unit|1 on
the whisk adapter|5 and press the parts
together. The motor unit|1 must engage
audibly.
5.3 Masher
1. Figure A: place the motor unit|1 on
the masher|23 and press the parts to-
gether. The motor unit|1 must engage
audibly.
2. Figure C: turn the masher|23 around.
Screw the masher attachment|22 anti-
clockwise on the masher. Please follow
the symbols and
at masher attach-
ment|22.
NOTE: motor unit|1 and masher|23 must
be assembled so that the masher attach-
ment|22 can be firmly tightened and re-
moved again for cleaning after use.
5.4 Chopper
1. Figure D: place the blade assem-
bly|27 vertically on the peg|25 in the
container|26.
2. Fill the chopper container with the pre-
pared food to no more than the mark-
ing max (approx. 500 ml / for liquids
no more than 300 ml).
3. Figure D: place the drive cover|28 on
the container|26. Align the drive cov-
er|28 so that its locks|29 point to the
guides|30 at the container. Turn the
drive cover|28 clockwise until it engag-
es audibly.
4. Figure A: place the motor unit|1 on
the drive cover|28 and press it down.
The motor unit|1 must engage audibly.
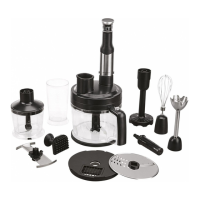
5.5 Multifunction accessories
Chopping
1.
Figure E:
place the blade assembly|
14
on the peg|
18
in the container|
15
.
2. Fill the container|15 with the prepared
food to no more than the marking
max. (approx. 2000 ml / for liquids
no more than 1250 ml).
Cutting and grating
1. Figure F: push the slicing insert/grat-
ing disk|20 onto the spacer|19. For
cutting, the blade points in the direction
of the lid. For grating, turn the disk
around.
2. Figure F: place the spacer|19 with the
mounted slicing insert/grating disk|20
on the peg|18 in the container|15.
 Loading...