13
GB
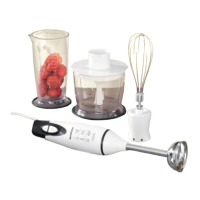
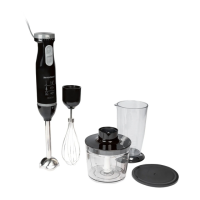
6.7 Application areas of the
multifunction accessories
Preparing food:
• Rinse or wash the food.
• Cut the food up into smaller pieces.
• Remove the outer shell from nuts. You
may use the inner skin if you wish, e.g.
with almonds.
• Use fresh herbs without stems and in a
dry condition.
• Remove sinews, bones and gristle from
the meat.
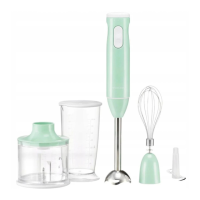
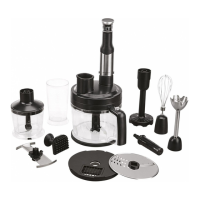
Blade assembly
The blade assembly|14 is ideal for chop-
ping meat, Parmesan, vegetables, fruit, nuts
and herbs.
1. Fill the food into the container|15 and
close it with the drive cover|8.
2. Place the motor unit|1 onto the drive
cover|8 until it engages.
3. Connect the mains plug|3 with the wall
socket.
4. Press the controller|2 to switch the de-
vice on and release it to switch off.
5. After chopping remove the mains
plug|3 and remove the motor unit|1
from the drive cover|8.
6. Figure H: press the button|16 and
turn the drive cover|8 anticlockwise to
open the container|15. Lift the drive
cover|8 off, when the marking |31 at
the handle|17 points to the attachment
marking |32.
7. Clean the device immediately if possible.
Slicing insert and grating disk /
dicer attachment
The slicing insert/grating disk|20 is used to
cut or grate raw fruit and vegetables such as
cucumbers, onions, mushrooms, apples, car-
rots, radishes, potatoes, courgette and cab-
bage.
The dicer, consisting of the blade assem-
bly|11 and disk insert|12, is suited to dice
raw fruit and vegetables such as onions, ap-
ples, carrots, potatoes and courgette.
1. Close the container|15 with the drive
cover|8 (see “Multifunction drive cover”
on page 9).
2. Place the motor unit|1 onto the drive
cover|8 until it engages.
3. Connect the mains plug|3 with the wall
socket.
4. Press the controller|2 to switch the de-
vice on.
5. Fill food into the refill opening|9. If nec-
essary, use the food pusher|7 to careful-
ly push the food down.
6. When you are finished, let go of the
controller|2.
7. After cutting, grating or dicing pull out the
mains plug|
3
and remove the motor unit|
1
from the drive cover|
8
.
8. Figure H: press the button|16 and
turn the drive cover|8 anticlockwise to
open the container|15. Lift the drive
cover|8 off, when the marking |31 at
the handle|17 points to the attachment
marking |32.
9. Clean the device immediately if possible.
 Loading...