ADJUSTMENT, REMOVAL AND REPLACEMENT PROCEDURES
NOTE. Read the instructions throughly
before performing any of the following
adjustment or removal and replacement pro-
cedure.
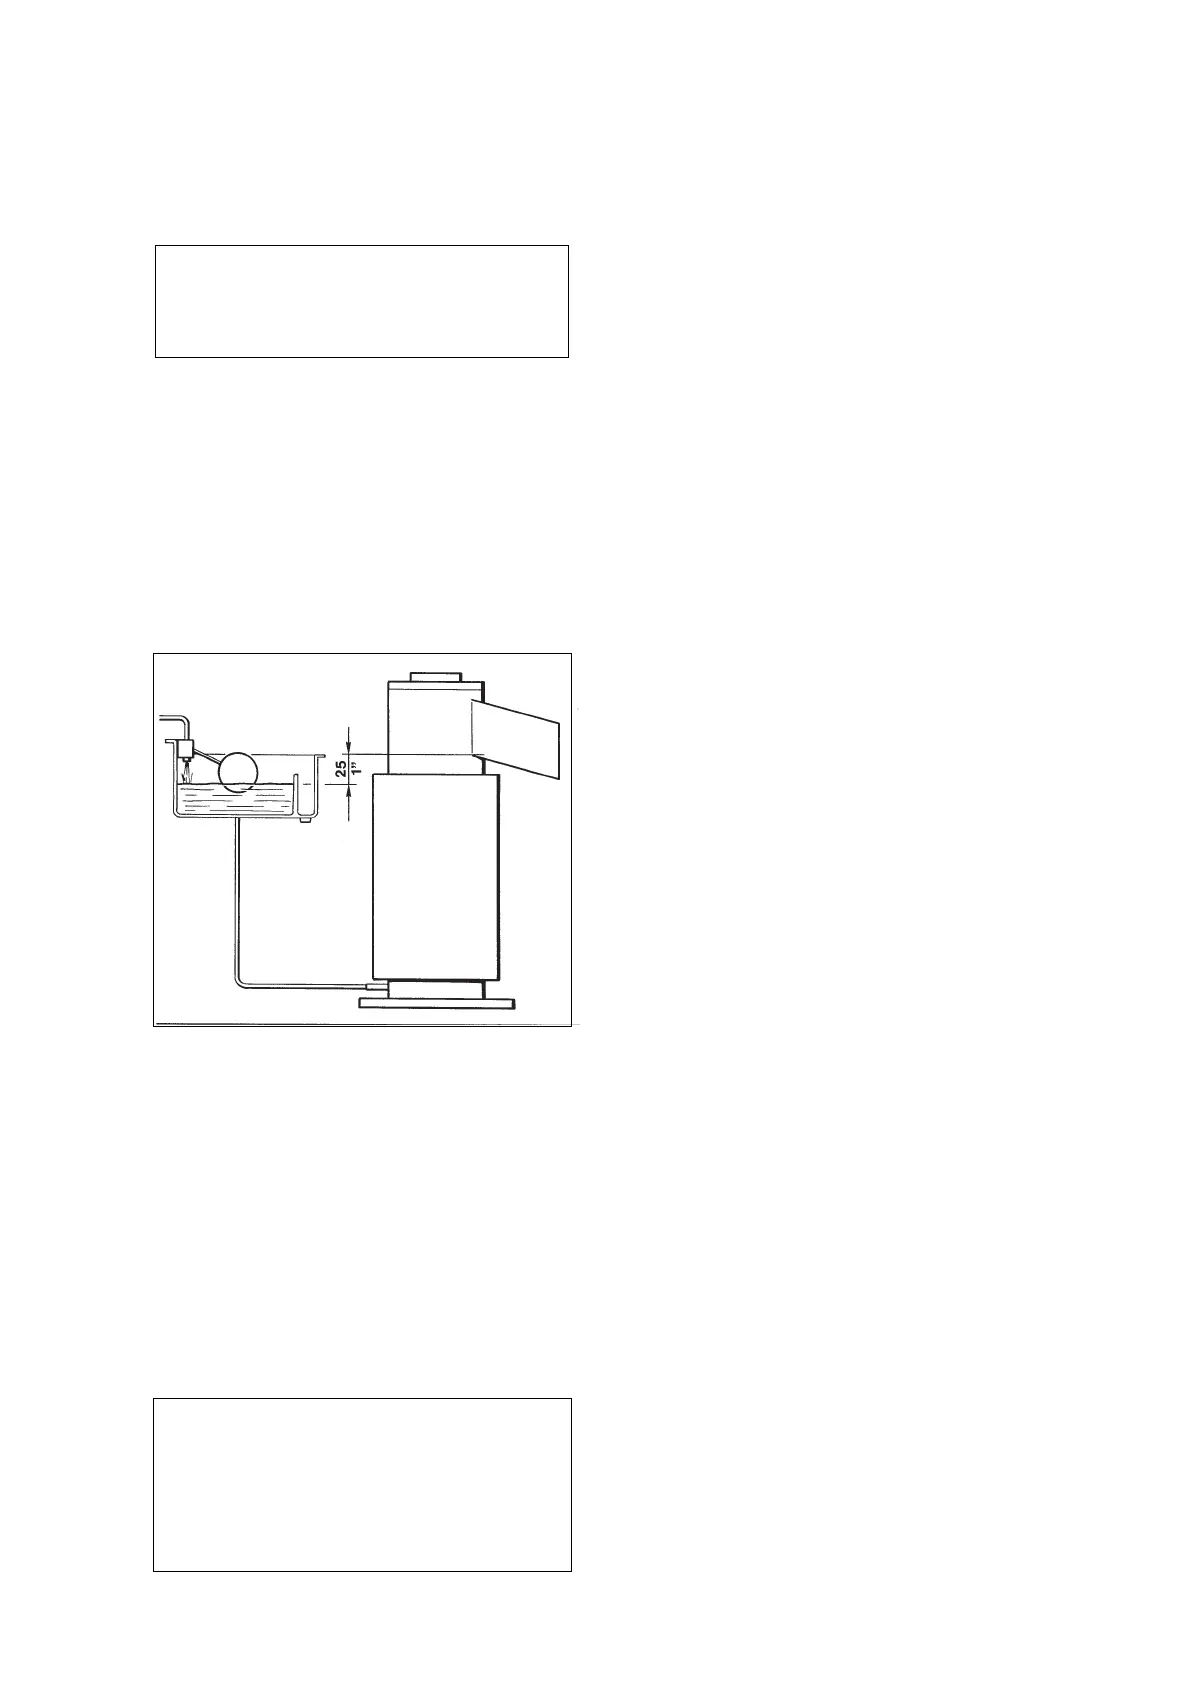
A. ADJUSTEMENT OF THE EVAPORATOR
WATER LEVEL
The correct water level in the freezing cylinder is
about 20 mm. (1") below the ice discharge
opening. Low water level causes excessive strain
inside the freezer assembly due to a faster
freezing rate.
When the water level is above or below the
correct one, adjustment can be performed by
raising or lowering at the measure required, the
water reservoir and its mounting bracket.
To Raise or Lower the water level:
a. Loosen and remove the screw securing the
mounting bracket of the water reservoir to the
unit cabinet and raise the water reservoir to the
correct level.
b. Thread the mounting screw in the
corresponding hole and tighten it.
WARNING. Be sure the electrical power
supply circuit breaker and the inlet water
supply are OFF, before starting any of the
following Removal and Replacement
procedures as a precaution to prevent
possible personal injury or damage to the
equipments.
B. REPLACEMENT OF EVAPORATOR
TEMPERATURE SENSOR
1. Remove the front/top panel.
2. Remove the insulation from the refrigerant
tubing, connecting the freezer to the accumulator,
to gain access to the sensor probe holder and
pull it out .
3. Trace the evaporator sensor terminal plug
(blue color) on the rear side of the control box
and remove it from its socket by carefully pulling
out the terminal plug securing clip.
4. To install the replacement evaporator
sensor follow the above steps in reverse.
C. REPLACEMENT OF CONDENSER
TEMPERATURE SENSOR
1. Remove the front /top panel and on SPN1205
model even the right side panel.
2. Trace the condenser sensor probe located
within the condenser fins on air cooled version
and withtrow it.
On water cooled version remove it by opening
the plastic strap (reusable) securing the probe to
the refrigerant liquid line.
3. Trace the condenser sensor terminal plug
(black color) on the rear side of the control box
and remove it from its socket by carefully pulling
out the terminal plug securing clip.
4. To install the replacement condenser sensor
follow the above steps in reverse.
D. REPLACEMENT OF THE OPTICAL
ICE LEVEL CONTROL
1. On SP 125, SP 255, SPN405 and SPN605
remove the front/top panel, while on SPN 1205
remove the front and rear panels.
2. Trace the optical ice level control terminal
plug (black with four terminal pins) on the rear
side of the control box and draw it out from its
socket by carefully slackening the fastening tie.
3. Unloose the two securing screw and remove
the optical ice level control from the plastic ice
chute.
4. To install the replacement optical ice level
control follow the above steps in reverse.
Page 30