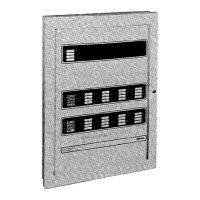
5
7. Cut and strip the green Earth connect wire on the DACT module and
connect to the 4004 Back Box using an 18 AWG green wire and wire nut.
Isolate the circuit ground connection from P1-1 of DACT. The ground
return is provided through Wiring Harness (733-897, supplied).
8. Install the mounting plate onto the back box by positioning the right side of
the plate behind the locking tab. Secure the plate with four #6 Torx screws.
9. Connect Wiring Harness (733-897) from System Board P5 to DACT
module P2, P5, and TB1.
10. Power-up and configure the 4004 System for the DACT module using the
programming instructions located on the Contractor Wiring Termination
Label (519-698) on the door.
11. Program the DACT in accordance with the installation/programming
manual that is supplied with the DACT.
Follow Steps 1 through 11 and refer to Figure 2 to mount a DACT module using
#4 self-tapping screws.
1. Remove the module from its packing material.
2. Locate the DACT module onto the back box wall so the green “POWER
ON” LED, yellow “SYSTEM Trouble” LED, and red “PHONE LINE #1”
and “PHONE LINE #2” LEDs are over the cutout slot opening on the
mounting plate. Using a pencil, mark the DACT module hole locations
onto the back box wall.
3. Remove the two bottom #6 Torx screws and loosen the two top #6 Torx
screws that secure the 4004 Control Panel Mounting Plate to the back box.
4. Carefully remove the mounting plate from the back box by lifting it upward.
Pull the plate left past the locking tab and forward to release the plate from
the back box.
5. Drill four .099 holes with a #11 drill where the pencil locations are
positioned for the self-tapping screws.
6. Install and secure the DACT module to the back box using #4 self-tapping
screws (supplied). Ensure the LED windows are over the cutout slot
opening on the mounting plate and that the TELCO wiring is oriented at the
top of the cabinet.
7. Cut and strip the green Earth connect wire on the DACT module and
connect to the 4004 Back Box using an 18 AWG green wire and wire nut.
Isolate the circuit ground connection from P1-1 of DACT. The ground
return is provided through Wiring Harness (733-897, supplied).
8. Install the mounting plate onto the back box by positioning the right side of
the mounting plate behind the locking tab. Secure the plate with four # 6
Torx screws.
Continued on next page
DACT Module Installation, Continued
VHB Tape Mounting Method
(Continued)
Screw Mounting Method
Technical Manuals Online! - http://www.tech-man.com
 Loading...