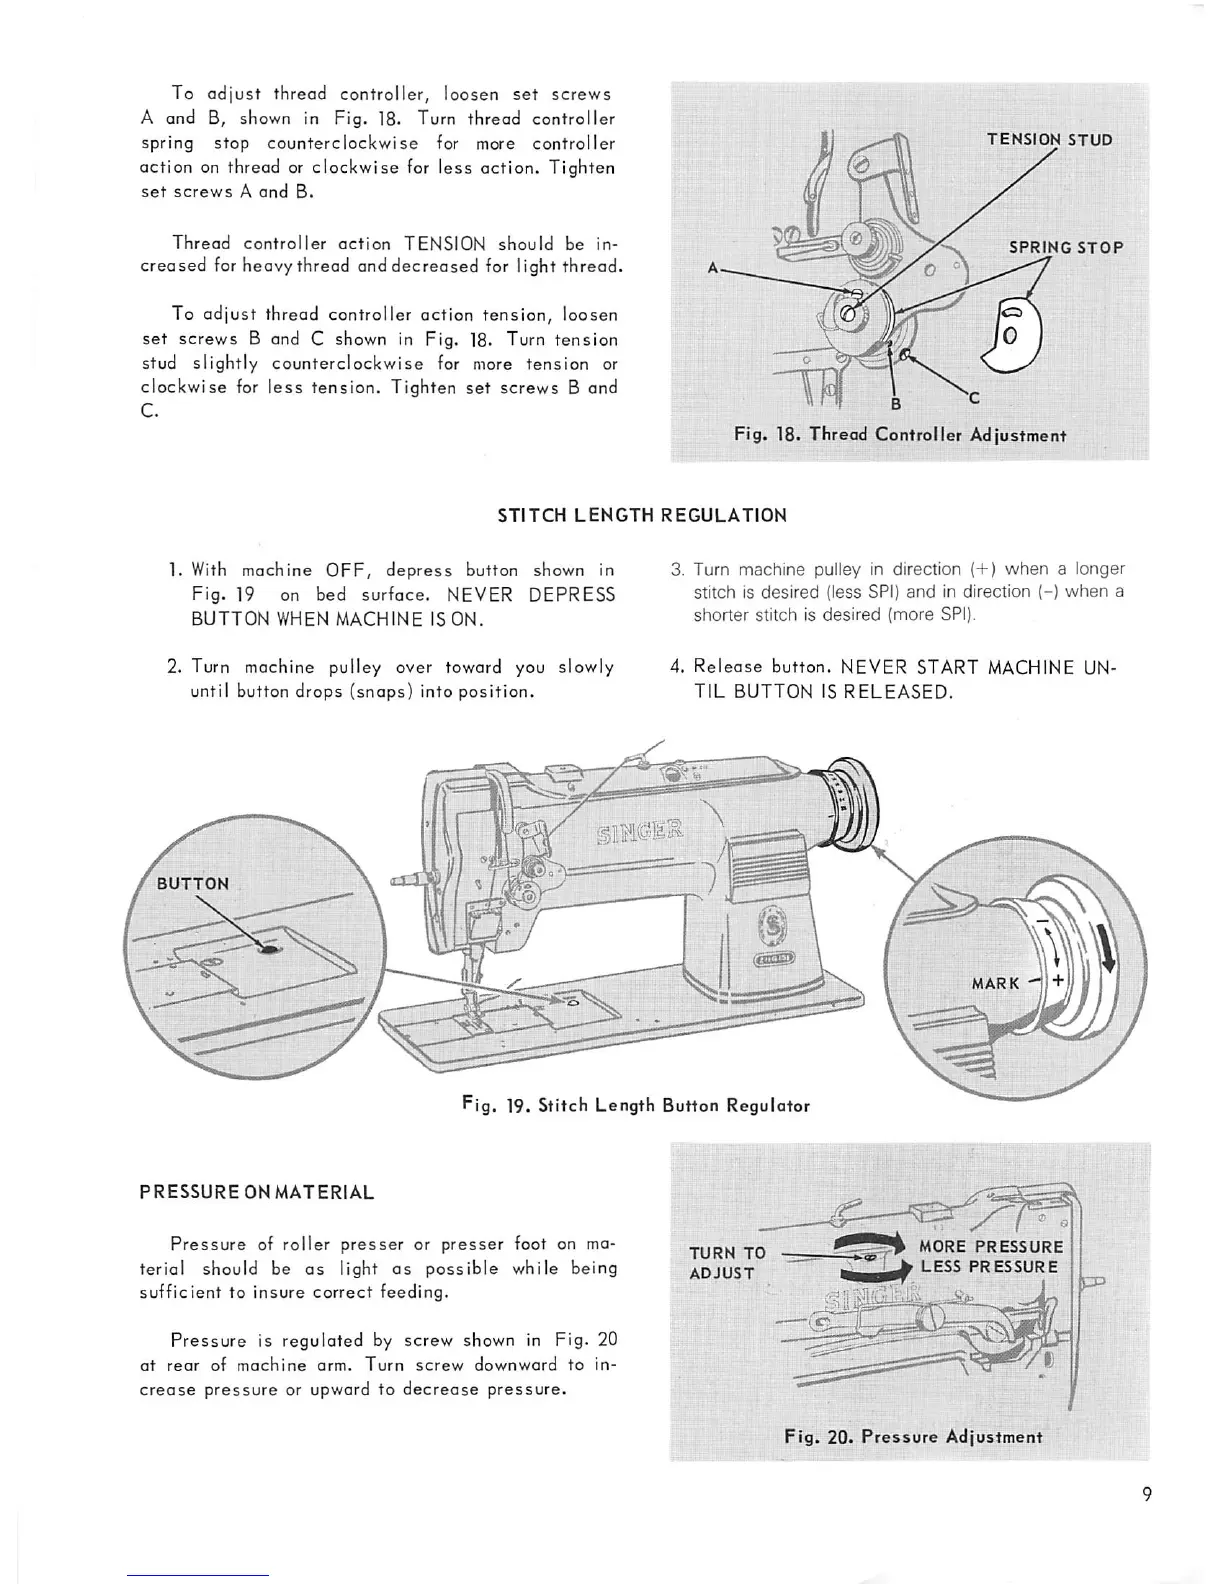
To
adjust
thread controller, loosen
set
screws
A and B, shown in Fig. 18. Turn thread controller
spring
stop
counterclockwise
for more
controller
action on thread or
clockwise
for
less
action. Tighten
set
screws
A
and
B.
Thread
controller
action
TENSION
should
be in
creased for heavy thread and decreased for light thread.
To adjust thread controller action tension, loosen
set screws B and C shown in Fig, 18. Turn tension
stud slightly counterclockwise for more tension or
clockwise
for
less
tension.
Tighten
set
screws
B and
C.
TENSION
STUD
SPRING
STOP
Fig. 18. Thread Controller Adjustment
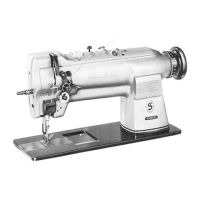
STITCH
LENGTH
REGULATION
1. With
machine
OFF,
depress
button shown in
Fig. 19 on bed
surface.
NEVER DEPRESS
BUTTON
WHEN
MACHINE
IS
ON.
2. Turn machine pulley over toward you slowly
until button
drops
(snaps)
into
position.
BUTTON
3. Turn
machine
pulley In direction
(+)
when
a
longer
stitch
is
desired
(less
SPI)
and
in
direction
(-)
when
a
shorter
stitch
is
desired
(more
SPI).
4.
Release
button.
NEVER
START
MACHINE UN
TIL
BUTTON
IS
RELEASED.
MARK
-i
+
Fig. 19. Stitch Length Button Regulator
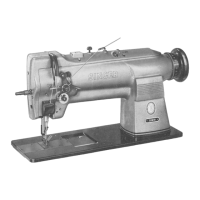
PRESSUREON
MATERIAL
Pressure
of
roller
presser
or
presser
foot on ma
terial
should be
as
light
as
possible
while
being
sufficient
to
insure
correct
feeding.
Pressure
is regulated by screw shown in Fig. 20
at
rear
of
machine
arm.
Turn
screw
downward
to
in
crease
pressure
or upward to
decrease
pressure.
TURN
TO
ADJUST
MORE
PRESSURE
LESS
PRESSURE
Fig.
20.
Pressure
Adjustment