12
E
D
B
F
G
C
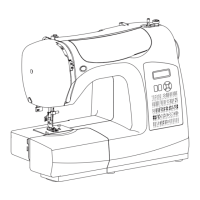
Threading the Machine
Make sure that the presser foot is raised and the needle
is in its highest position.
1. Place the thread on the spool pin and t the
appropriately sized spool cap.
2. Pull the thread into the right thread guide (B) from
front to back and the left thread guide (C) from back
to front. Pull the thread between the tension discs
(D).
3. Thread down through the right-hand threading slot
and then upwards through the left-hand threading
slot.
4. Bring the thread from the right into the take-up
lever (E) and down in the left-hand threading slot,
into the lower thread guide (F) and to the needle
thread guide (G).
5. Thread the needle.
AB
1 2
43
C
E
D
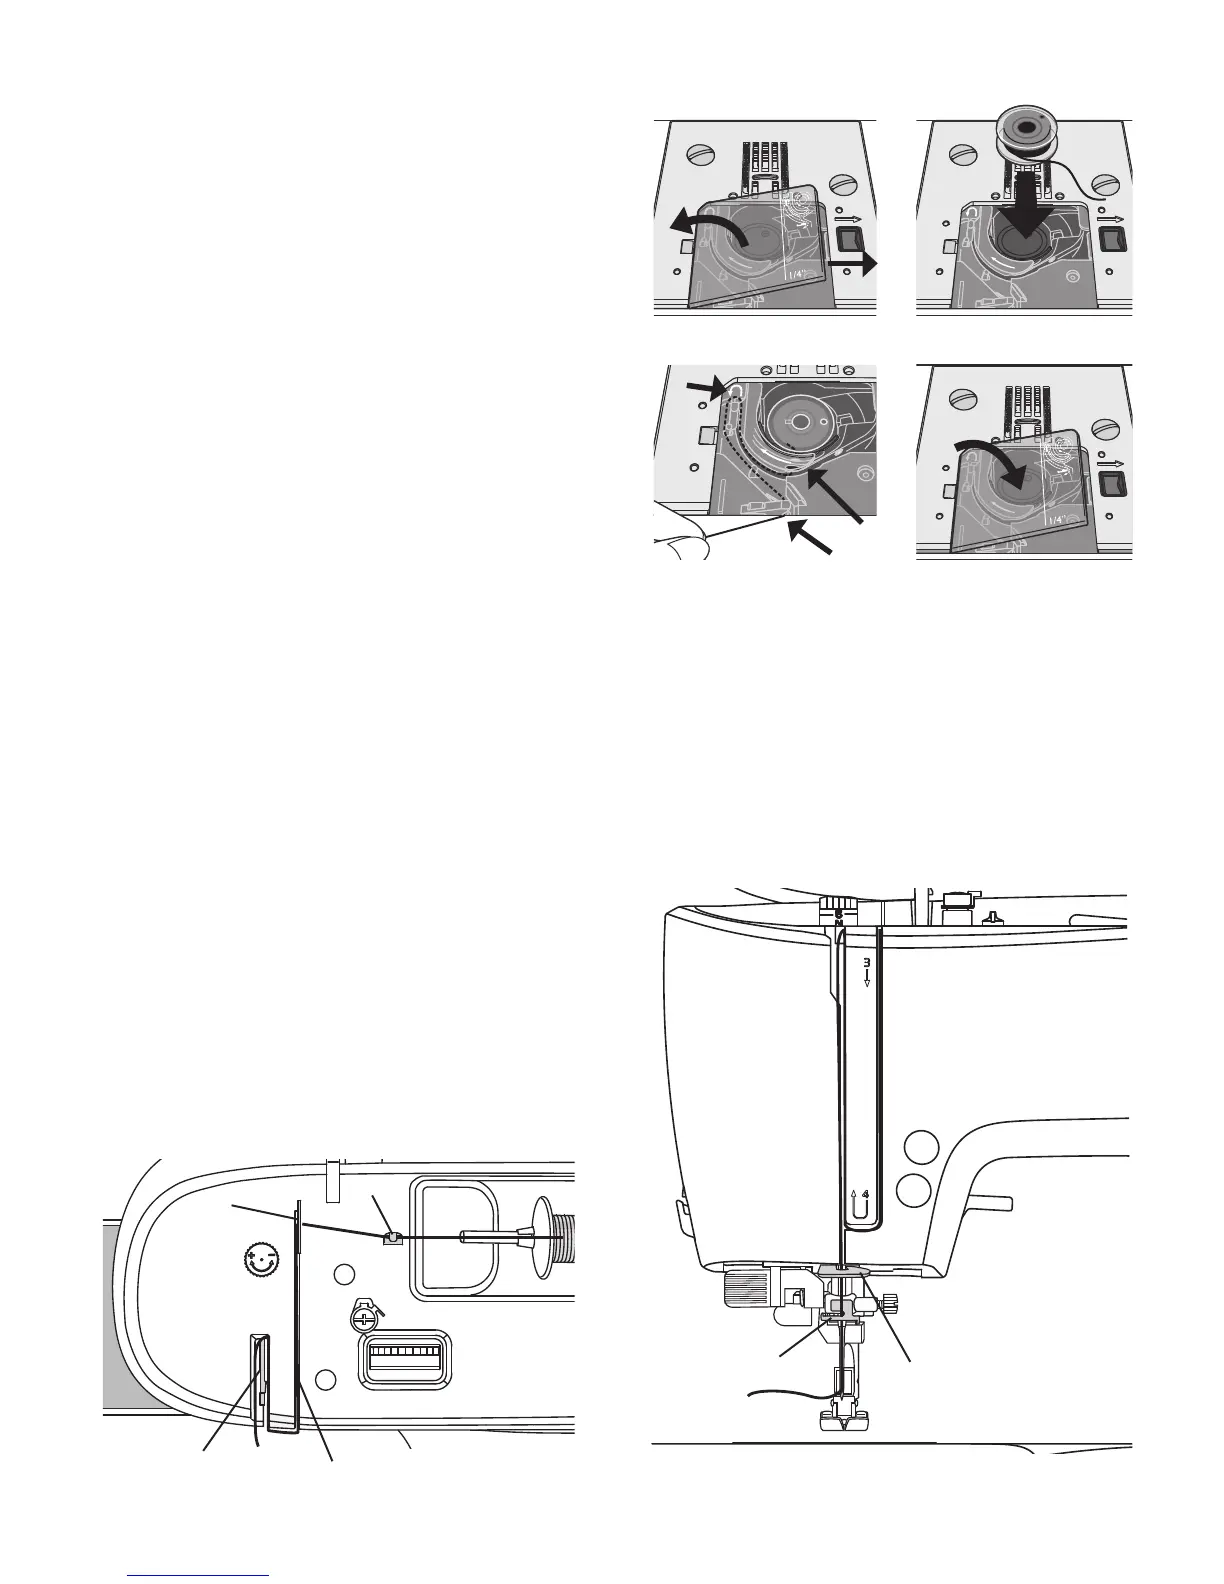
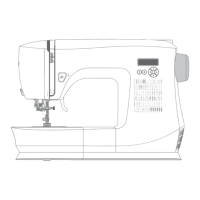
Inserting the Bobbin
Make sure that the needle is fully raised and the machine
is turned off before inserting or removing the bobbin.
Open the bobbin cover by pushing the release button to
the right (A). Remove the cover (B).
1. Insert the bobbin in the bobbin case with the thread
running in a counterclockwise direction.
2. Pull the thread through the slit (C).
3. With a nger held gently on top of the bobbin, draw
the thread at the arrow markings into the stitch plate
thread guide from (C) to (D).
4. Pull the thread at the arrow markings into the stitch
plate thread guide from (D) to (E).
5. To cut off excess thread pull thread back over the
cutting off blade at point (E).
6. Replace the bobbin cover.