18
1
3
2
5 9
4
6
7
8
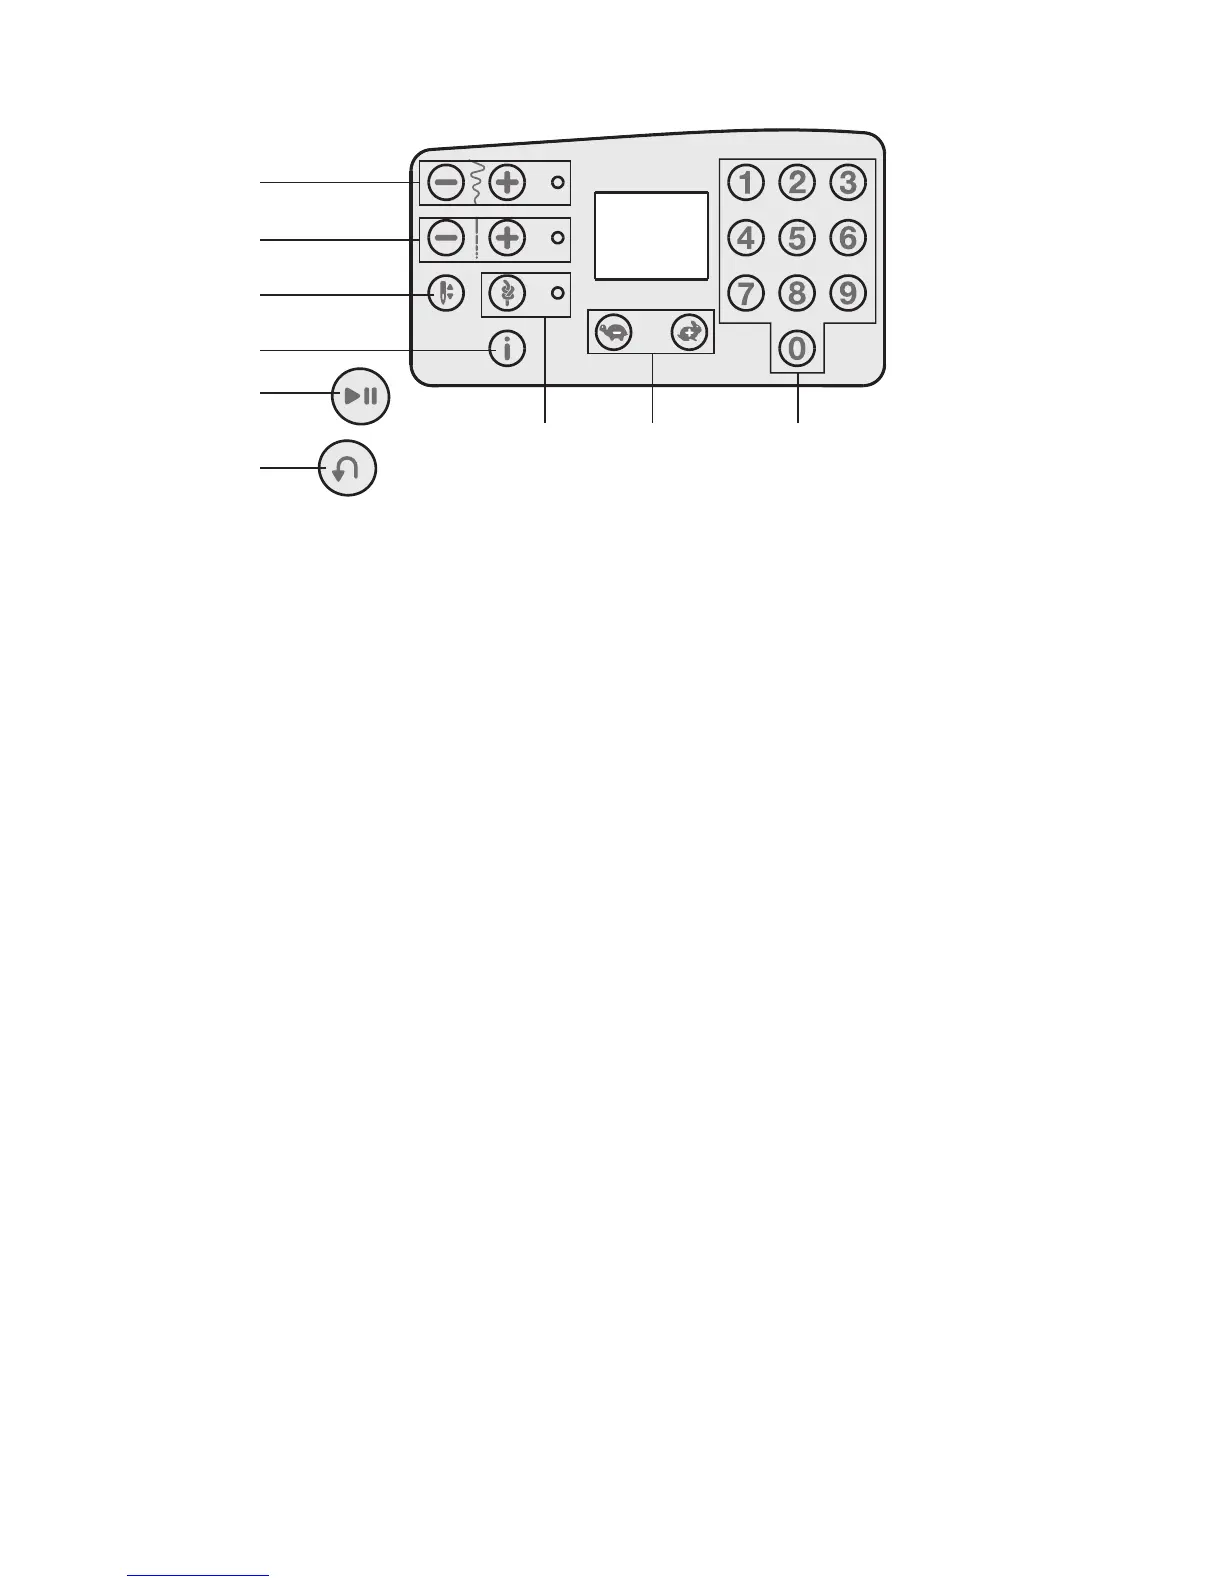
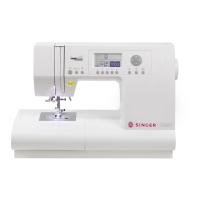
Machine Operation Buttons
Reverse (1)
If you press the Reverse Button while sewing, the
machine sews in reverse for as long as you keep the
button pressed.
Start/Stop (2)
Press this button to start or stop the machine without
using the foot control. Press the button once to start and
press it again to stop.
Speed Control Buttons (3)
The Speed Control Buttons set the maximum sewing
speed. To increase sewing speed, using the “+” button,
to decrease sewing speed, using the “-” button.
Info Button (4)
Press this button to show the presser foot
recommendation on the display. If a dot is visible in the
lower right corner of the screen, the Integrated Even
Feed System should be engaged.
Immediate Tie-Off/Tie-Off (5)
For immediate tie-off press the button while sewing.
The machine sews tie-off stitches immediately and stops
automatically.
To set the machine to perform a tie-off at the end of a
stitch, press the button before starting to sew. The LED
light next to the button becomes lit. After sewing the
desired length of stitching, press the Reverse Button
while actively sewing. The machine will complete the
current stitch, tie-off and stop automatically.
Needle Up/Down (6)
Press this button to move the needle up or down. The
setting of the needle stop position is changed at the same
time.
You can also tap the foot control to raise or lower the
needle.
Stitch Length (7)
Increase or decrease the stitch length using the “+” and
“-” buttons.
Stitch Width or Stitch Positioning (8)
Increase or decrease the stitch width using the “+” and
“-” buttons.
For straight stitches, use the “+” and “-” buttons to
change the stitch position.
Note: There are 29 needle positions available. 3.5 on the
display is the center position.
Stitch Selection (9)
Press a combination of the 0 to 9 buttons to select the
stitch represented by that number.