33
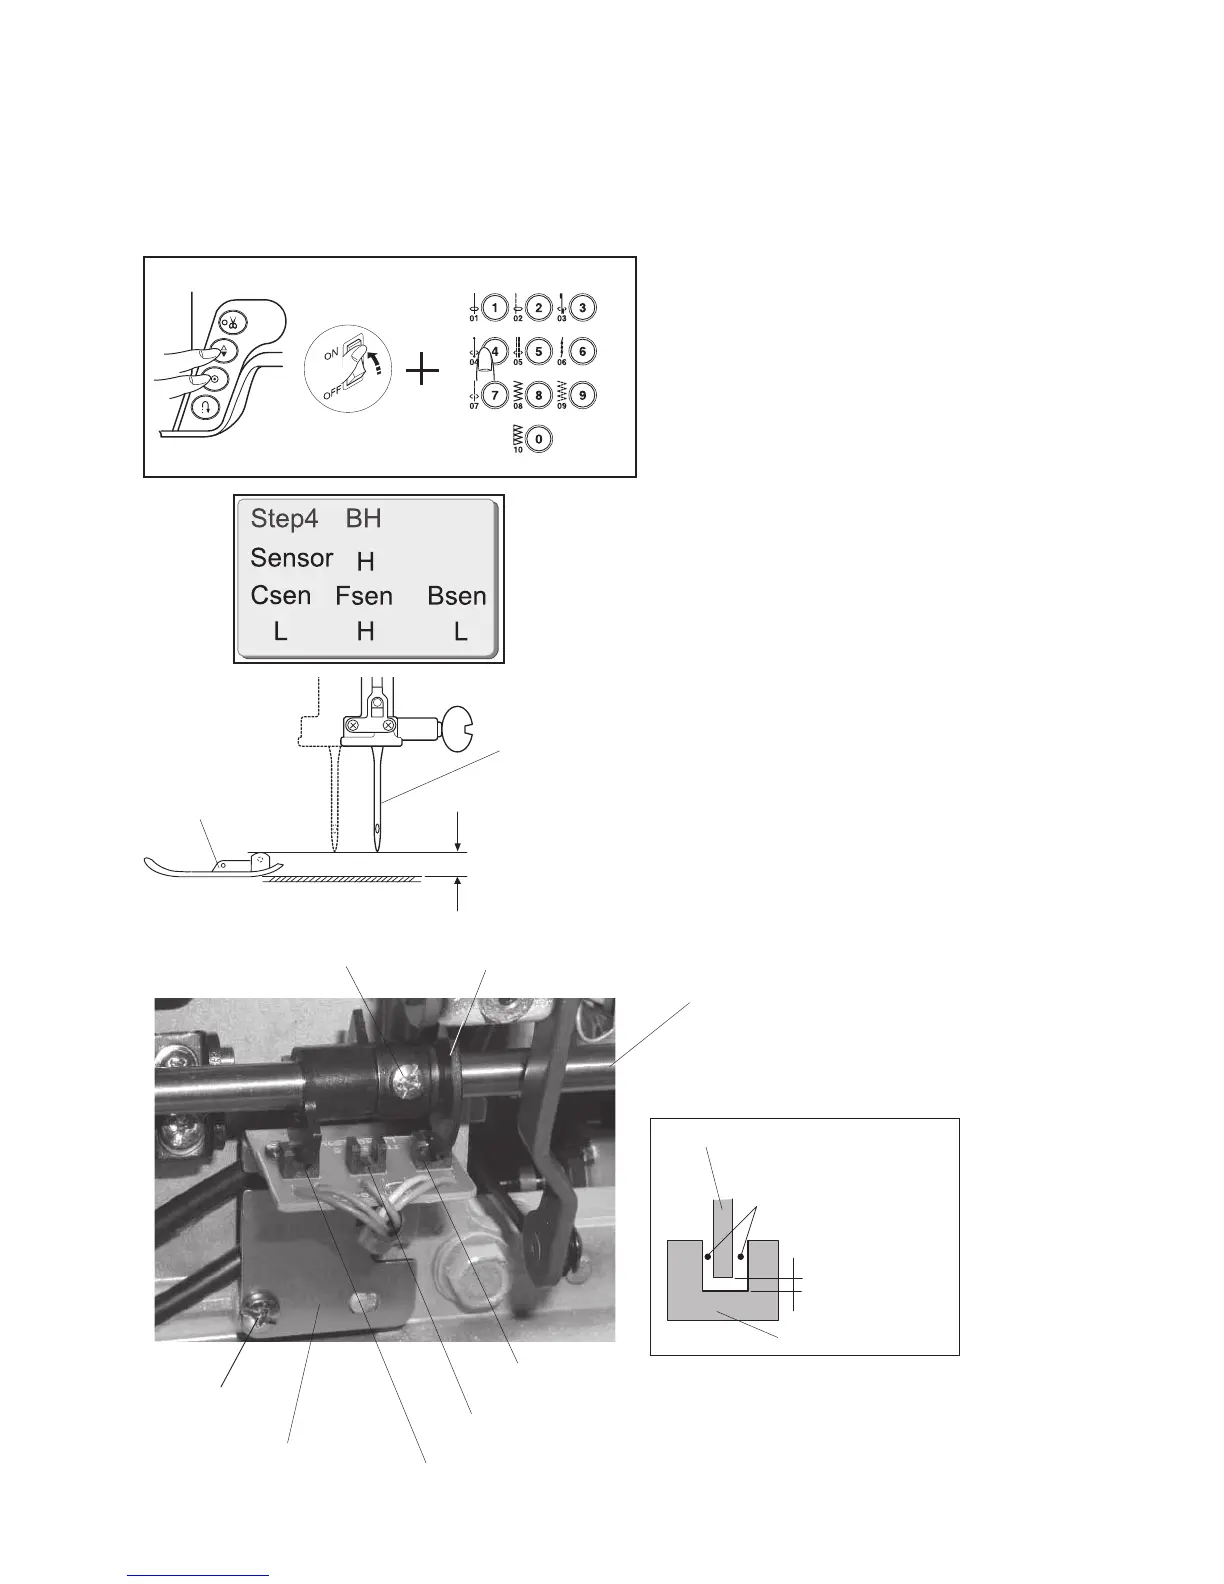
8.0 – 8.4mm (C)
Zigzag foot
Needle, size 14
Shield plate (E)
Setscrew (D)
Sensor
Setscrew (G)
Zigzag sensor (F)
Feed sensor
Auto thread cutter
sensor
Setting plate
0.5-1.5MM
Shield plate should
not touch.
Sensor
Shield plate (E)
When the machine is set for zigzag stitching, the
needle should start to zigzag 8.0 mm to 8.4 mm
(C) = height of zigzag foot) above the surface of
the needle plate.
1. Set the machine for adjusting mode by turning
the power switch while pressing the needle up/
down and the lock stitch buttons at a time.
Then press the number 4 button within 3
seconds (If it is not pressed within 3 seconds,
the machine will return to default setting
mode).
2. Turn the balance wheel toward you slowly with
your hand until the needle comes 8.0-8.4mm
above the surface of the needle plate in its
upward travel. The “Bsen” should show “H”.
3. Remove the machine base.
Loosen the setscrew (D) and turn the shield
plate (E) until the “Bsen” on the LCD changes
from [L[ to [H] and buzzer sound.
Tighten the setscrew (D).
4. Set the right side surface of the shield plate to
the center of the sensor as shown in the Fig. 1
and tighten the setscrew (G)
5. Turn
the balance wheel toward you, and check
the clearance between the left side of the
shield plates and sensors. (The shield plates
and sensors should not tough.)
Also, check that “Csen” changes from [L] to [H]
at the lowest needle position.
6. Attach the machine base.
TO ADJUST ZIGZAG TIMING
Lower shaft
Fig. 1



 To Next Page