7
TO REPLACE CIRCUIT BOARD A AND FUSE
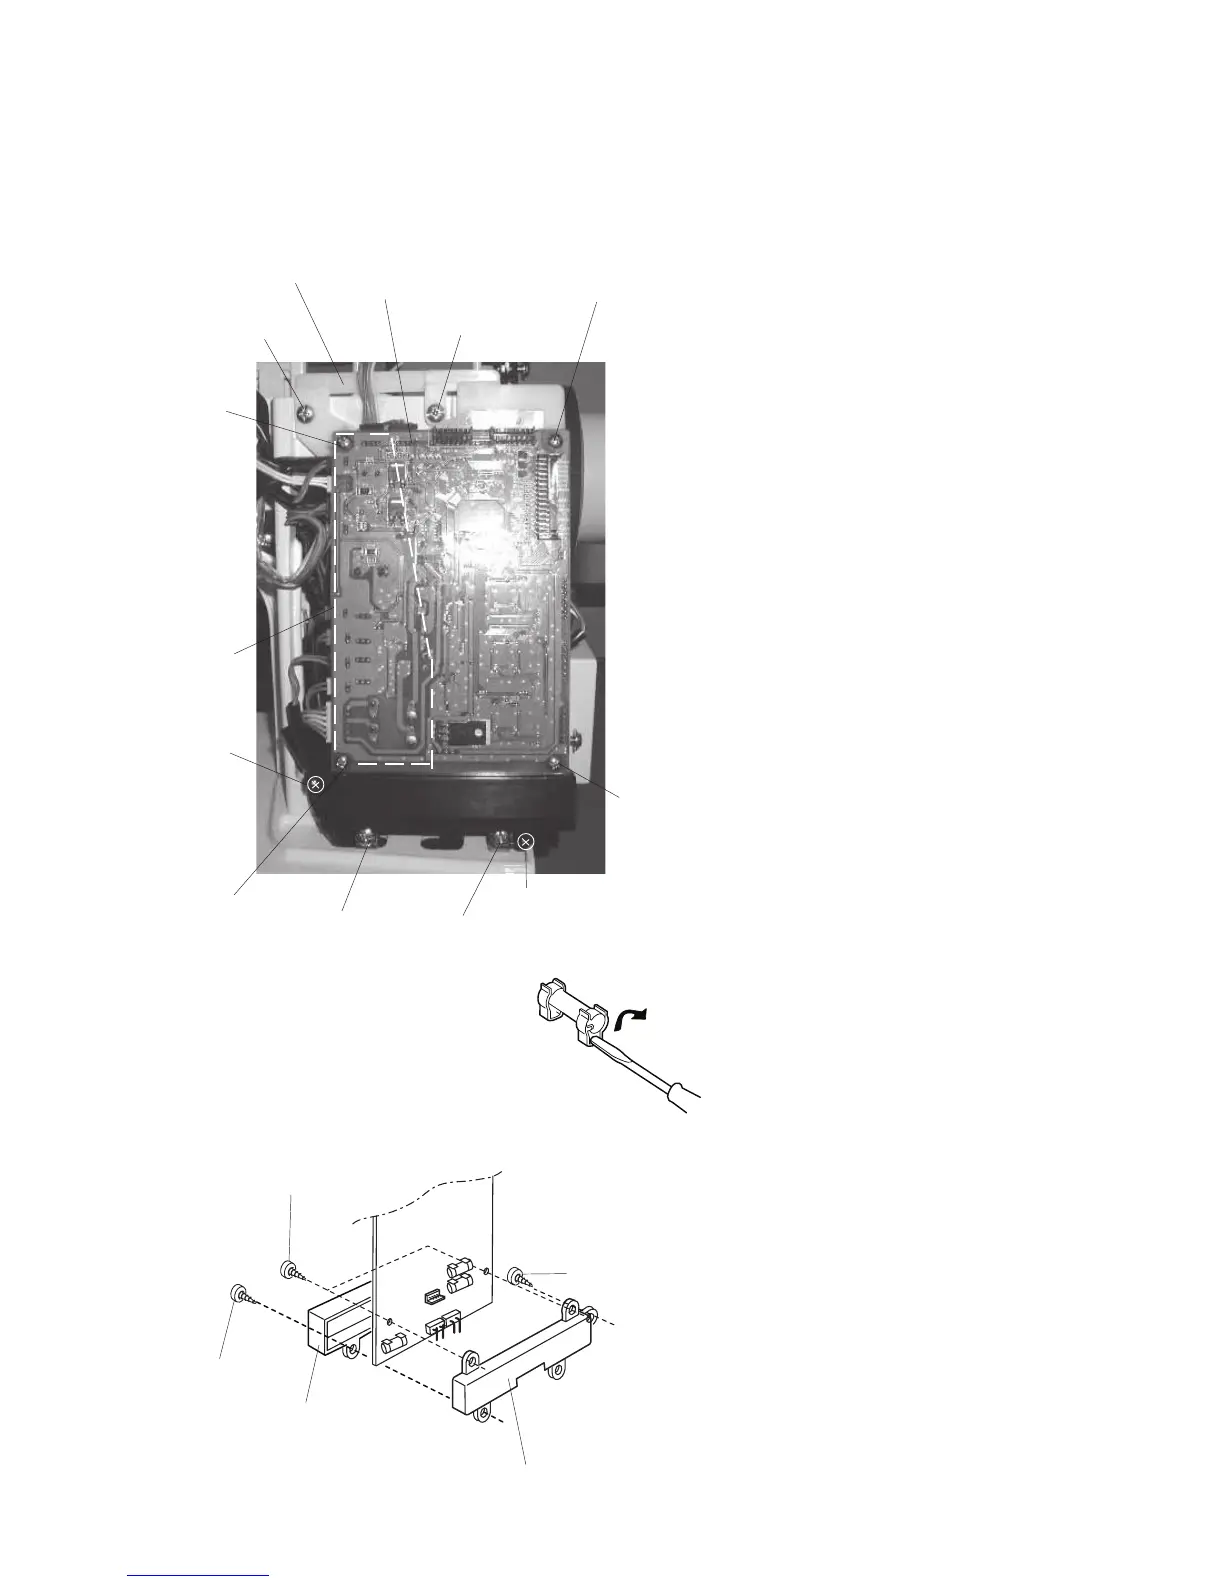
Circuit board A
Setscrew (A)
Setscrew (A)
Setscrew (A)
Setscrew (A)
Mounting
bracket
Insulation
paper
Setscrew (B)
Setscrew (B)
Setscrew (C)
Setscrew (C)
A board case
Lid
Setscrew (B)
Setscrew (D)
Setscrew (D)
Setscrew (C)
Setscrew (C)
[To remove]
1. Remove the front cover (refer to page 4).
2. Remove the 4 setscrews (A).
Remove the circuit board A together with
the mounting bracket.
3. Remove the 2 setscrews (D).
4. Remove the 2 setscrews (B) and 2
setscrews (C).
5. Remove the circuit board A and lid.
[To attach]
Reverse the above procedure.
* The shiny side of the insulation paper
should face the circuit board A
[To change the fuse]
1. Remove the 2 setscrews (B) and 2
setscrews (C).
2. Remove the circuit board A and lid.
3. Pry the fuse out with a screwdriver as
shown.
If the fuse is loose, bend the fuse holder with
your fingers.



 To Next Page