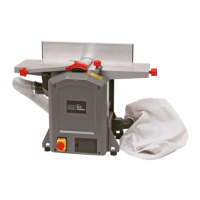
This document describes the SIP Industrial Planer Thicknesser, available in two models: an 8"x 8" Planer Thicknesser (Part No. 01557) and a 10"x 10" Planer Thicknesser (Part No. 01558). These machines are designed for woodworking applications, specifically for planing and thicknessing timber.
Function Description:
The SIP Planer Thicknesser combines two primary functions:
- Planing: This involves surfacing timber to achieve a flat and smooth finish. The machine is equipped with an infeed table, outfeed table, and an adjustable fence to guide the timber across the cutter block. The depth of cut for planing can be adjusted, and the fence can be tilted to achieve angled cuts.
- Thicknessing: This function reduces the thickness of timber to a desired dimension, ensuring parallel surfaces. The timber is fed through the machine, passing under a cutter block, with the thicknessing table adjusted to control the final thickness.
The machine is designed for both rough sawn timber requiring finishing on all four sides and for setting the machine for planing and thicknessing to achieve specific dimensions. It is crucial to understand the operation of both planing and thicknessing modes to achieve the desired results safely and effectively.
Important Technical Specifications:
The technical specifications vary slightly between the two models:
Planing:
- Planer Width: 204mm (01557) / 252mm (01558)
- Planer Length: 740mm (01557) / 920mm (01558)
- Max Cutting Depth: 2.5mm (both models)
- Fence Tilt: 90 - 135° (both models)
- Table Width: 355mm (01557) / 445mm (01558)
Thicknessing:
- Timber Size Thicknessing - Min / Max: 5 - 120mm (both models)
- Max Timber Width: 204mm (01557) / 252mm (01558)
- Max Depth Cut: 2.0mm (both models)
- Feed Speed: 6.4mtrs / min (both models)
Dimensions & Specification:
- Motor: 230v 1500w (both models)
- Cutter Block Speed: 9000rpm (both models)
- Dust Extraction Outlet - ID: 55mm (01557) / 55mm (01558)
- Dust Extraction Outlet - OD: 62mm (01557) / 62mm (01558)
- Dust Extraction Adaptor - ID: 63mm (01557) / 63mm (01558)
- Dust Extraction Adaptor - OD: 68mm (01557) / 68mm (01558)
- Noise Level: 105dB(A) (both models)
- Weight—GW / NW: 28 / 24kg (01557) / 31 / 27kg (01558)
- Packaged Dimensions L x W x H: 850 x 430 x 460mm (01557) / 1030 x 430 x 520mm (01558)
Usage Features:
The manual emphasizes several key usage features and safety instructions:
- Safety First: The document highlights the importance of reading and fully understanding the instructions before operation. It includes safety symbols for danger, warning, and supplementary information. Electrical safety, work area environment, personal protective equipment (PPE), and proper tool handling are stressed.
- Assembly: The planers weigh approximately 24-28Kgs and require proper assembly. This includes attaching the angle fence, the table adjustment handle, the dust collector chute, the cutter guard system, and the rubber feet. It is crucial to ensure all components are securely fastened and the planer is level. The machine is fitted with 2 inter-locking safety switches, which must not be bypassed.
- Setting the Angle Fence: The angle fence can be adjusted by loosening a lock handle, allowing for precise angle cuts.
- Setting the Cutter Blade: The cutter setting tool is used to ensure the knife touches both sides of the blade adjustment block, indicating correct blade height.
- Planing Operation:
- The cutting depth is set by a knob and gauge.
- The maximum depth of cut is 2mm.
- The fence is set at 6 o'clock for normal planing (90 degrees).
- The cutter guard must be pushed out of the way and placed on the table so it rests snugly against the fence.
- The cutter guard is light enough to touch the workpiece, completely covering any exposed cutter.
- The green ON button activates the machine, and the workpiece is fed across the fence and over the cutter.
- The red OFF button stops the machine.
- Thicknessing Operation:
- The thicknessing table is adjusted using a handle to set the desired thickness.
- The workpiece is fed into the machine, with the table adjustment handle used to control the depth of cut.
- It is advisable to work with rough or warped wood to make very small depths of cut to begin with (1mm should be sufficient, or 1/4 of a turn of the handle).
- Support the workpiece at the desired height so it is horizontal and fed into the cutter.
- The rollers automatically feed the workpiece past the kick-back pawls and into the cutter blade.
- Ensure the machine is well supported at the outlet side.
- Dust Extraction: Dust extraction is required for safe operation. The machine includes outlets and adaptors for connecting to a dust extraction system.
- Electrical Connection: The machine requires a 230V ~ 13 amp type plug. The wiring colors are specified: Yellow/Green for Earth, Blue for Neutral, and Brown for Live. It is critical to ensure correct wiring and to use a residual current circuit breaker (RCCB) for safety.
Maintenance Features:
Regular maintenance is crucial for the longevity and safe operation of the Planer Thicknesser:
- Machine Care:
- The planer thicknesser is designed for low maintenance.
- Bearings are greased for life.
- After approximately 10 hours of operation, it is recommended to lubricate the following parts: bearings of the feed-in and feed-out rollers, bearings of the pulley and gear wheel of the belt, treat threaded spindles for height adjustment of the thicknessing table with dry lubricant only, and clean the table surface and feed-in/feed-out rollers.
- Dirty feed-in rollers and feed-out rollers need to be cleaned.
- Regularly check that no dust has accumulated in the ventilation apertures of the motor.
- For prolonged periods of operation, users are recommended to have the machine checked by an authorized customer service shop.
- Tool Care:
- The cutter head, clamping devices, knife supports, and knives must be kept free from resin.
- Clean clamping devices, knife supports, and reversible knives every 24 hours in paraffin, white spirit, or commercially available resin remover.
- Tools made of aluminum may only be depurated with cleaning agents that do not corrode this kind of material.
- Do not use solvents to clean the machine as this could damage plastic components.
- Cutter Blade Removal:
- Cutter blades will require sharpening or replacing. Care should be taken as they are very sharp.
- Blades must always be fitted as a pair.
- To remove the cutter blade, first ensure the machine is switched OFF and isolated from the mains supply.
- Turn the cutter height adjuster to its zero point.
- Remove the Angle Fence.
- Raise the Cutter Guard arm.
- Turn the cutter block to reveal the four hex. socket head screws securing the cutter blade, then carefully remove them.
- Turn the cutter block by 180 degrees and repeat the process.
- Always hone/replace cutter blades as a pair.
- To replace in reverse order, use a straight edge to ensure the cutting edges are level and in line with the table when they are at 12 o'clock. Tighten the securing screws taking care not to over-tighten or damage the hex. sockets.
- It is recommended that sharpening is done professionally, using a jig, as blades must be sharpened as a pair to ensure they are correctly balanced. This avoids the possibility of vibration due to unbalanced cutters rotating at speed.
- Drive Belt Replacement:
- Remove the front cover (3 nuts).
- Remove the worn or broken drive belt.
- Place the replacement drive belt over the small belt wheel.
- Position part of the drive belt over the large belt wheel.
- Rotate the large belt wheel by hand in a clockwise direction whilst guiding the belt on to the belt wheel.
- Troubleshooting: The manual includes a troubleshooting guide for common issues such as the machine not starting, loose switch terminal, faulty switch, guard not fitted, motor running but cutterblock not rotating, motor slows down during cut, dust & chip collector hood blocked, and excess vibration. Solutions range from replacing fuses and switches to cleaning components and adjusting knives.
The document also includes exploded views and parts lists for both the 8" and 10" planer thicknessers, which are invaluable for identifying and ordering replacement parts. Furthermore, UK and EU Declarations of Conformity are provided, ensuring the product meets relevant safety and electromagnetic compatibility regulations. Finally, instructions for responsible disposal of packaging and electrical equipment are included.