15
PLANING
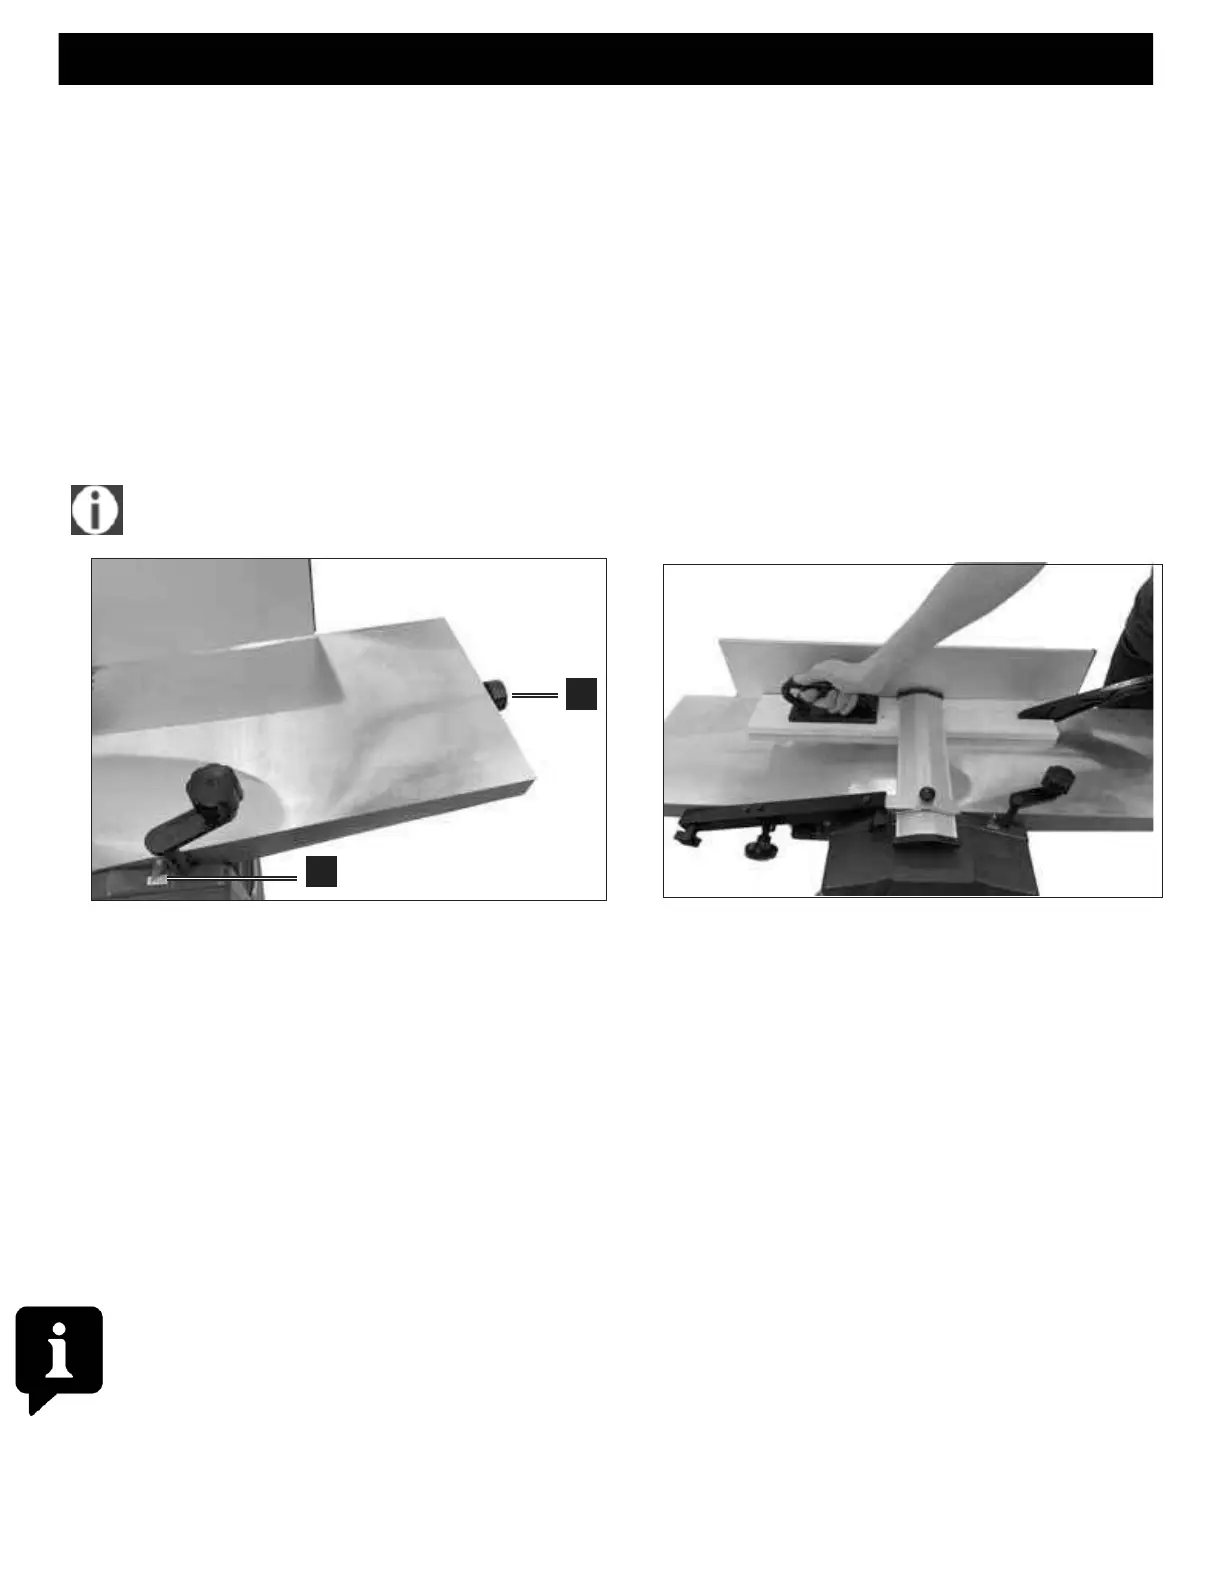
1. The cutting depth is set by the knob (13) & gauge (15) at the infeed table. We recommend a depth of cut of
no more than 1mm and no less than 0.5mm. The maximum depth of cut is 2mm.
2. Ensure the fence (8) is at the correct angle. For normal planing, this would be 90 degrees.
3. Slide the cutter guard (9) out of the way and place the workpiece on the table so that it rests snugly against
the fence, with the lead edge a short distance from the cutter, noting that direction of feed is right to left,
looking from the front of the machine.
4. Slide the cutter guard up to lightly touch the workpiece, thereby completely covering any exposed cutter.
Ensure the guard is as low as possible and the Cutter Guard Lock Knob is tightened.
5. Press the green ON button and allow the machine to come up to full speed.
6. Applying firm downwards pressure, and keeping the workpiece against the fence, proceed to feed the work
over the cutter. Do not feed too quickly.
7. Press the green Off button.
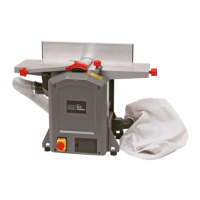
IMPORTANT: ALWAYS use the push stick and the push pad/s as shown in the picture. Fig.B
THICKNESSING
1. Lower the Thicknessing table using handle (12) sufficiently for the workpiece to be inserted beneath the cutter
blade, ensuring the blade is at 6 o’clock. Work enters from the left and exits at the right of the machine.
2. Raise the table until there is slight resistance. The work just touches the blade.
3. Withdraw the workpiece, then wind the table upwards - turn clockwise, using the Raise/Lower Handle (12),
(see Fig.C) to the appropriate cutting depth, noting that one turn is equivalent to 3mm. Do not exceed 2mm
depth of cut as this could cause kickback, and/or damage to the components or overheating of the motor.
4. It is advisable when working with rough or warped wood to make very small depths of cut to begin with - 1mm
should be sufficient, or 1/4 of a turn of the handle.
5. Support the workpiece at the desired height, so that it is horizontal and feed it into the cutter, from the left
hand side of the machine. The rollers will automatically feed the work past the kick-back pawls and into the
cutter blade. Ensure it is well supported at the outlet side.
IMPORTANT:DO NOT remove chips or shavings from the table until the machine has stopped
completely and is isolated from the mains supply.
OPERATING INSTRUCTIONS Cont.
Fig.A
13
15
Fig. B