DANGER
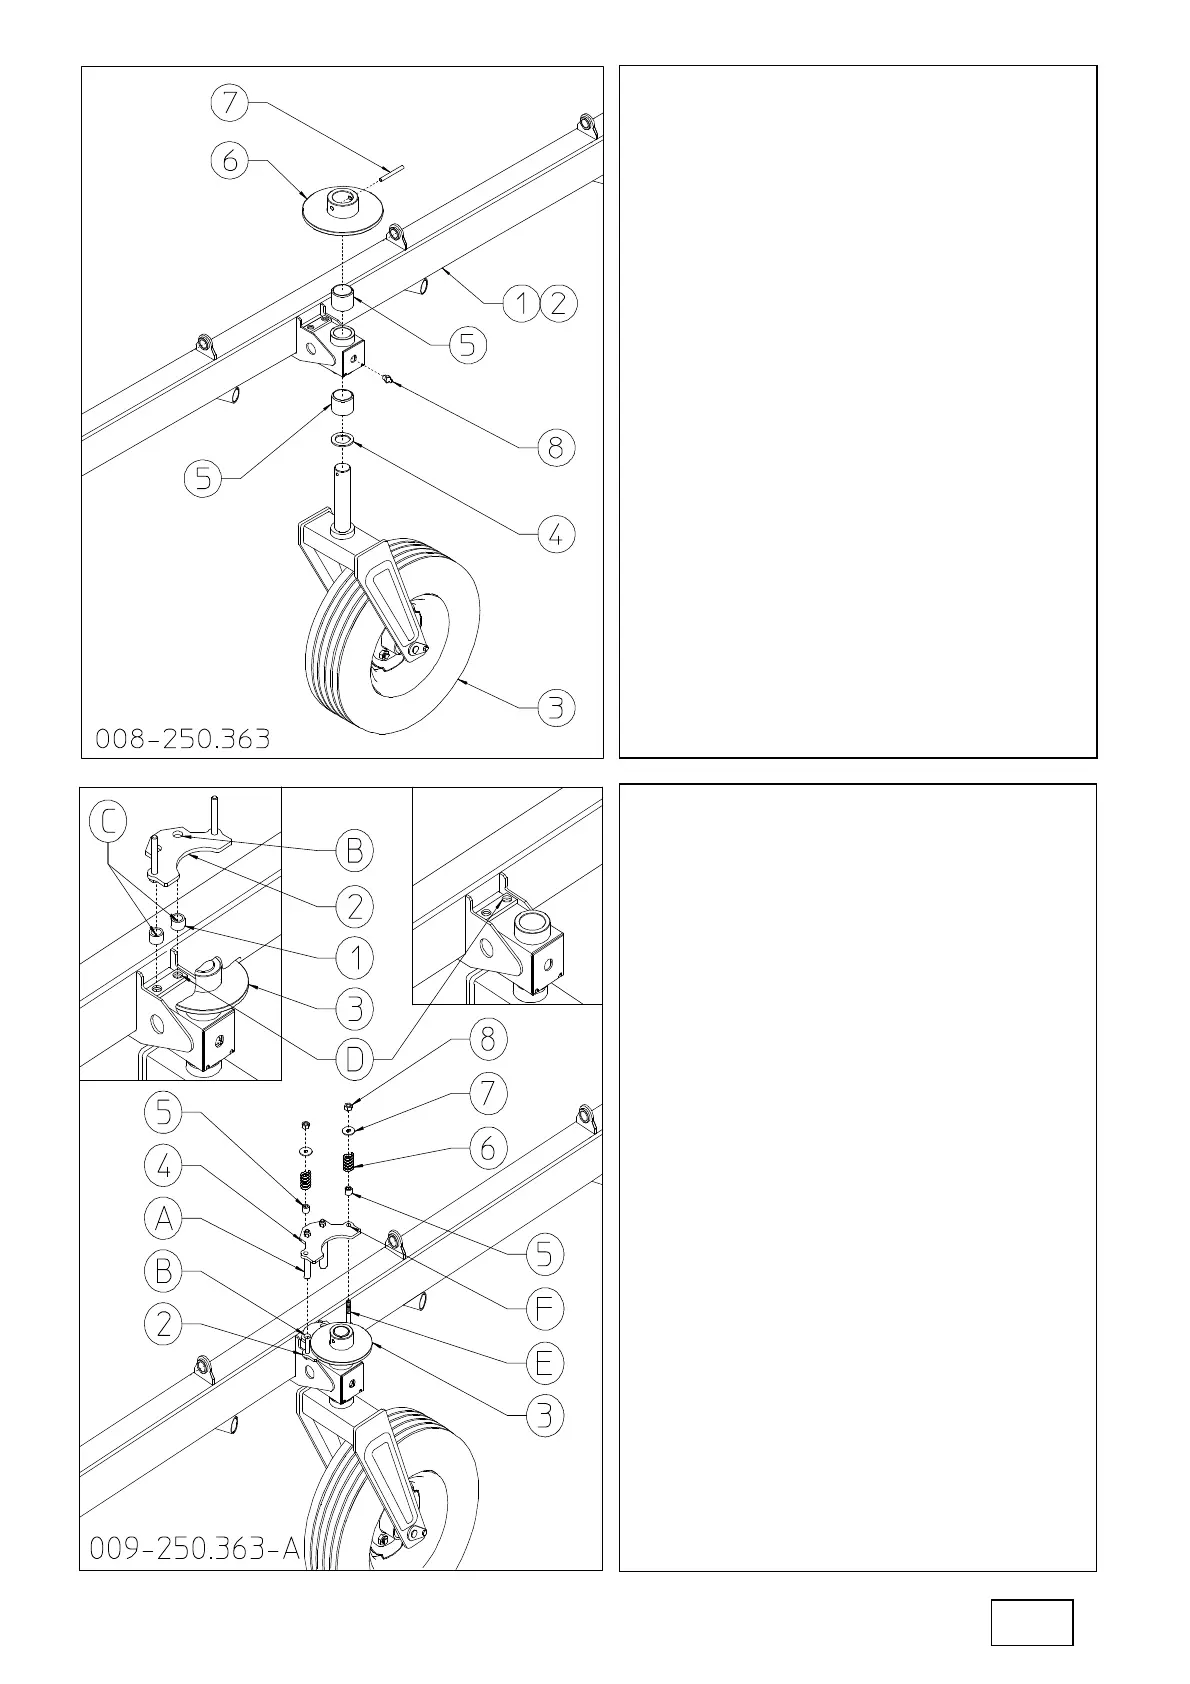
Insert the nylon bushings 5 into the
openings in sections 1-2 (RH-LH).
Place spacer 4 on the pins of the
wheel units 3. Insert the wheel units 3
into the openings in sections 1-2.
Attach the flange 6 onto the pins of the
wheel units 3 using the spring pins 7.
Attach the grease nipples 8 to the
openings in sections 1-2.
Before continuing make sure that the
wheel units 3 can turn freely.
In this step, you will use:
Item 4: 2 spacers ø50-76x5 (1.97”x3”)
Item 5: 4 nylon bushings ø50-60x50
(ø1.97”-2.36x1.97”)
Item 7: 2 spring pins ø10x80
(0.4”x3.15”)
Item 8: 2 grease nipples M8 (0.31”)
DANGER
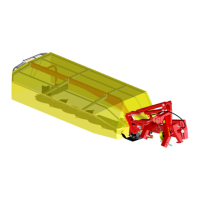
Attach the shims 1 and the plate with bolt 2
underneath flange 3. Attach the counterplate
4 over flange 3, inserting the counterplate
pins A (counterplate 4) into the holes B in
the plate with bolt 2, into the holes C in the
shims 1 and into holes D in the sections. The
plate screws E must go into the holes F of
the counter plate 4.
Place the bushing 5, spring 6 and washer 7
on the screw E and lock with the nut 8.
Note: the more spring 6 is compressed by
tightening nut 8, the more the turning of the
wheel is braked, therefore check that it is
adjusted properly when the machine is to be
operated (see machine use).
In this step, you will use:
Item 1: 4 shims ø21-30x10 (0.82”-
1.18”x0.39”)
Item 5: 4 bushings ø13-18x20 (0.5”-
0.71”x0.79”)
Item 6: 4 springs ø5-30x45 (0.20”-
1.18”x1.77”)
Item 7: 4 washers ø12-36x4 (ø0.47”-
1.42x0.16”)
Item 8: 4 nuts M12 (0.47”)
53