Do you have a question about the SJCAM M20 and is the answer not in the manual?
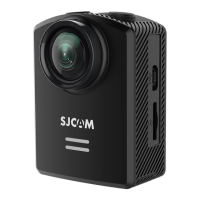
Welcome message and initial advice for new users of the SJCAM M20 camera.
Important safety precautions for handling the SJCAM M20 camera, including avoiding drops and heat.
Step-by-step instructions on how to connect the SJ Smart Remote to the SJCAM M20.
Select to record videos or capture still photos with the camera.
View recorded videos and photos on the camera display.
Create time-lapse videos by stitching photos automatically on the camera.
Record videos in slow motion for dynamic visual effects.
Capture time-lapse sequences where each frame is a separate image file.
Capture multiple snapshots rapidly, up to 10 consecutive shots.
Enhances underwater images by adding red to compensate for light loss.
Enable live analog video feed via USB, requiring an AV-out cable.
Automatically starts recording when motion is detected in front of the camera.
Automatically starts recording when the vehicle's engine starts, requires car charger accessory.
Enable or disable remote control functionality and pair the remote.
Access camera settings for configuration and customization.
Adjust video resolution to balance detail and file size.
Automatically overwrites oldest footage when memory card is full.
Field of View adjustment to control the angle of the recorded scene.
Automatically adjusts brightness and contrast for balanced images in various lighting.
Enables active video stabilization to reduce camera shake.
Enable or disable the recording of sound along with video footage.
Adjust microphone sensitivity for recording audio at desired levels.
Overlay the date and time of recording onto video or photo files.
Select NTSC or PAL for video output, affecting framerate and color encoding.
Configure On-Screen Display to show activated features and status information.
Choose between .MOV or .MP4 file formats for video recording.
Adjust bitrate to control video definition and file size.
Save copies of recordings/shots to both camera MicroSD and mobile phone storage via app.
Automatically start recording as soon as the device is powered on.
Change the size of still photos to affect detail and file size.
Control image compression, affecting file size and detail.
Adjust image sharpness for crisper or smoother visual output.
Adjust color temperature to compensate for ambient lighting conditions.
Select from preset color styles like Normal, B&W, Retro, Warm, or Cool.
Adjust image sensor sensitivity to light; use 'Auto' if unsure.
Exposure Value: control the amount of light allowed in for brighter or darker scenes.
Save uncompressed RAW image files for later editing, separate from JPG.
Corrects wide-angle lens distortion, making images appear 'flat'.
Displays your license number on videos, useful for dashcam use.
Adjust the camera's internal date and time settings.
Automatically turns off the camera after a set period of inactivity.
Enable beep sounds for navigation and selection, useful outdoors.
Control which LED status indicators are active on the camera.
Configure how long the LCD display remains active before turning off.
Adjust framerate frequency (50Hz/60Hz) to counter flicker effects.
Flip the recording 180 degrees for upside-down camera mounting.
Add the SJCAM logo watermark to the bottom of your recordings.
Select the system language for the camera interface.
Change the name of the camera's Wi-Fi network.
Change the password for the camera's Wi-Fi connection.
Erase selected items or all photos and videos from the camera.
Completely erases the memory card and prepares it for use.
Restore the camera to its original factory settings.
Displays the current firmware version and directs to update sources.
Transfer files using a USB cable connected to a computer.
Transfer files wirelessly using the SJCAM App on a mobile device.
Transfer files by inserting the microSD card into a computer via an adapter.
Transfer files by inserting the microSD card into a smartphone with storage capabilities.
| Product color | Red |
|---|---|
| International Protection (IP) code | IP68 |
| Video resolutions | 640 x 480, 848 x 480, 1280 x 720, 1920 x 1080, 2560 x 1440 pixels |
| Maximum frame rate | 240 fps |
| Supported video modes | 1080p |
| Video formats supported | MOV, MP4 |
| Maximum video resolution | 2560 x 1440 pixels |
| Playback modes | Slow |
| Languages support | CHI (SIMPL), CZE, DAN, DEU, DUT, ENG, ESP, FRE, HUN, ITA, JPN, KOR, POR, RUS, SLV, TUR |
| Photo mode | Yes |
| Sensor type | CMOS |
| Total megapixels | 16.35 MP |
| Image formats supported | JPG, RAW |
| Display diagonal | 1.5 \ |
| Lens type | Wide-angle |
| Digital zoom | 6 x |
| Field of view (FOV) angle | 166 ° |
| Near Field Communication (NFC) | No |
| USB 2.0 ports quantity | 1 |
| Storage media | Memory card |
| Compatible memory cards | MicroSD (TransFlash) |
| Maximum memory card size | 128 GB |
| Mobile operating systems supported | Android, iOS |
| Cables included | USB |
| Underwater case waterproof up to | 30 m |
| Battery capacity | 900 mAh |
| Battery life (max) | 1.4 h |
| Depth | 40.14 mm |
|---|---|
| Width | 37.18 mm |
| Height | 48 mm |
| Weight | 50.5 g |
| Weight (including battery) | 55.5 g |