29
tage specified on the nameplate of the machi-
ne. Power tools marked with 230 V can also be
operated with 220 V, and power tools marked
with 127 V can also be operated with 115 V.
• Holdpowertoolbyinsulatedgrippingsurfa-
ces only (Figure 8). The accessory may contact
hidden wiring or its own cord. Accessory contac-
tinga“live”wiremaymakeexposedmetalparts
ofthepowertool“live”andshocktheoperator.
• Checkgrindingtoolsbeforeusing.Thegrin-
ding tool must be mounted properly and be able
to move freely. Carry out a test run for at least
one minute with no load. Do not use damaged,
ou-of-centre or vibrating grindind tools. Dama-
ged grinding tolls can burst and cause injuries.
Whenoperatingthemachinewithpowerfrommo-
bile generators that do not have sufficient reserve
capacityorarenotequippedwithsuitablevolta-
gecontrolwithstartingcurrentamplication,loss
of performance or untypical behavior can occur
uponswitchingon.
Pleaseobservethesuitabilityofthepowergene-
rator being used, particularly with regard to the
mains voltage and frequency.
ON/OFF (Figure 5)
To start thepower tool,puch the On/Offswitch
Aforwards.
To lock the On/Of switch A press the On/Off
switchAdownatthefrontuntilitlatches.
Toswitch offthepowertool, releasetheOn/Off
switchAor,ifitislocked,brieypushdownthe
backoftheOn/OffswitchA and then release it.
!
Be aware of the sudden impact when the
tool is switched on.
!
Before the accessory reaches the work-
piece, the tool should run at full speed.
!
Before switching off the tool, you should
lift it from the workpiece.
!
The accessory continues to rotate for a
short time after the tool has been switched off.
USE
GRINDING (Figure 6)
Movethetoolbackandforthwithmoderatepres-
sure.
Thebestresultsareachievedwithanangleof30º
to40ºforgrinding.Movethemachinebackand
forthwithlightpressure.Inthismanner,thework-
piece does not become too hot, no discoloration
occurs and no ridges are produced.
!
Never use a cutting disc for side grinding.
CUTTING (Figure 7)
Whencutting,donotpress,tiltoroscillate.Work
withamoderatefeedratethatissuitedtothema-
terialtobeworked.
Thedirectioninwhichonecutsisimportant.The
machinemustalwaysrotateoppositetothedirec-
tion of motion; therefore never move the machine
intheotherdirection!Otherwise,thedangerexists
thatitwillbeforceduncontrolled out of the cut.
When cutting profiles or square pipes, it is best
tostartwiththesmallestcrosssection(gure7).
!
Do not subject cutting discs to side pres-
sure.
For your safety, in the cutting off operations must
be use the adequate protection guard, which
onlytheundersideofthecutting-offwheelcould
be expose during the cutting-off operation. As
showedinthepicture9.
•Donottiltthetoolwhilecutting.
•Alwaysmovethetoolinsamedirectionasarrow
on tool head, in order to prevent the tool from being
pushed out of the cut in an uncontrolled manner.
•Donotapplypressureonthetool;letthespeed
ofthecuttingdiscdothework.
•Theworkingspeedofthecuttingdiscdepends
on the material to be cut.
•Donotbrakecuttingdiscswithsidepressure.
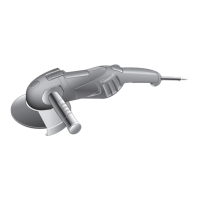
HOLDING AND GUIDING THE TOOL (Figure 8)
!
While working, always hold the tool at the
grey-coloured grip area(s)
.
Always hold the tool rmly with both hands, so
youwillhavefullcontrolofthetoolatalltimes.
Payattentionto thedirectionof rotation;always
holdthetoolso,thatsparksandgrinding/cutting
dustyawayfromthebody.
Provide for a secure stance.
MAINTENANCE / SERVICE
MAINTENANCE AND CLEANING
!
Before any work on the machine itself,
pull the mains plug.
Forsafeandproperworking,alwayskeepthema-
chine and the ventilation slots clean.