9
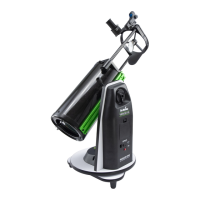
The Red Dot Finder is a zero magnication pointing tool that
uses a coated glass window to superimpose the image of a
small red dot onto the night sky. The Red Dot Finder is equipped
with a variable brightness control, azimuth adjustment control,
and altitude adjustment control (Fig.12). The Red Dot Finder is
powered by a 3-volt lithium battery located underneath at the
front. To use the Finder, simply look through the sight tube and
move your telescope until the red dot merges with the object.
Make sure to keep both eyes open when sighting.
Like all nderscopes, the Red Dot Finder must be properly
aligned with the main telescope before use. This is a simple
process using the azimuth and altitude control knobs.
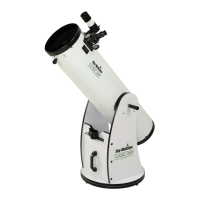
Open the battery cover by pulling it down (you can gently pry
at the 2 small slots) and remove the plastic shipping cover
over the battery (Fig.13).
Turn on the Red Dot Finder by rotating the variable brightness
control clockwise until you hear a “click”. Continue rotating
the control knob to increase the brightness level.
Insert a low power eyepiece into the telescope’s focuser. Locate
a bright object and position the telescope so that the object
is in the centre of the eld of view.
With both eyes open, look through the sight tube at the object.
If the red dot overlaps the object, your Red Dot Finder is per-
fectly aligned. If not, turn its azimuth and altitude adjustment
controls until the red dot is merged with the object.
1.
2.
3.
4.
Aligning and using the Red Dot Finder
Operating the CQ40 mount
Aligning the Red Dot Finder
Azimuth
adjustment
knob
Bracket
Thumbscrews
Azimuth
adjustment
knob
LED
Ta b
Battery
compartment
cover
Plastic
shipping
cover
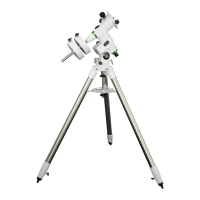
The CQ40 mount is designed to be used in the Equatorial mode, which allows the user to take full advantage of
the extra possibilities oered by this mode:
- The CQ40’s setting circles can be used to help nding objects invisible to the naked eye.
- It is easy to follow a celestial object once it is visible in the eyepiece. Turning only the RA axis exible control cable
will allow following.
The use in EQ mode requires the mount to be polar aligned. To reach this situation, the mount has to be oriented
by horizontal rotation and vertical adjustment.
Horizontal rotation:
Rotate till the latitude adjustment lever points south (for NCP or Polaris alignment if you are observing in
the northern hemisphere) or north (for SCP alignment in the southern hemisphere). Horizontal rotation is
possible by just moving the tripod or slightly loosen the M10 bolt holding the mount on the tripod.
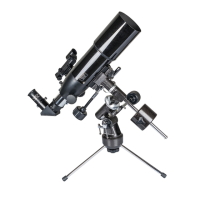
Attaching the red dot nder
Slide the red dot nder bracket into the rectangular slot and
tighten the screw to hold the red dot nder in place (g.11).
Fig.11
Fig.12
Fig.13