EasyManua.ls Logo

Skytech Smart Stat III User Manual

Default Icon
7 pages
To Next Page IconTo Next Page
Page #1 background imageLoading...
Page #1 background image
Model: Smart Stat III
INSTALLATION AND OPERATION INSTRUCTIONS
IF YOU CANNOT READ OR UNDERSTAND THESE INSTALLATION INSTRUCTIONS DO
NOT ATTEMPT TO INSTALL OR OPERATE
INTRODUCTION
This remote control system was developed to provide safe, reliable, user-friendly remote control system for gas heating appliances. The
system can be operated manually from the transmitter.
The transmitter operates on (2) AAA 1.5V batteries that are included. Install the AAA
batteries supplied with the unit into the battery compartment. It is recommended
that ALKALINE batteries always be used for this product. Be sure the batteries are
installed with the (+) and (-) ends facing the correct direction.
If the transmitter does not illuminate when you press any buttons, or you see nothing
on the LCD screen, check the position of the batteries.
TRANSMITTER
MODE
TIME
TIMER
SET
DOWN
UP
+
+
-
-
LIQUID CRYSTAL DISPLAY - LCD
ON
OFF
THERMO
X
ROOM
SET
AM
PM
TIMER
FLAME
E
E
1
2
3
4
5
6
7
8
Low Battery Indicator -1. Battery power is low, replace batteries within two weeks.
Timer -2. Time remaining before the system shuts off.
Mode -3. Indicates whether the system is ON, OFF, or in THERMO mode.
Set -4. Indicates the desired SET temperature when in THERMO mode.
Flame -5. Indicates appliance is on.
Clock -6. Indicates current time.
Room -7. Indicates current ROOM temperature.
ºF -8. Indicates degrees Fahrenheit (ºC indicates degrees Celsius).
MODE FUNCTION
To select an operational mode, press the MODE button on the transmitter.
ON - Turns the appliance ON, the ame icon will appear on the LCD screen.
THERMO - Remote is in THERMO mode.
OFF - Turns the appliance OFF, the ame will disappear from the LCD screen.
The factory setting for temperature is degrees fahrenheit (ºF). To change this set-
ting to degrees Celsius (ºC):
Remove battery cover on the back of the transmitter and locate the setting
button in the top center of the battery compartment.
Push the button once to enter temperature scale setting mode.
Use the up and down buttons to switch between the ºF and ºC.
Push the setting button again once again to set the displayed temperature
scale.
Repeat this procedure to switch back to ºF.
SETTING ºFAHRENHEIT / ºCELSIUS SCALE
+
+
-
-
SETTING
BUTTON
REV. 5-8-13 Page 1
Skytech Smart Stat III

Other manuals for Skytech Smart Stat III

Question and Answer IconNeed help?

Do you have a question about the Skytech Smart Stat III and is the answer not in the manual?

Skytech Smart Stat III Specifications

General IconGeneral
TypeRemote Control
BrandSkytech
ModelSmart Stat III
CategoryRemote Control
Power SourceBattery
Number of Devices Controlled1
Weight0.3 lbs

Summary

Introduction and Transmitter Overview

Introduction

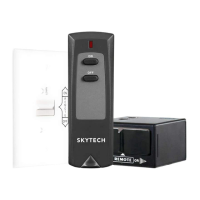
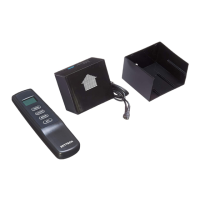
Overview of the remote control system for gas heating appliances.

Transmitter

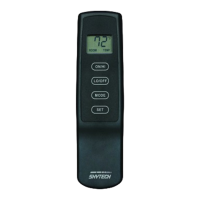
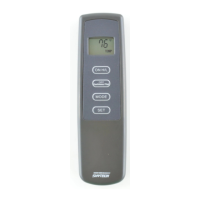
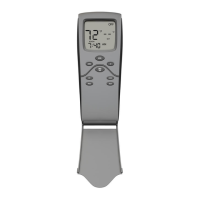
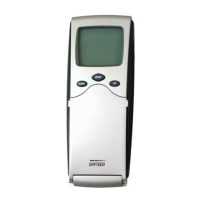
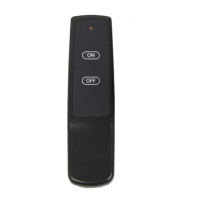
Details the components and functions of the Skytech Smart Stat III transmitter.

Liquid Crystal Display - LCD

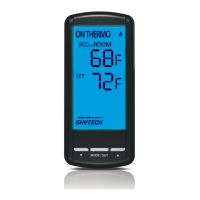
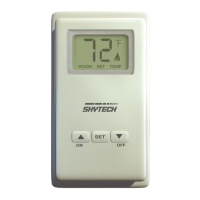
Explains the indicators and information displayed on the transmitter's LCD screen.

Mode Function

Details how to select operational modes ON, THERMO, and OFF on the transmitter.

Setting Fahrenheit Celsius Scale

Instructions for changing the temperature scale between Fahrenheit and Celsius.

Transmitter Operation and Features

Thermostat Function

How to use the thermostat mode to control heating based on set temperature.

Thermo Updating Feature

Explains the remote's feature to update room temperature and the 'swing' setting.

Setting the Clock

Step-by-step guide to setting the current time on the transmitter.

Setting the Countdown Timer

Instructions for setting and using the built-in countdown timer for appliance operation.

Receiver and Installation

Receiver

Description of the remote receiver and its manual slide switch for operation.

Warning

Critical safety precautions and warnings related to the installation process.

Millivolt Valves

Wiring instructions for millivolt valve systems.

Millivolt System Check

Steps to verify the millivolt system is functioning correctly after installation.

Electronic Spark Ignition 24 VAC Input

Wiring instructions for 24 VAC input electronic spark ignition systems.

Electronic Spark Ignition Dry Contact Input

Wiring instructions for dry contact input electronic spark ignition systems.

System Checks and Advanced Features

Electronic Spark System Check

Procedures to verify the correct operation of spark ignition systems.

Communication Safety Transmitter

Details the communication safety feature and receiver shutdown protocols.

Auto Shut Down

Information on the automatic 9-hour appliance shut down in ON mode.

CP Childproof Feature

How to activate and use the childproof lock-out function on the transmitter.

Transmitter Wall Bracket

Instructions for mounting the transmitter using the provided wall bracket.

Battery Life

Guidance on transmitter battery lifespan and when to replace them.

Troubleshooting and Technical Information

Learning Transmitter to Receiver

Steps to pair the transmitter with the receiver using security codes.

Trouble Shooting

Common issues and solutions for the remote control system's operation.

FCC Requirements

Manufacturer's statement regarding radio frequency interference and modifications.

Warranty and Service

Limited Lifetime Warranty

Explains the warranty coverage, terms, and conditions for the remote control system.

How to Obtain Service

Instructions on how to contact customer support for warranty claims and technical assistance.

Related product manuals