EasyManua.ls Logo

Skytech TS/R-2A User Manual

Skytech TS/R-2A
9 pages
To Next Page IconTo Next Page
Page #1 background imageLoading...
Page #1 background image
___________________________________________________________________________________________________________
REV 12/26/13 Page 1 of 7
Skytech TS/R-2A
Model: TS/R-2A
INSTALLATION AND OPERATING INSTRUCTIONS
INTRODUCTION
This SKYTECH remote control system was developed to provide a safe, reliable, and user-friendly remote control system for gas
heating appliances. The system can be operated thermostatically or manually from the transmitter. The system operates on radio
frequencies (RF) within a 20-foot range using non-directional signals. The system operates one of 1,048,576 security codes that are
programmed into the transmitter at the factory; the remote receiver’s code must be matched to that of the transmitter prior to initial use.
WALL MOUNT THERMOSTAT
The wall/transmitter operates on (2) 3V Button Cell (Included) which powers the LCD screen and
powers the RF signal. These batteries are made specifically for remote controls and electronic
lighters. Before using the transmitter the 3V batteries must be installed into the battery
compartments.
It is recommended that CR2032 lithium batteries always be used for longer battery life and
maximum operational performance.
Upon initial use, there may be a delay of five seconds before the remote receiver will respond to
the transmitter. This is part of the system’s design. If the LCD screen will not come on, check the
3V Button Cell battery.
TO INSTALL BATTERIES IN THE WIRELESS THERMOSTAT
1. Remove face from backing plate this is done by sliding the face up about 1/2” then pull the face off the base plate. As shown in
Figure #1
2. Locate the (2) holders for the 3V button cell batteries.
3. Slide the button cell batteries into the battery holders. (Make sure that the batteries are installed with the (+) plus side facing
you or up.
TO REMOVE THE BATTERIES IN THE WIRELESS THERMOSTAT
1. Remove face from backing plate this is done by sliding the face up about 1/2” then pull the face off the base plate. As shown in
Figure #1
2. Locate the (2) holders for the 3V button cell batteries.
3. Insert a small screwdriver into the slot above the button cell battery and push the battery out. AS shown in Figure #2
Figure #1 Figure #2
Review COMMUNICATION SAFETY SECTION under TRANSMITTER section and THERMO SAFETY SECTION under REMOTE
RECEIVER section. These signal/temperature safety features shut down the fireplace system when a potentially unsafe condition exists.
IF YOU CANNOT READ OR UNDERSTAND THESE INSTALLATION INSTRUCTIONS DO NOT
ATTEMPT TO INSTALL OR OPERATE
BACK OF UNIT
(2) 3 Volt Button
Cell Batteries
Battery Removal
Slots
+
Plus
Side
+
Plus
Side
ROOM
TEMP
THERMO
MODE
“SET”
ON
SET
OFF
LCD
DISPLAY
ON/UP
BUTTON
OFF/DOWN
BUTTON
SET
BUTTON
ROOM
TEMP
ON
OFF
SET
Question and Answer IconNeed help?

Do you have a question about the Skytech TS/R-2A and is the answer not in the manual?

Skytech TS/R-2A Specifications

General IconGeneral
BrandSkytech
ModelTS/R-2A
CategoryRemote Control
LanguageEnglish

Summary

INSTALLATION AND OPERATING INSTRUCTIONS

INTRODUCTION TO SKYTECH REMOTE SYSTEM

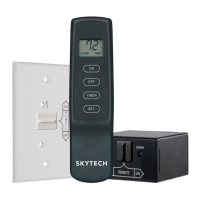
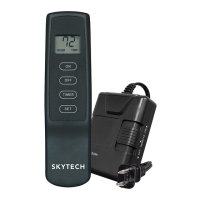
Overview of the Skytech remote control system for safe, reliable, and user-friendly operation of gas heating appliances.

WALL MOUNT THERMOSTAT OPERATION

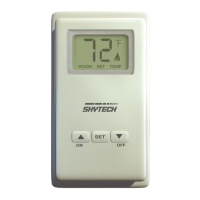
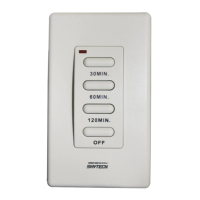
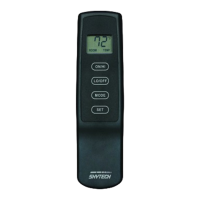
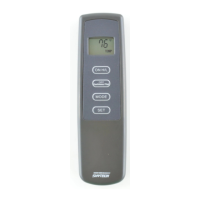
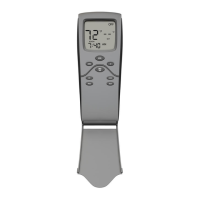
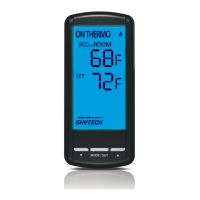
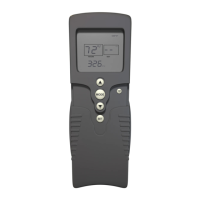
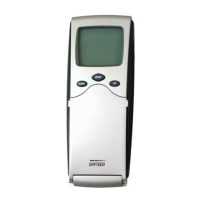
Details on the wall-mounted transmitter, its LCD display, buttons, and battery requirements.

WIRELESS THERMOSTAT BATTERY MANAGEMENT

Step-by-step instructions for installing and removing the 3V button cell batteries in the wireless thermostat.

THERMOSTAT MOUNTING AND GENERAL OPERATION

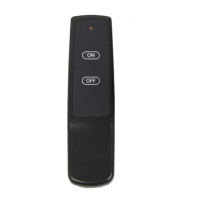
Instructions for mounting the thermostat and details on its functions, manual, and thermostat modes.

TRANSMITTER AND RECEIVER FEATURES

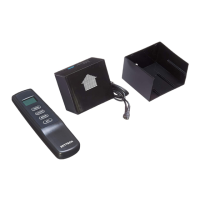
Information on the transmitter's thermo updating and communication safety, plus receiver operation.

INSTALLATION INSTRUCTIONS

GENERAL INSTALLATION AND WARNINGS

Critical safety warnings and general guidelines for installing the Skytech remote control system.

WALL MOUNTING THE REMOTE RECEIVER

Steps for attaching the receiver's wall cover plate and mounting it into a plastic switch box.

HEARTH MOUNTING THE REMOTE RECEIVER

Instructions for placing the receiver on the fireplace hearth or behind the control access panel.

WIRING GUIDELINES FOR APPLIANCES

Guides for connecting the receiver to millivolt valves and electronic spark ignition systems.

SYSTEM CHECK AND OPERATION

Procedure to verify system operation after installation for millivolt valves and electronic ignition.

GENERAL INFORMATION AND TROUBLESHOOTING

TRANSMITTER LEARNING PROCEDURE

Steps to pair the transmitter's security code with the receiver for initial use or replacement.

THERMO FUNCTION CONSIDERATIONS

Guidance on optimal placement of the transmitter when using the THERMO mode.

BATTERY LIFE EXPECTANCY

Information on battery life, recommendations for replacement, and voltage requirements.

TROUBLESHOOTING COMMON ISSUES

Guidance to resolve problems with the fireplace system or the Skytech remote control.

PRODUCT SPECIFICATIONS

Technical specifications including battery types, FCC ID, and operating frequency.

WARRANTY AND SERVICE INFORMATION

LIMITED LIFETIME WARRANTY DETAILS

Terms and conditions of the Skytech remote control system's limited lifetime warranty.

HOW TO OBTAIN SERVICE AND WARRANTY

Instructions and required information for claiming warranty service or contacting Skytech.

Related product manuals