22 Installing the Interactive Whiteboard
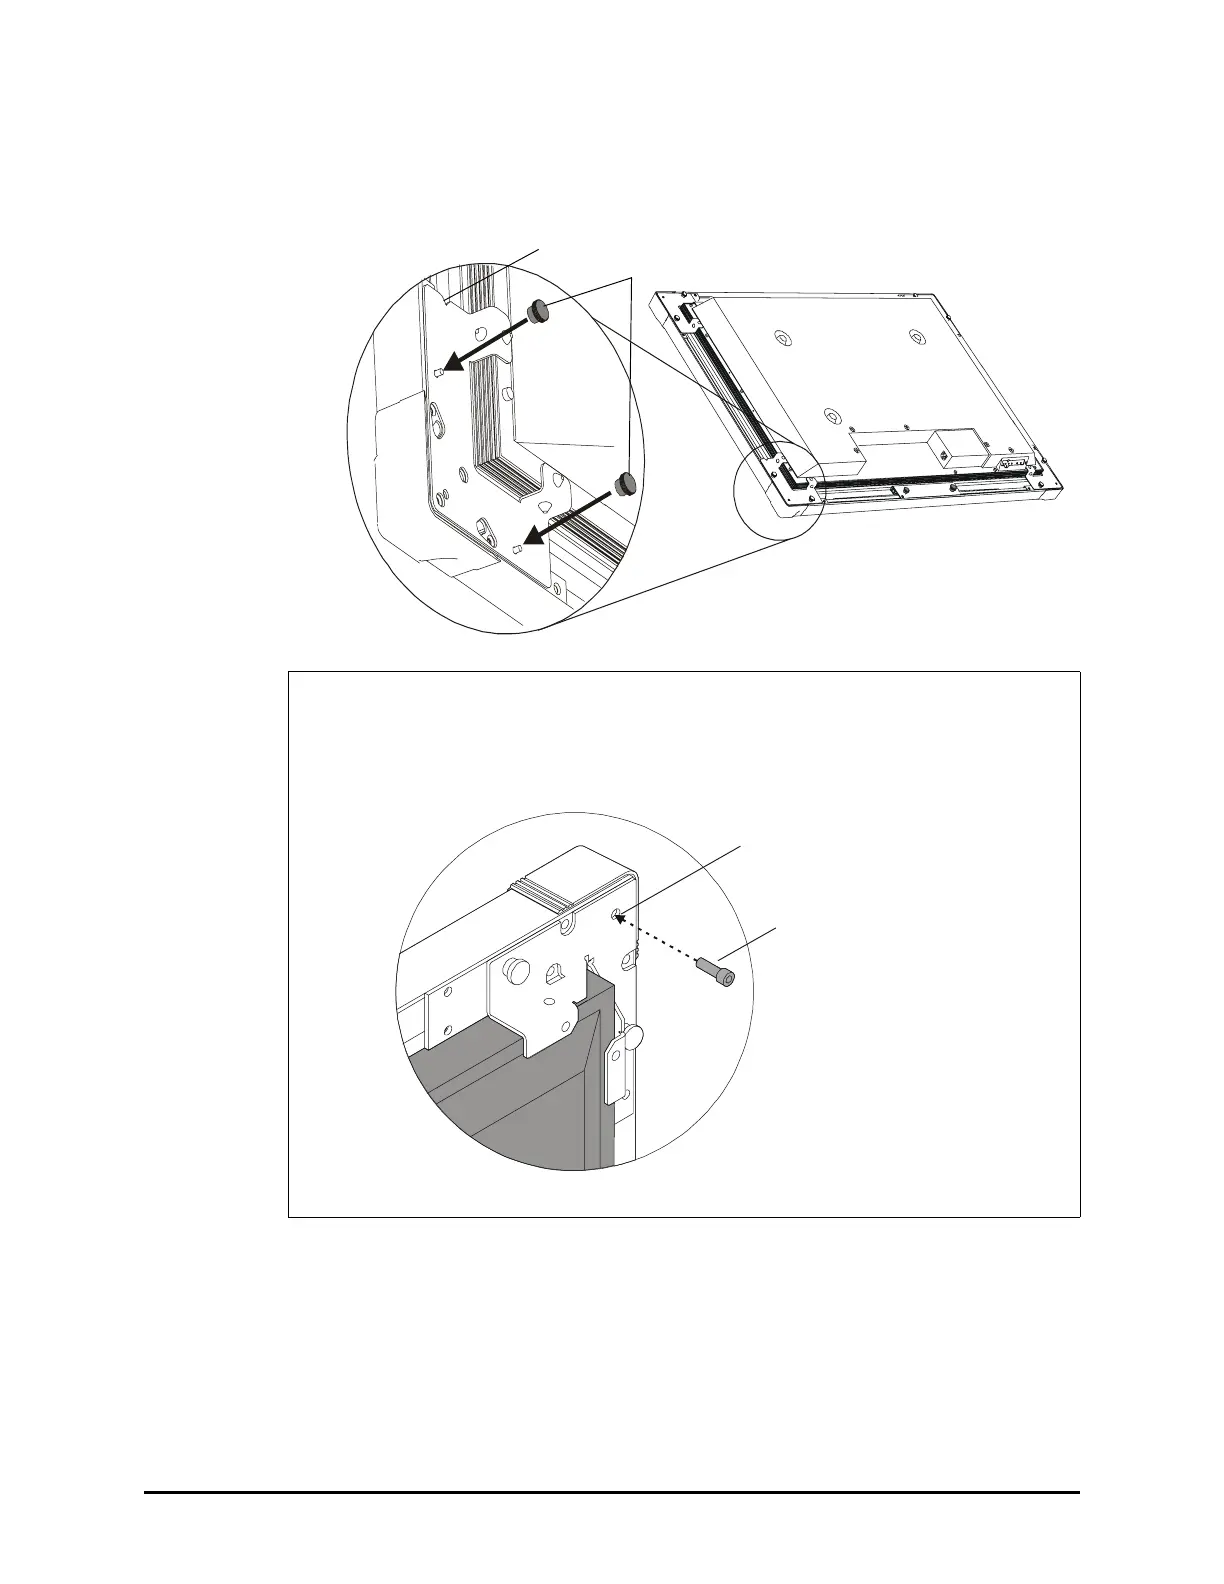
Be sure to put the corner bracket with the triangular notch in the bottom-left corner
(when you’re looking at the back of the overlay) and the bracket without the notch in
the bottom-right corner.
7. To continue the installation, complete the following procedures:
– attach either a pen tray (page 23) or a controller (page 25)
– complete the installation (page 27)
Optional Security Procedure
If you want an additional level of security, you can install a 1/4-20 × 1/2" security screw
on each corner bracket.
NOTE: These screws aren’t supplied by SMART Technologies Inc.
Notch
Thumbscrews
Supply and install
a security screw in
each corner
Security Screw
Hole






 To Next Page