24 Installing the Interactive Whiteboard
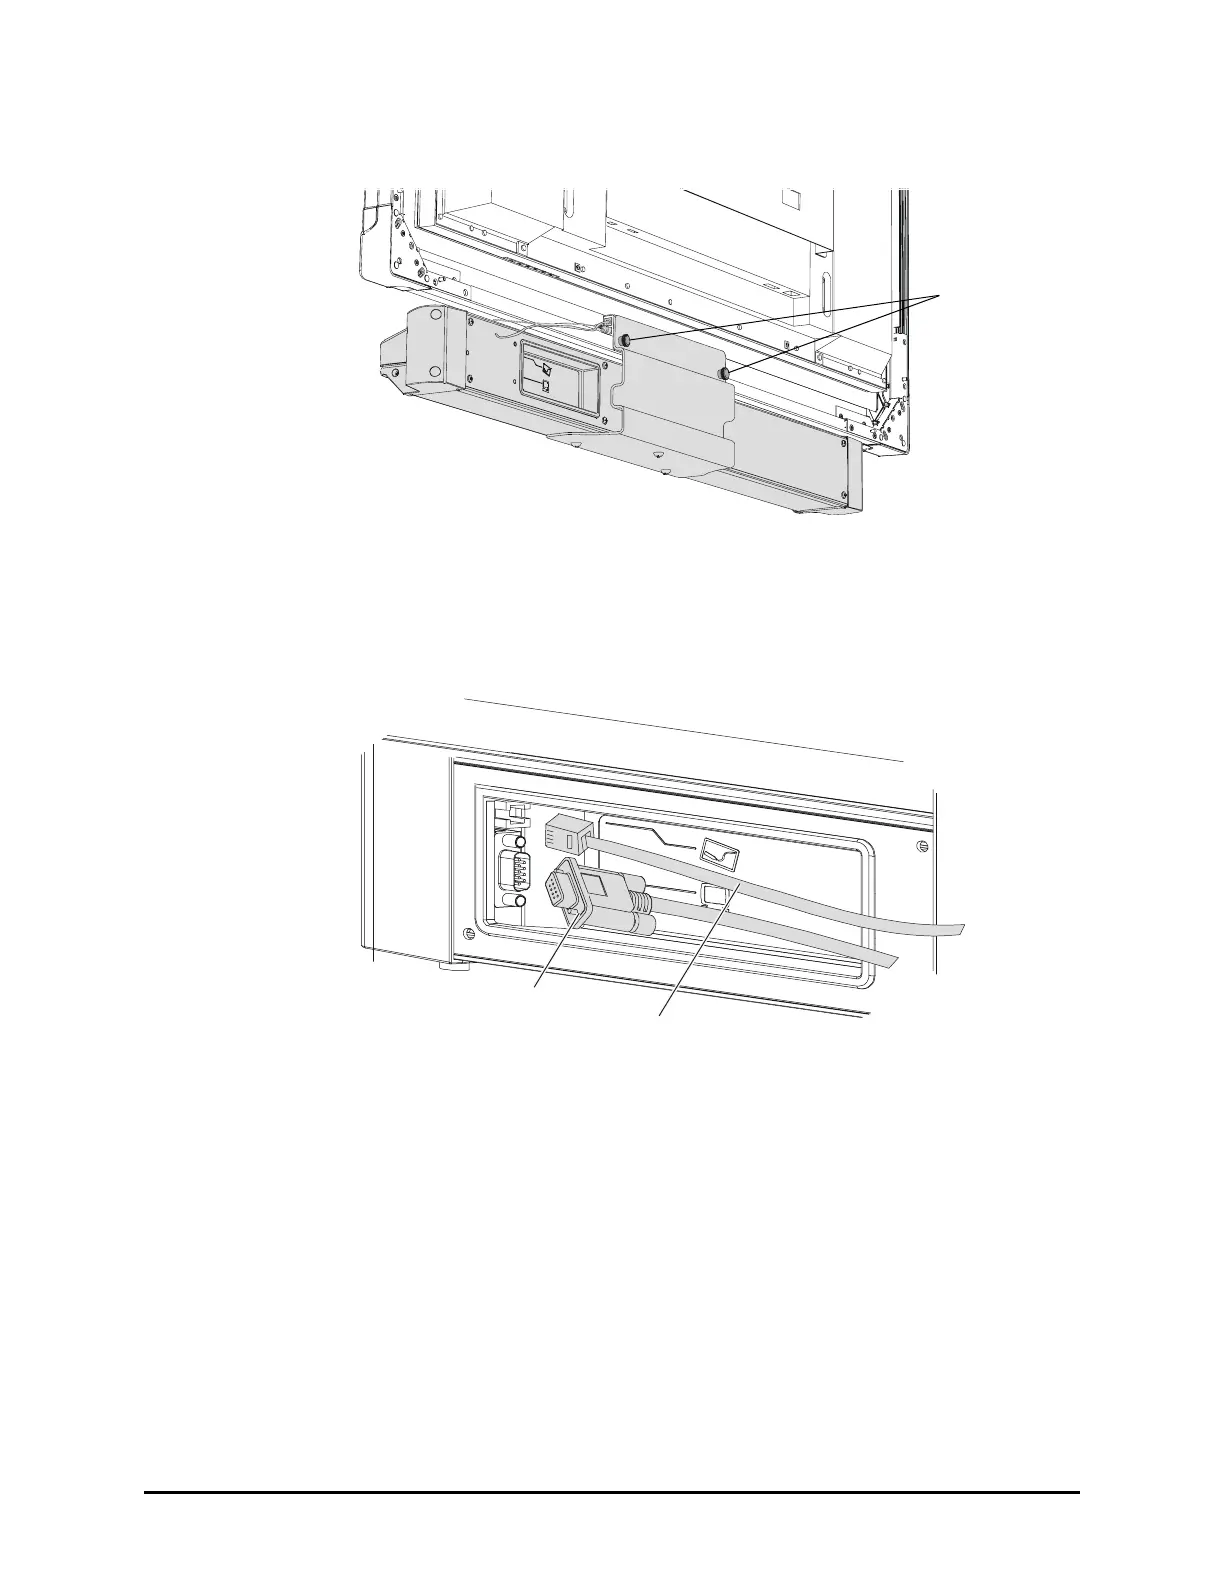
3. Attach the thumbscrews you removed in step 1.
4. Connect the MOD8 cable to the pen tray (see the next illustration). Earlier you
connected the other end of the same cable to the back of the overlay.
5. Connect the DB9 end of the SMART USB adapter cable to the pen tray. You’ll
connect the other end of this cable to your computer when you complete the
installation.
OR
If you ordered a straight-through DB9-to-DB9 serial cable with your interactive
whiteboard, connect one end of the cable to the pen tray. You’ll connect the other end
of this cable to your computer when you complete the installation.
NOTE: You can order a straight-through DB9-to-DB9 serial cable from SMART
Technologies. To do this, contact Technical Support (page 39).
OR
If you ordered the WC2 Wireless Serial Adapter (Part No. WC2-NA) with your
interactive whiteboard, connect one radio to the pen tray. To do this, follow the
instructions that came with your kit. You’ll connect the second radio to the computer
later.
6. To complete the installation see page 27.
Thumbscrews
MOD8 Cable
DB9 Connector of
RS-232 Serial Cable
B
a
c
k
o
f
t
h
e
P
e
n
T
r
a
y
SMART USB Adapter Cable





 To Next Page