This is useful:
R
if you wish to cool the interior of the
vehicle before driving
R
if you wish to charge the vehicle at a
charging station/wallbox at the most
inexpensive electricity rate
With the "Air conditioning before start"
function, the vehicle interior is cooled
prior to a desired departure time.
Prerequisites:
R
The doors and tailgate are closed.
R
The charging cable for the high‑voltage
battery is connected to a power source
and inserted into the vehicle's power
socket.
R
The high‑voltage battery has a suffi-
cient charge.
The maximum duration of "Air condition-
ing before start" is 30 minutes.
Set the air distribution of your vehicle as
follows so that the "Air conditioning
before start" function has the greatest
effect:
R
in summer, to the center and side vents
R
in winter, onto the windshield and side
windows
Information on air distribution can be
found on (Y page 102).
The setting of the airflow regulator has no
influence on the "Air conditioning before
start" function.
i
If the programmed time is too short, the
high‑voltage battery cannot be com-
pletely charged. After setting the depar-
ture time, the maximum charge level
which can be reached is then shown.
i
If the high‑voltage battery is not suf-
ficiently charged and the "Air condi-
tioning before start" function is acti-
vated, the high‑voltage battery is
charged first. When a charge level of at
least 20 % has been reached, the "Air con-
ditioning before start" function is acti-
vated. This function then has priority
over the charging of the high‑voltage
battery.
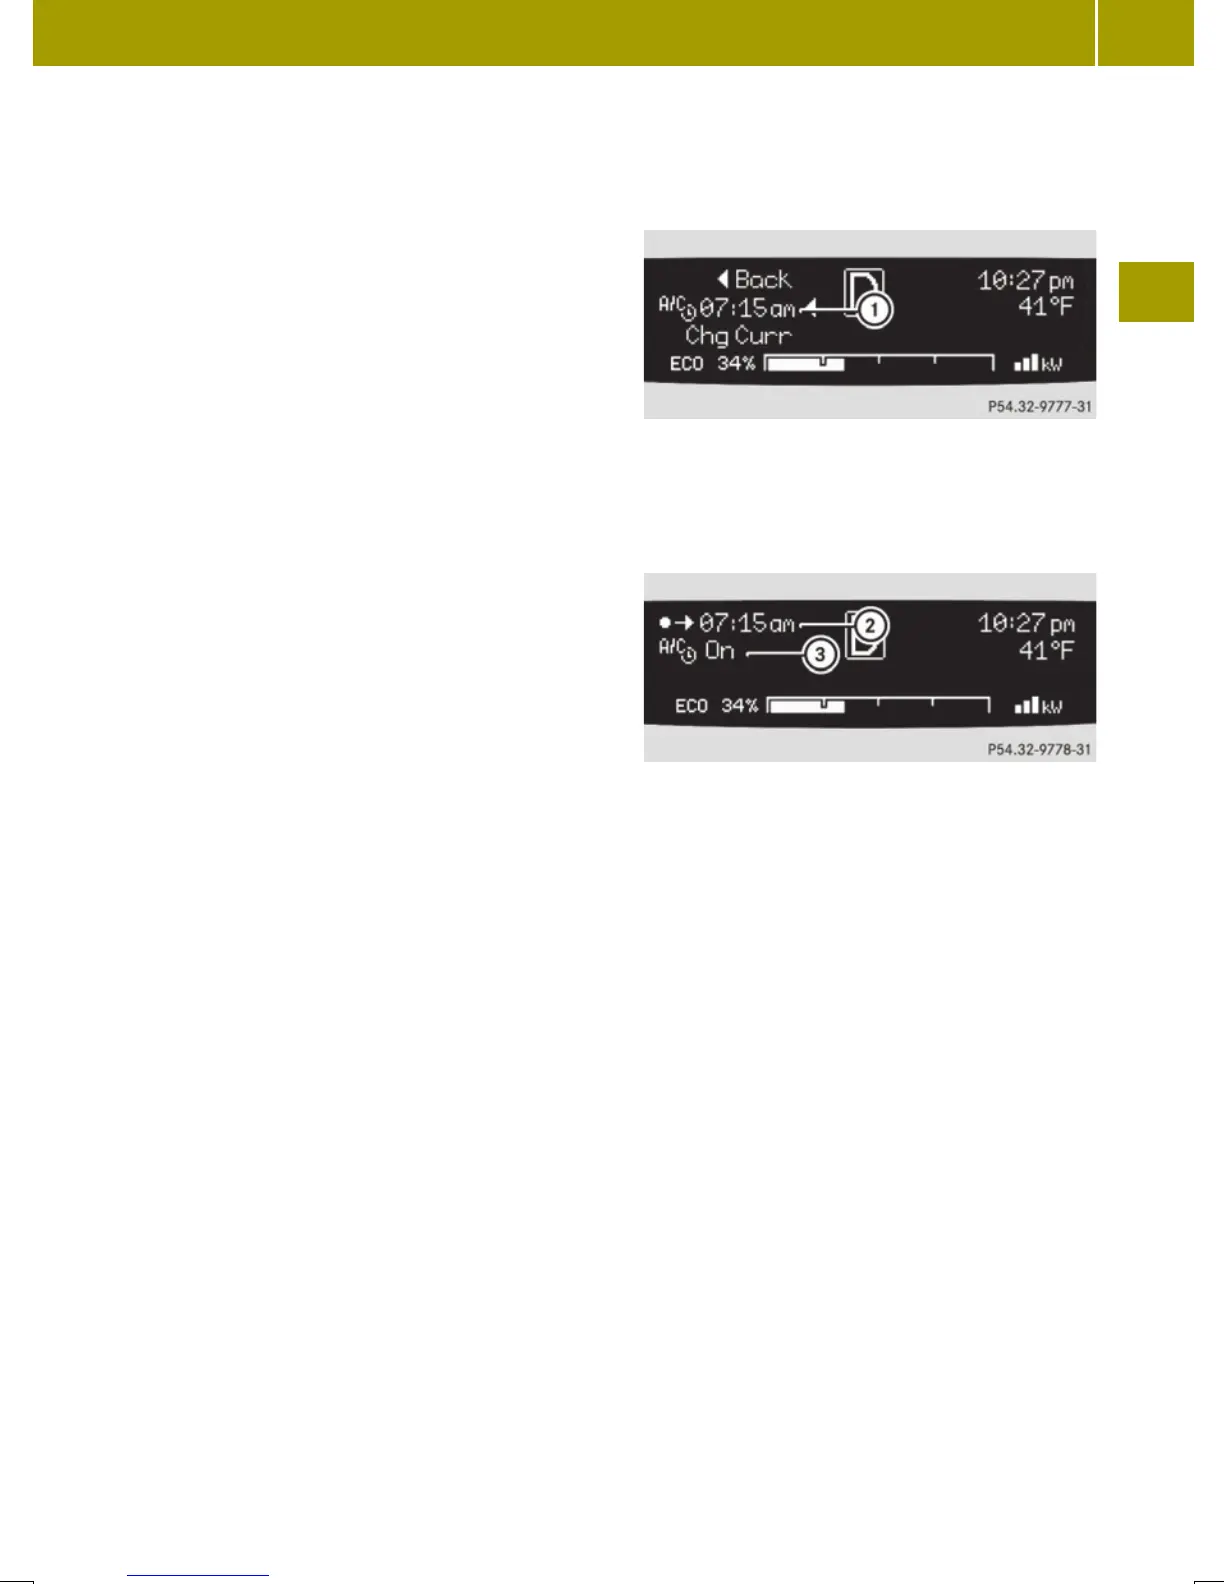
Activating the set departure time
X
Press and hold the control switch on the
control lever up or down until the display
of the last set departure time : appears
in the multifunction display.
X
Briefly press the OK button on the control
lever.
The departure time is activated ;. The
setting for the "Air conditioning before
start" function = is stored.
Changing the set departure time
X
Press and hold the control switch on the
control lever up or down until the Over‐Over‐
writewrite menu appears in the multifunction
display.
X
Briefly press the OK button on the control
lever.
X
If the 12-hour mode is set:
press and hold the control switch on the
control lever up or down until the
desired mode (amam oder pmpm) is selected.
X
Briefly press the OK button on the control
lever.
X
Press and hold the control switch on the
control lever up or down until the
desired hour is selected.
Control system
91
>> Controls.
Z