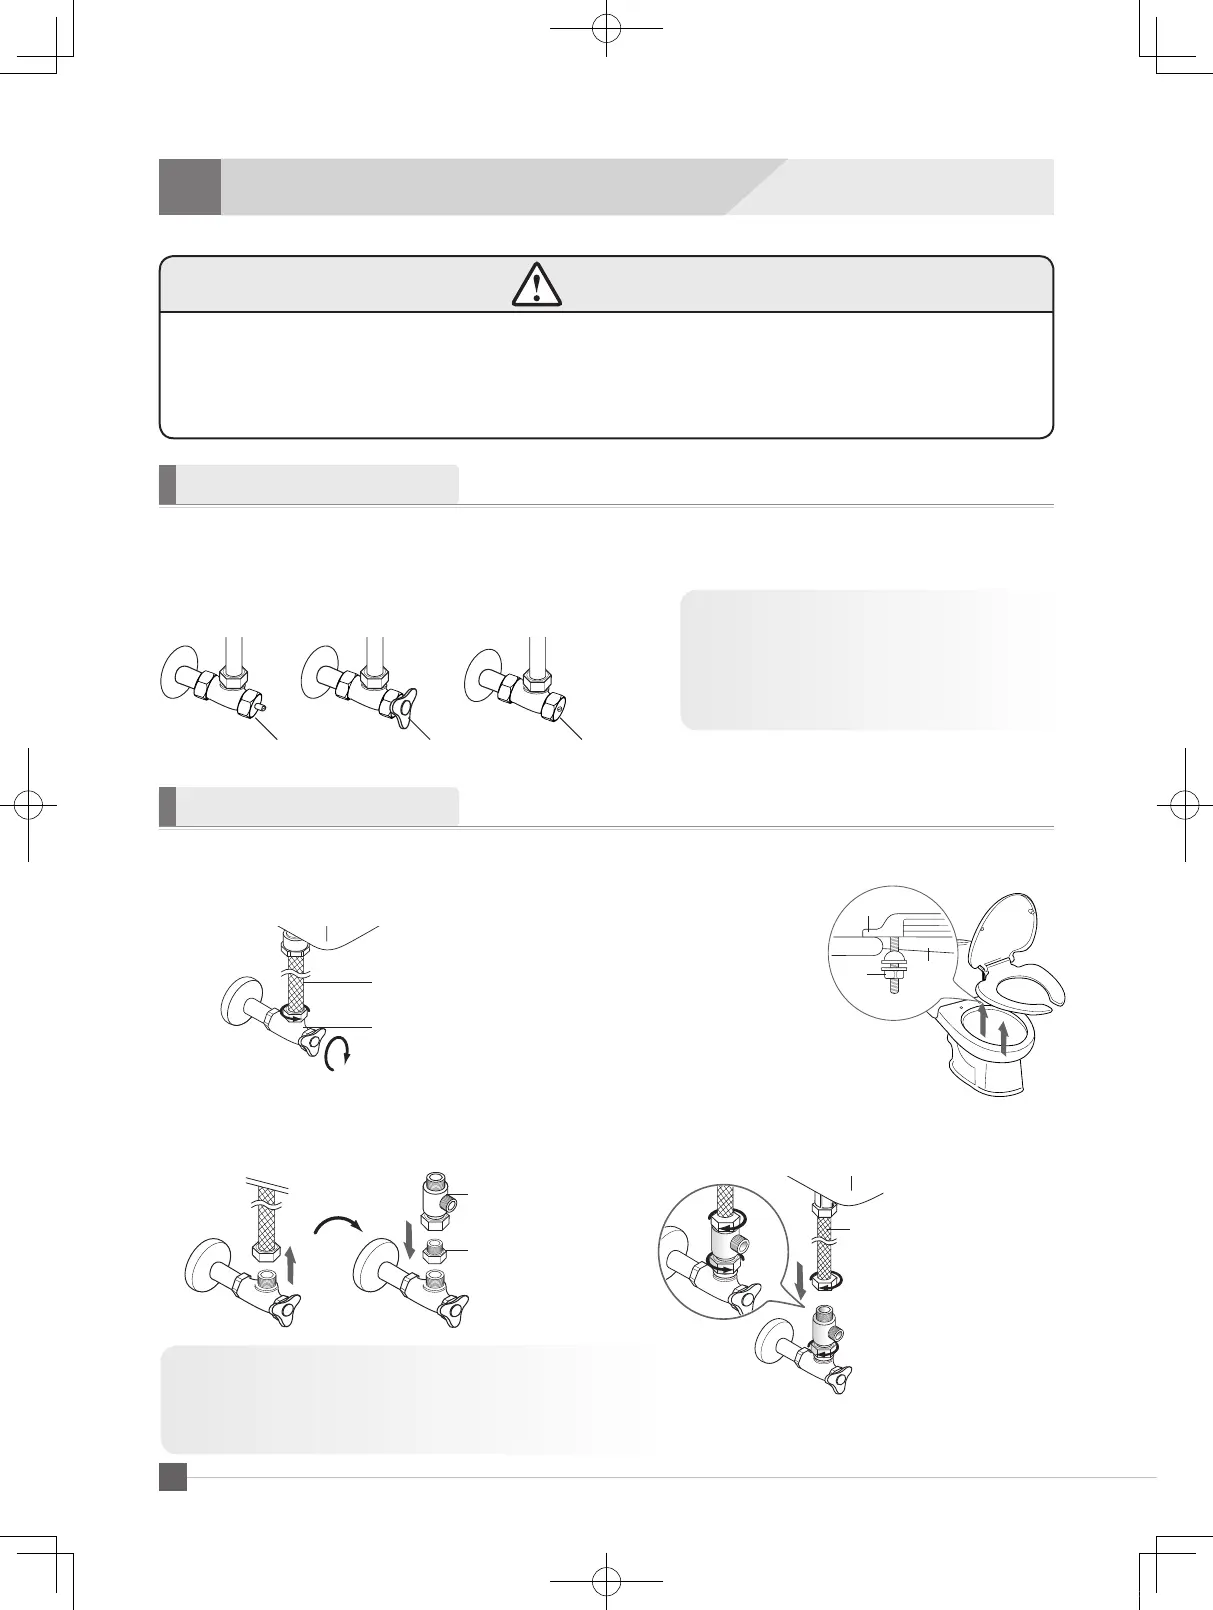
Check the water valve in the bathroom. You may need to consider purchasing additional components.
For the following case, the T-valve alone is sufficient for connection.
Minus home Handle
Inner bolt for water valve
■ Water supply valve ■ Inner bolt water valve
ᆞPlease consult with a qualified specialist.
ᆞ
Please put the unused water hose in a secure area.
■
Professional engineering is needed for plumbing work
on specialized water pipes and flush valve pipes.
ᆞThis product requires 120V usage.
ᆞPlease do not plug in the electrical cord prior to installation.
ᆞPlease consult with a licensed electrician if electrical work is needed, and in case a grounded outlet is not available,
grounding should be done in order to prevent short circuits or electric shock.
ᆞPlease contact our service center(1-800-515-3430) when you want to reinstall the bidet product(move or replacement).
Caution
Shut water supply by turning it to the right
and disassemble the water hose.
Water supply hose
Water valve
Remove existing seat and lid.
ᆞRelease the bolts on both
sides of the existing toilet
seat to remove the seat
and lid.
ᆞStore the removed seat,
nut and water hose in a
safe area in case you
move or it needs to be
reinstalled.
Connect the water supply hose to the
T-valve. Insert the packing in the T-valve.
Connect the water supply hose to the assembled
T-valve.
Conversion Nut
(with packing)
T-valve
(with packing)
If the water supply hose is old or
damaged please replace it with the
water supply hose that is included with
the unit.
※ If the water supply valve opening is 1/2 inch please use
a conversion nut to connect it with the T-valve.
※ Included 1/2" conversion nut is OD Compression, not FIP.
※ T-valve packing must be used to prevent water from leaking.
Nut
Toilet
body
Exisiting toilet seat
10
5
Installation
Check the water valve
Installation steps
SB-2000.indd 10 2019-02-15 오후 2:07:31