Measurement Units
3. Select the walk around icon .
PSI/BAR/kPa/C/F
4. Select the number of tires on the vehicle
example. A typical
heavy-duty truck contains 10.
This function changes the measurement units of the parameters
displayed
.
5. Activate each of the vehicle's wheel sensors in the proper order (see
service information for the activation order).
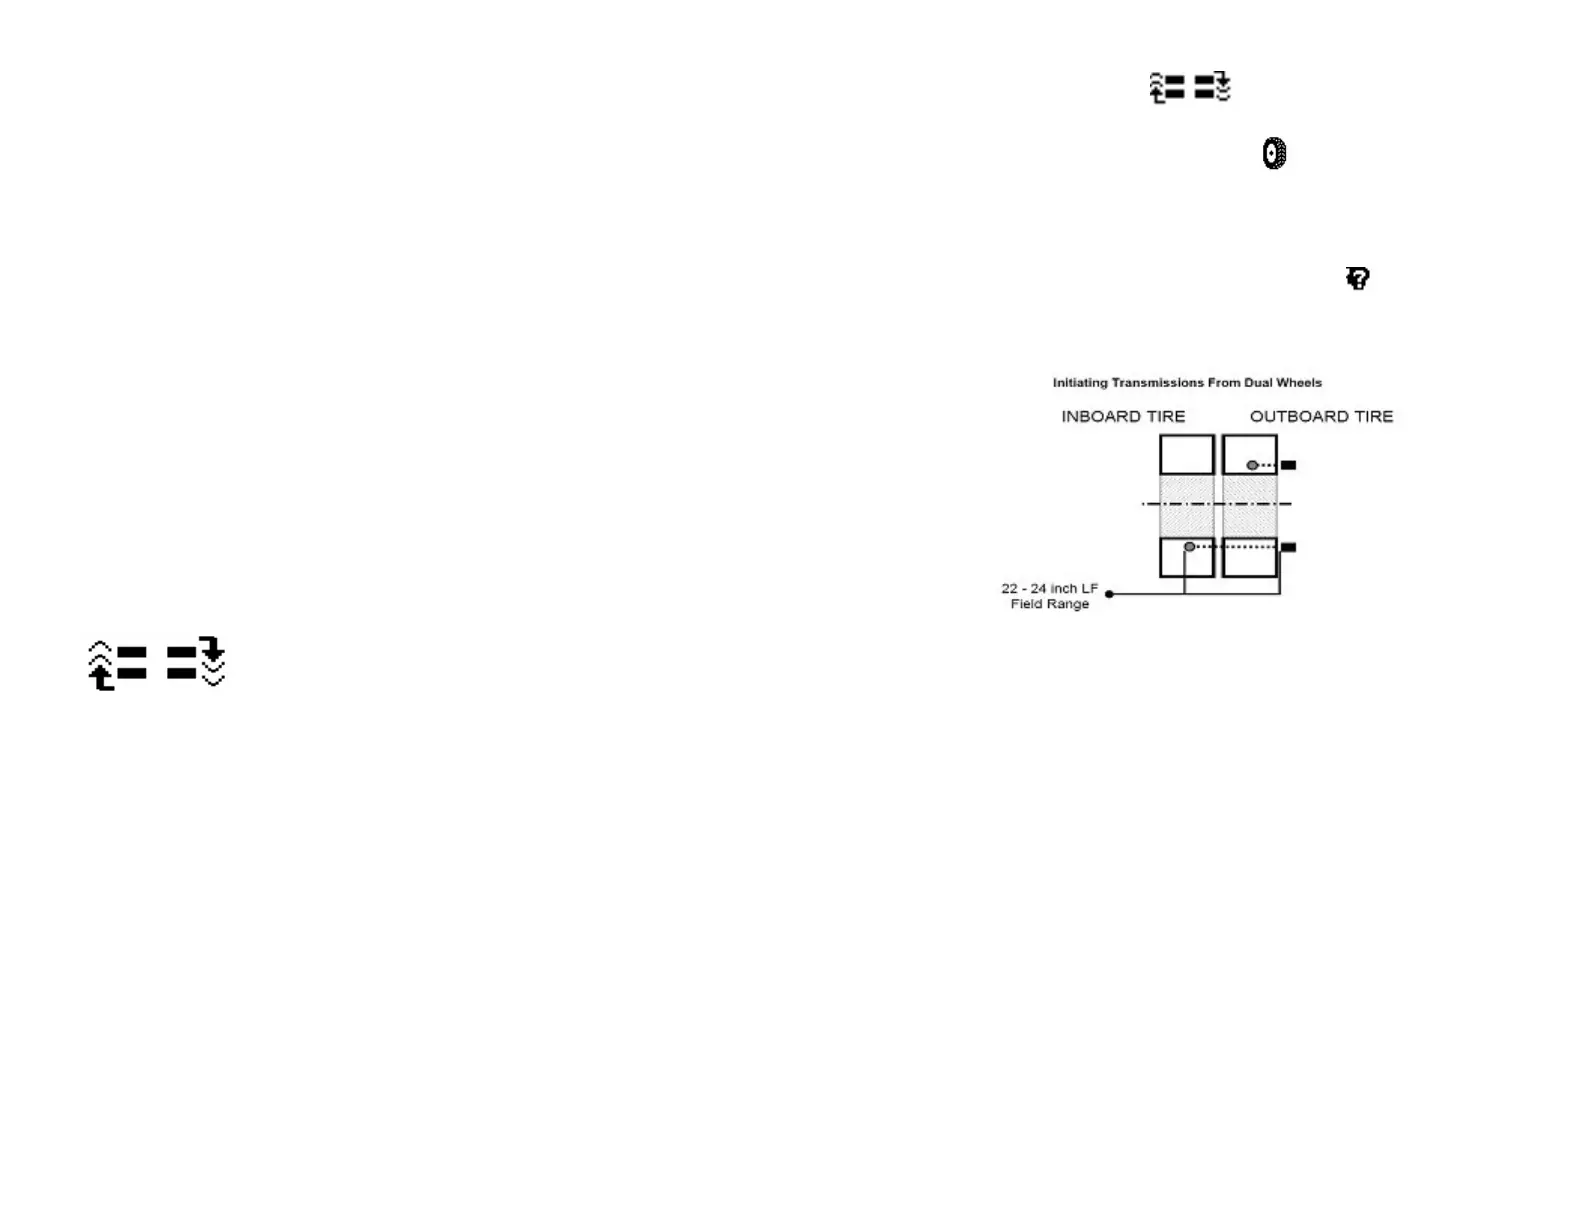
6. Hold the SmartWave tool’s antenna against the tire’s upper sidewall
in line with the valve stem. Press the Learn button
. The tool is
able to receive signals from an inner tire on a dual tire configuration
as well. Just hold the tool in line with the circumferential position of
the valve stem of the inner wheel.
Stored Sensor Information Retrieval
This function allows the user to refer to sensor information stored in the
tool memory. Up to 100 sensors readings can be stored & retrieved.
Delete Sensors in Memory
This function is used to delete all sensor data stored in the tool memory.
Walk-Around Learn
Walk-Around Learn Procedure
When the tires are rotated or replaced on a vehicle with a tire pressure
monitoring system, the vehicle must re-learn the position of each tire.
The Walk-Around Learn procedure is used to activate each sensor in its
new location, store the sensor information and download to the vehicle’s
Tire Pressure Sensor Receiver.
The unit will learns and stores the location of each sensor as the user
walks around the vehicle in a U-shaped pattern starting at the left side
(looking forward) front most tire location. If this is a dual tire axle start
with the inner tire location. The new location information (tire IDs) for
each sensor collected is then uploaded to the receiver in the vehicle.
Perform the following steps:
1. Power up the vehicle’s Tire Pressure Sensor Receiver (see vehicle's
service information for specific details).
2. Press and hold the Setup button until a list of menu items appear.
(continued)
11
Figure 7
7. Once the tool has learned the tire sensor ID for the given position,
automatically switches to the next tire position. Repeat until all the
tires have been learned.
8. After the last tire has been learned, press the down arrow, you are
now ready to transmit this information to the vehicle’s Tire Pressure
Sensor Receiver.
9. Using the supplied cable, connect the tool to the diagnostic port of
the Tire Pressure Sensor Receiver.
10. Press the check mark to begin downloading the new tire sensor IDs
into the receiver.
11. If there is a communication error, the tool displays a warning. Check
all the connections and try again
12. If the tool screen reverts back to the screen for entering the number
of tires, then the number of tires that was entered does not match the
number of tires in the vehicle’s receiver. Make sure the number of
tires entered on the tool matches the number of tires being
monitored to the vehicle and repeat the Walk-Around Learn
procedure.
12