When the “ # “ symbols are displayed on the first line, Smarty is VIN# locked to a vehicle.
The second line of the display shows the firmware version and the tuning data version.
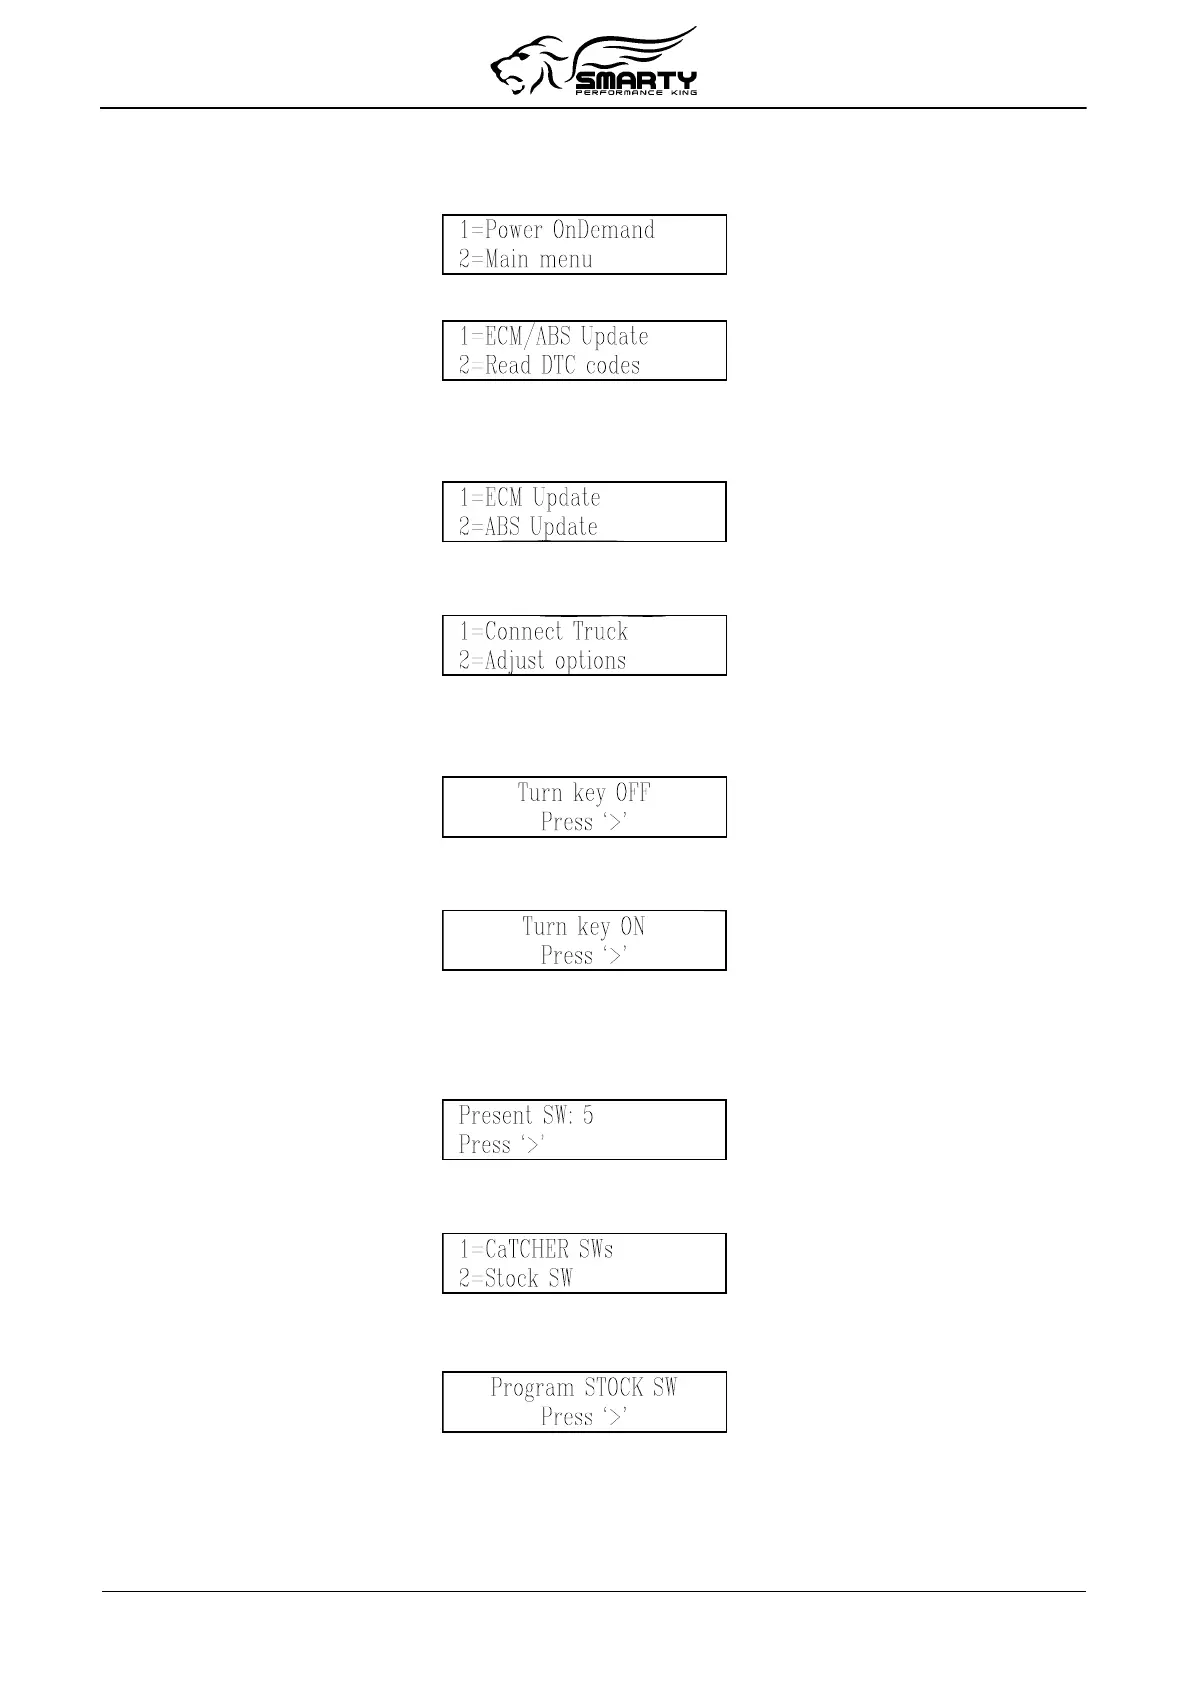
After a few seconds the PoD menu will appear:
Press the ‘2’ key to select the main menu:
Once Smarty is VIN# Locked, the ABS control system can be accessed in order to correct the wheel
height.
Press the ‘1’ key, and Smarty displays the following screen:
Press the ‘1’ key to select ECM Update.
Then the Options menu appears:
From the Options menu, press '1' to select Connect Truck.
Smarty will try to communicate with the ECM. If the connection cannot be established, Smarty asks
you to switch off the ignition key:
Turn the ignition key to “OFF”. Press the ‘>’ key. Smarty will then ask you to turn on the ignition
key in order to retry the connection:
Turn the ignition key to the “RUN” position. DO NOT START THE ENGINE. Press the ‘>’ key.
When the connection has been established, Smarty shows the currently installed software.
After the first update, the following screen will appear displaying the CaTCHER software currently
installed in the ECM: (See example below for Smarty software #5).
Press the ‘>’ key. Smarty asks you to select either CaTCHER Software Versions (see Change
CaTCHER Programs below) or the STOCK software:
Return to STOCK program.
Press the ‘2’ key. Smarty asks for confirmation to restore the ECM to STOCK software:
Press the ‘>’ key. The ECM is restored to STOCK software and Smarty is unlocked. Smarty can now
be used on another vehicle.
Change CaTCHER programs
Page 8 of 16