C
HAPTER
3
| Installing the Switch
Mounting
– 46 –
4. If installing multiple switches, mount them in the rack, one below the other.
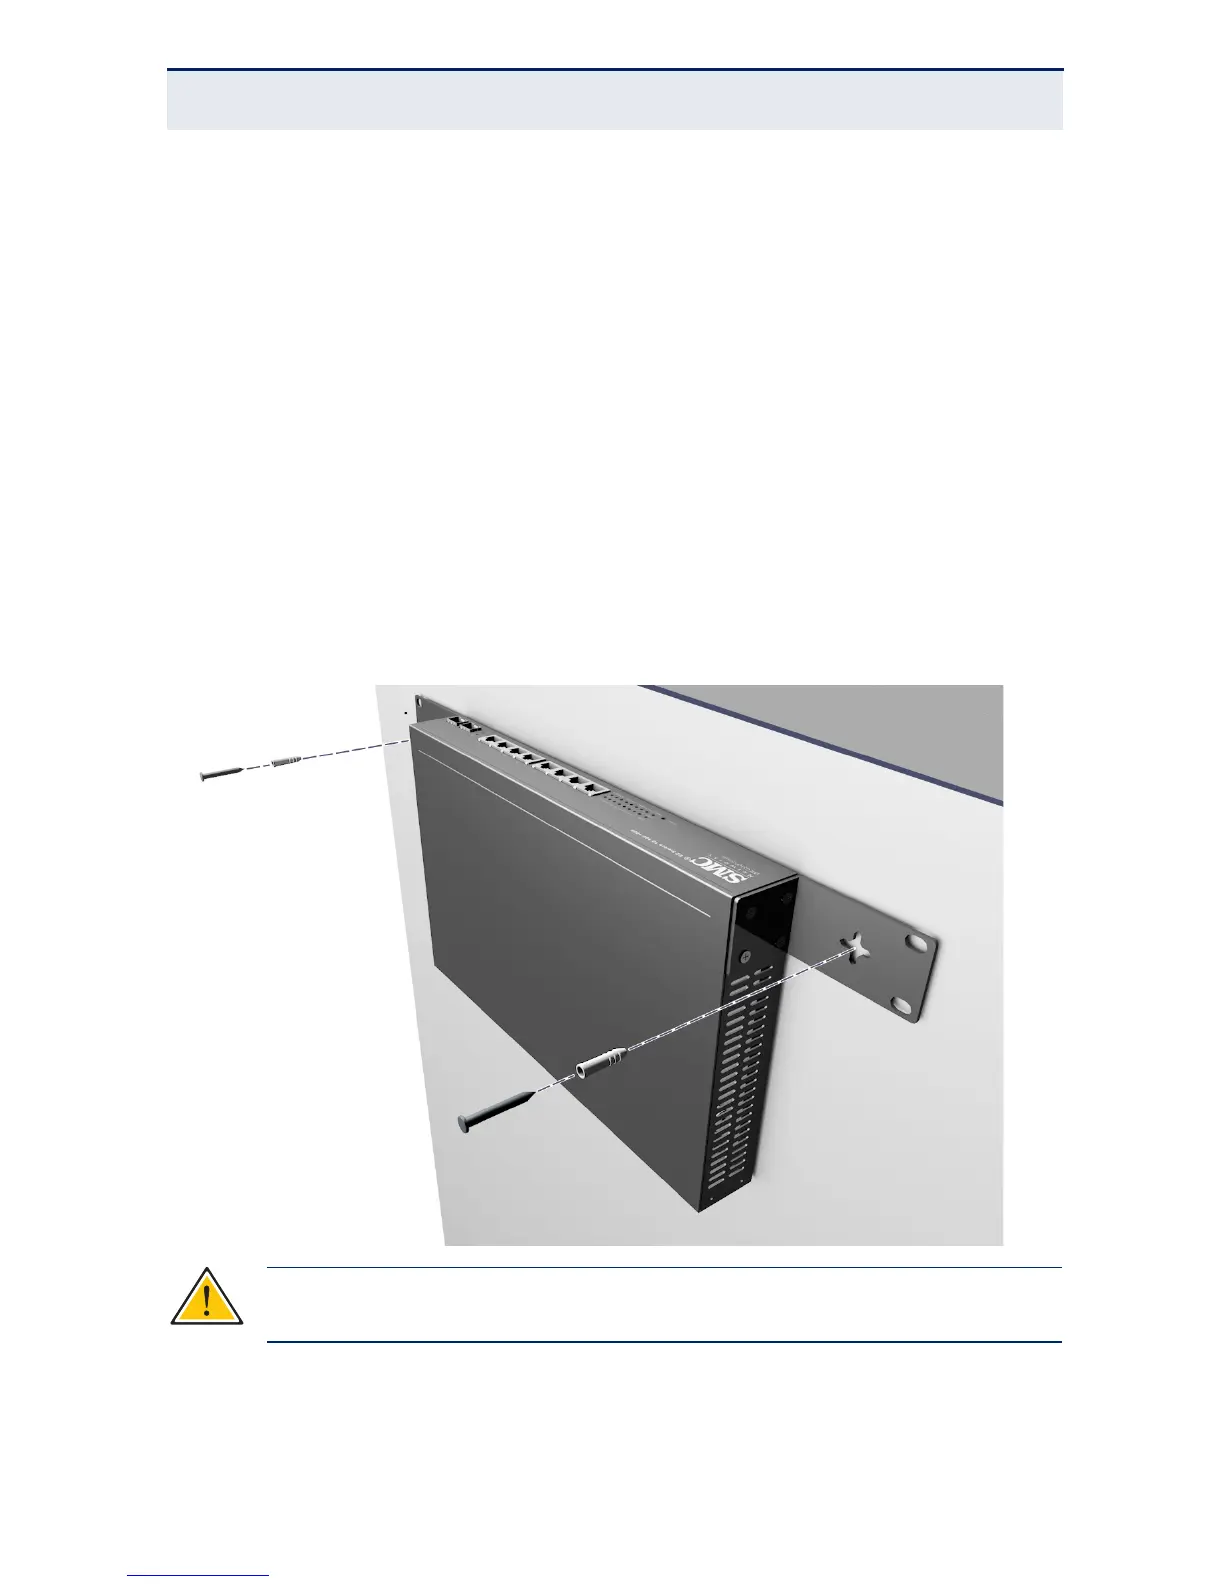
WALL MOUNTING
The switch can be wall mounted by using the brackets in the bracket mounting
kit. Compared with the rack mount, the brackets must be rotated 90 degress
when attached to the switch.
1. Attach the brackets to the device using the screws provided in the bracket
mounting kit. The bracket ears should be flat on the same plane as the
switch bottom panel.
2. Fasten the switch to the wall by utilizing suitable screws and if necessary,
anchor plugs.
Figure 16: Wall Mounting
3. Continue installing switches, or if finished go to “Connecting to a Power
Source” on page 48.
C
AUTION
:
The wall must be sufficiently strong to bear the weight of the
switch.
 Loading...