Instructions for the user
24
11 CLEANING AND MAINTENANCE
11.1 Cleaning stainless steel and enamelled versions
To keep stainless steel in good condition, it must be cleaned regularly, after each use of the cooker,
after allowing it to cool.
11.1.1 Routine daily cleaning
When cleaning and caring for stainless steel surfaces, always use only specific products which do not
contain abrasives or chlorine-based acids.
Instructions for use: pour the product onto a damp cloth and wipe over the surface, then rinse
thoroughly and dry with a soft cloth or chamois leather.
11.1.2 Food stains or spills
Never use metal scouring pads or sharp scrapers which will damage the surface.
Use ordinary non-abrasive products with the aid of wooden or plastic utensils if
necessary. Rinse thoroughly and dry with a soft cloth or chamois leather.
Do not allow spills of foods with high sugar content (e.g. jam) to dry inside the oven. If
they dry for too long, they might damage the enamel coating of the inside of the oven.
11.2 Cleaning the hob components
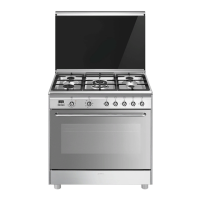
11.2.1 The glass lid
The lid can be lifted off its hinges when in the open position for easier cleaning.
If liquids are spilt onto the closed lid, wipe them off carefully with a cloth befor
opening it.
11.2.2 The pan stands
Remove the pan stands and wash them in warm water with a non-abrasive detergent, taking care to
remove all deposits. Put them back on the hob.
The continuous contact between the pan stands and the flame may cause deterioration in the enamel
in the areas exposed to heat over time. This is an absolutely natural phenomenon which does not
impair this component's operation at all.
11.2.3 The burner caps and flame diffuser rings
The burner caps and flame diffuser rings can be removed for easier
cleaning; wash them in hot water and non-abrasive detergent, taking care
to remove all deposits, and wait for them to dry completely.
WARNING: never wash these components in the dishwasher.
They may be left to soak in hot water and detergent.
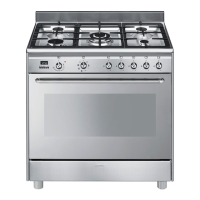
Replace the flame diffuser rings, checking that they are correctly in place
with their respective burner caps, making sure that the holes A in the flame
diffusers are aligned with the plugs and thermocouples.
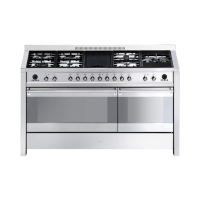
Place the burner caps G and F on the burner D, ensuring that they fit
snugly. Place the burner on the base B, fitting it into the seat provided
(taking care to use the pin C as reference).