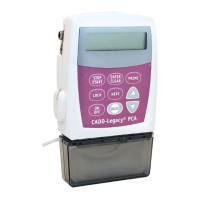
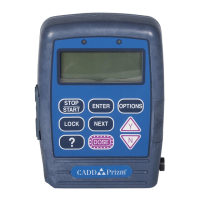
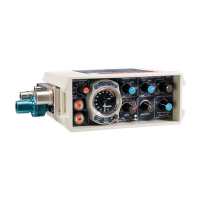
PUMP OPERATIONS
1. Stop the pump.
2. Press LOCK.
3. Press
´orÎ until desired lock level appears.
4. Press LOCK or ENTER/CLEAR.
5. Press
´orÎ until the lock level code appears.
6. Press LOCK or ENTER/CLEAR.
1. Press and hold STOP/START until
(– – – – – – – – – – – –) appears on the display.
2. Release STOP/START key. STOPPED
will appear on the display when the
pump is stopped.
1. Press and hold STOP/START until
(– – – – – – – – – – – –) disappears from
the display.
2. Release STOP/START key. RUN will appear on the
display when the pump is running.
Pump must be stopped and in LL0 or LL1.
WARNING: Do not prime the fluid path with the
tubing connected to a patient as this could result
in over delivery of medication or air embolism.
1. Press and hold PRIME until the word PRIME
appears on the display, along with
(– – – – – – – – – – – –).
2. Release the PRIME key.
3. Press and hold PRIME. Priming appears on the
display. Continue priming until the fluid path is
free of air.
4. Press NEXT to return to the main screen.
1. Stop the pump.
2. Press NEXT to display the Reservoir Volume screen.
3. Press ENTER/CLEAR to reset the value to
previously programmed amount.
1. Press and hold ON/OFF until pump beeps and
powers up.
1. PressandholdON/OFFuntil(••••••••••••)
appears on the display.
2. Release ON/OFF key.
3. The screen will go blank as the pump goes into a
lower power state.
1. Stop the pump.
2. Push down and hold the arrow button on the
battery door while sliding the door off. Remove
and discard old batteries.
IMPORTANT: Always stop pump before
removing batteries.
3. Install new batteries, matching polarities shown
on pump. Replace battery door and close.
4. Start the pump.
WARNING: If a gap is present anywhere between
the battery door and the pump housing, the
door is not properly latched. If the battery door
becomes detached or loose, the batteries will not
be properly secured which could result in loss of
power or non-delivery of medication.
WARNING: Do not use rechargeable NiCad or
nickel metal hydride (NiMH) batteries. Do not use
carbon zinc (“heavy duty”) batteries.
Change the
Lock Level
Stop the
Pump
Start the
Pump
Prime the
Fluid Path
Reset the
Reservoir
Volume
Turn the
Pump On
Turn the
Pump Off
Change the
Batteries
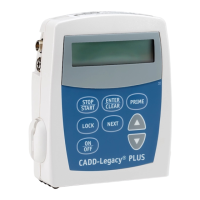
PUMP OPERATIONS CONTINUED
Pump must be stopped and in LL0.
1. Press LOCK.
2. Press LOCK or ENTER/CLEAR.
3. Press
´orÎ until the biomed code appears.
4. Press LOCK or ENTER/CLEAR.
5. Press NEXT to go through settings.
6. Press NEXT until AIR DETECTOR appears.
7. Press
´orÎ until desired setting appears.
8. Press ENTER/CLEAR.
9. Press NEXT.
WARNING: When the air detector is turned off,
the pump will not detect air in the fluid path.
Periodically inspect the fluid path and remove
any air to prevent air embolism.
10. Press NEXT until UPSTREAM SENSOR appears.
11. Press
´orÎ until desired setting appears.
12. Press ENTER/CLEAR.
13. Press NEXT.
WARNING: When the upstream occlusion sensor
is turned off, the pump will not detect occlusions
upstream (between pump and reservoir).
Periodically inspect the reservoir for decreasing
reservoir volume and inspect the fluid path
for kinks, a closed clamp, or other upstream
occlusions. Upstream occlusions could result in
under- or non-delivery of medications.
14. Press NEXT until NEXT FOR BIOMED,
ENTER FOR MAIN appears.
15.Press ENTER/CLEAR to return to main
screen. Or press NEXT to continue in Biomed
settings loop.
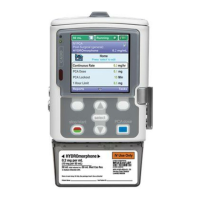
Main Screen Displays status of pump (STOPPED or RUN)
Reservoir Volume Volume of fluid in reservoir
Continuous Rate Continuous rate of infusion in ml/24 hrs
Given Total amount of medication delivered since
display was last cleared
Air Detector Indicates if air detector is turned on or off
(status only) and high or low sensitivity level
Upstream Sensor Indicates if turned on or off
(status only)
PROGRAMMING SCREENS
To Access
To Turn Air
Detector
ON-HIGH,
ON-LOW
or OFF
To Turn
Upstream
Sensor
ON/OFF
To Exit Biomed
Functions
BIOMED
FUNCTIONS
PROGRAMMING / SET-UP SEQUENCE
Batteries must be installed; pump must be stopped and in LL0.
NOTE: Value Not Saved is displayed if a value is scrolled and ENTER/
CLEAR is not pressed. Press NEXT to continue programming.
WARNING: If the pump is dropped or hit, inspect it for damage. Do
not use a pump that is damaged or is not functioning properly.
Enter Reservoir
Volume
Enter Continuous
Rate in ml/24 hrs
Clear Milliliters
Given
Verify Air Detector
Status
Verify Upstream
Sensor Status
Verify Programming
Main Screen
Press NEXT.
1. Press
´orÎ to select desired reservoir
volume.
2. Press ENTER/CLEAR.
3. Press NEXT.
4. Press
´orÎ to select desired
Continuous Rate in ml/24 hours.
5. Press ENTER/CLEAR.
6. Press NEXT.
WARNING: This pump delivers medication
at a continuous rate in milliliters per
24 hours (ml/24 hrs). Programming
the pump at a delivery rate other than
what is prescribed will cause over- or
under-delivery of medication.
7. Press ENTER/CLEAR to clear the given
value. The display will show 0.00.
8. Press NEXT.
9. Verify the setting is correct. (To change
setting, see Biomed Functions section.)
10. Press NEXT.
11. Verify the setting is correct. (To change
setting, see Biomed Functions section.)
12. Press NEXT.
13. Press NEXT repeatedly to review program.
IN19872.indd 2 10/27/11 2:53 PM

 Loading...