9
ASSEMBLING THE UNIT / START-UP GUIDE cont'd
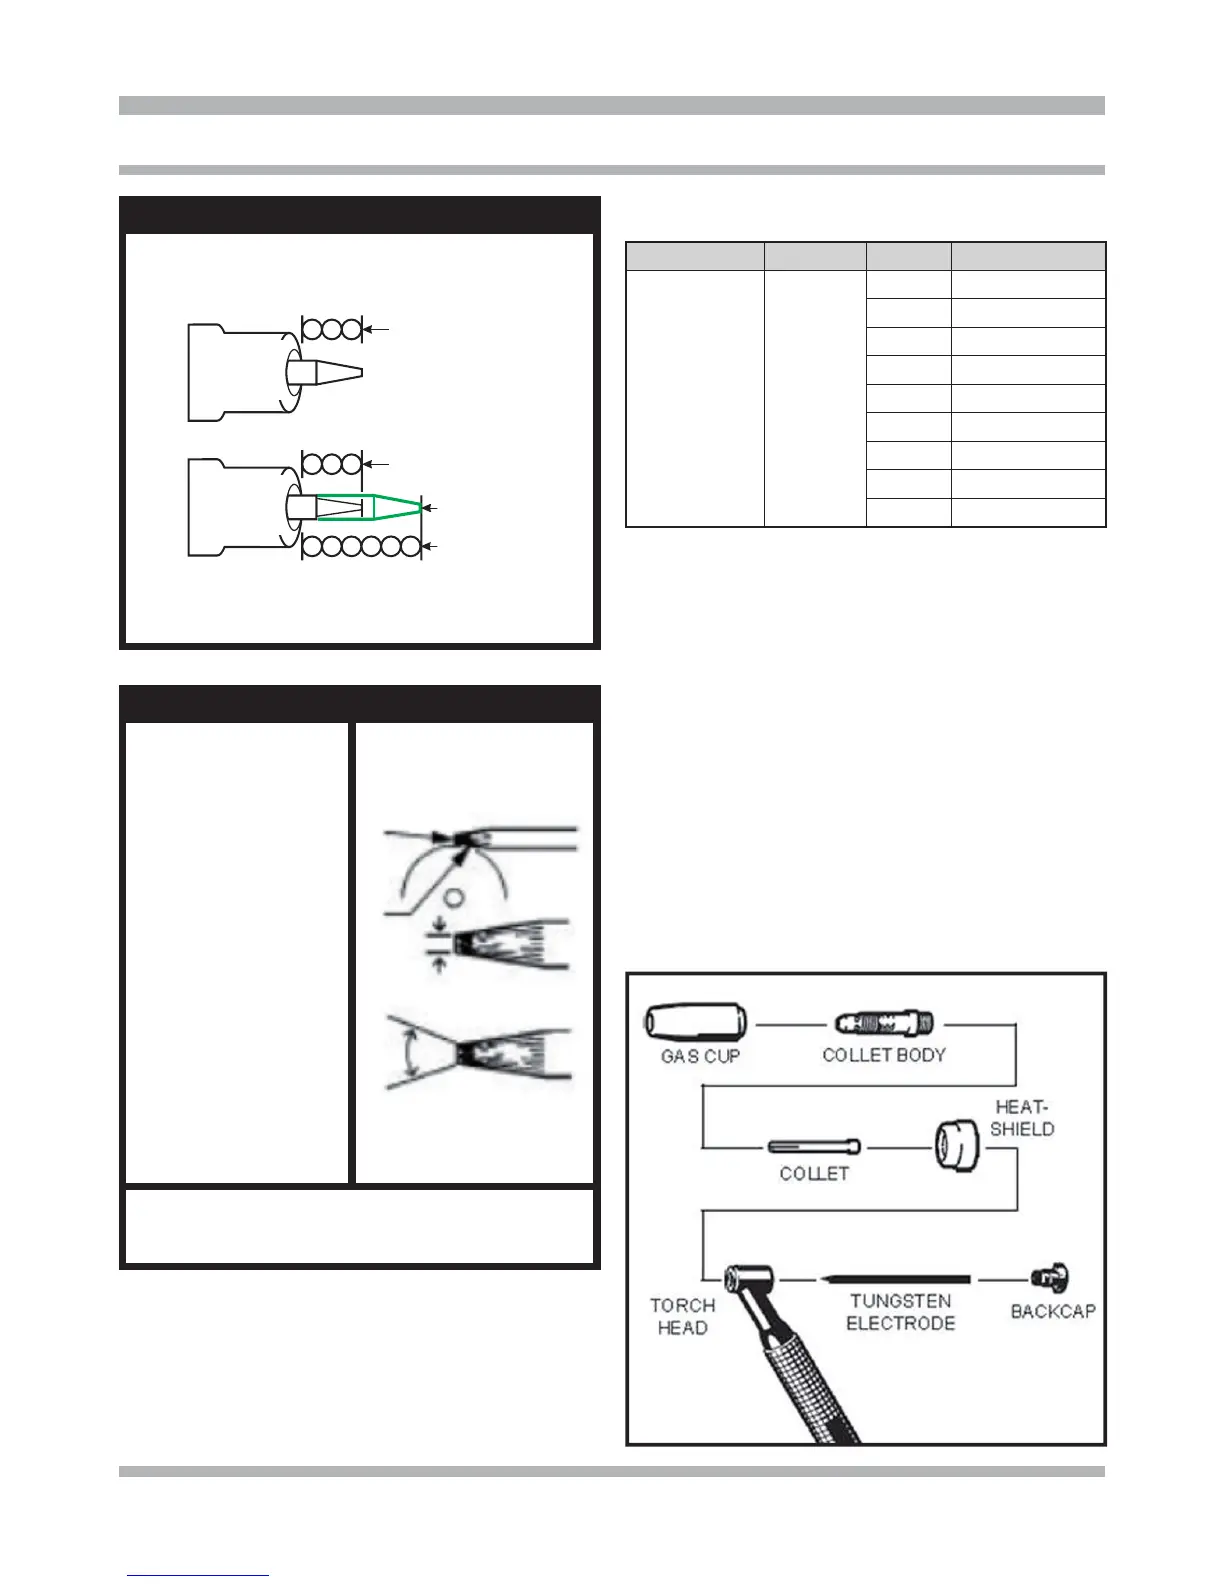
TUNGSTEN EXTENSION
STANDART PARTS
GAS LENS PARTS
(IN DRAFT-FREE AREAS)
General
Purpose
3 x DIA.
General
Purpose
3 x DIA.
MAX:
6 x DIA.
TUNGSTEN GRINDING
Shape by grinding longi-
tudinally (never radially).
Remove the sharp point
to leave a truncated point
with a at spot. Diameter
of at spot determines
amperage capacity. (See
below).
The included angle
determines weld bead
shape and size. General-
ly, as the included angle
increases, penetration in-
creases and bead width
decreases.
Use a medium (60 grit
or ner) aluminium oxide
wheel.
You can also sharpen the tungsten electrode using our
chemical tungsten sharpner part # ckstigsharp.
GUIDE FOR SETTING TIG WELDER
Material Polarity Amps THICKNESS
Steel
Chrome Moly
Stainless Steel
Cast Iron
Brass
Nickel
Copper
DC 25 24 Ga. (.024”)
30 22 Ga. (.030”)
40 20 Ga. (.036”)
50 18 Ga. (.048”)
60 16 Ga. (.060”)
75 14 Ga. (.075”)
105 12 Ga. (.105”)
115 11 Ga. (.115”)
130 1/8” (.125”)
TORCH HEAD ASSEMBLY
1. The electrode to use is the red tipped "2% thorium
tungsten" 1/16" in diameter.
2. Make sure the Te on heat shield is in place.
3. Locate the matching size Collet and Collet body.
4. Drop the Collet, slit-end down, into the Collet body.
5. Screw assembly into the torch head, heat shield side,
and tighten rmly.
6. Install a Gas cap, screw into place seating the cup
against the Te on heat shield.
7. Insert tungsten electrode, prepped end rst, thru the
torch head, Collet and center hole of the Collet body.
8. Allow tungsten electrode to extend past the cup ~ 3
times the electrode diameter.
9. Screw Backcap into torch head and tighten rmly.
Review the exploded view below.
 Loading...