34 SnapperPro.com
7. The mower blade should have a maximum of 1/64" (0,40
mm) cutting edge (B) or less.
CAUTION
Thrown objects hazard.
An unbalanced mower blade can create excessive vibration
and damage the unit, or cause mower blade failure resulting
in thrown debris.
Be sure blade is balanced before installing.
8. Clamp a nail in a bench vise, hang the blade on the nail,
and position the blade in a level horizontal position as
shown in Figure 36.
36
9. Check the balance of the blade. If either end of the
blade moves downward the end that moves downward
is heavier than the other. Sharpen the heavy end until
balance is achieved.
10. Repeat the process until the mower blade remains in the
horizontal, level position.
Installing the Mower Blades
CAUTION
Laceration hazard.
Mower blades are sharp.
Always wear gloves when handling, or working near, mower
blades.
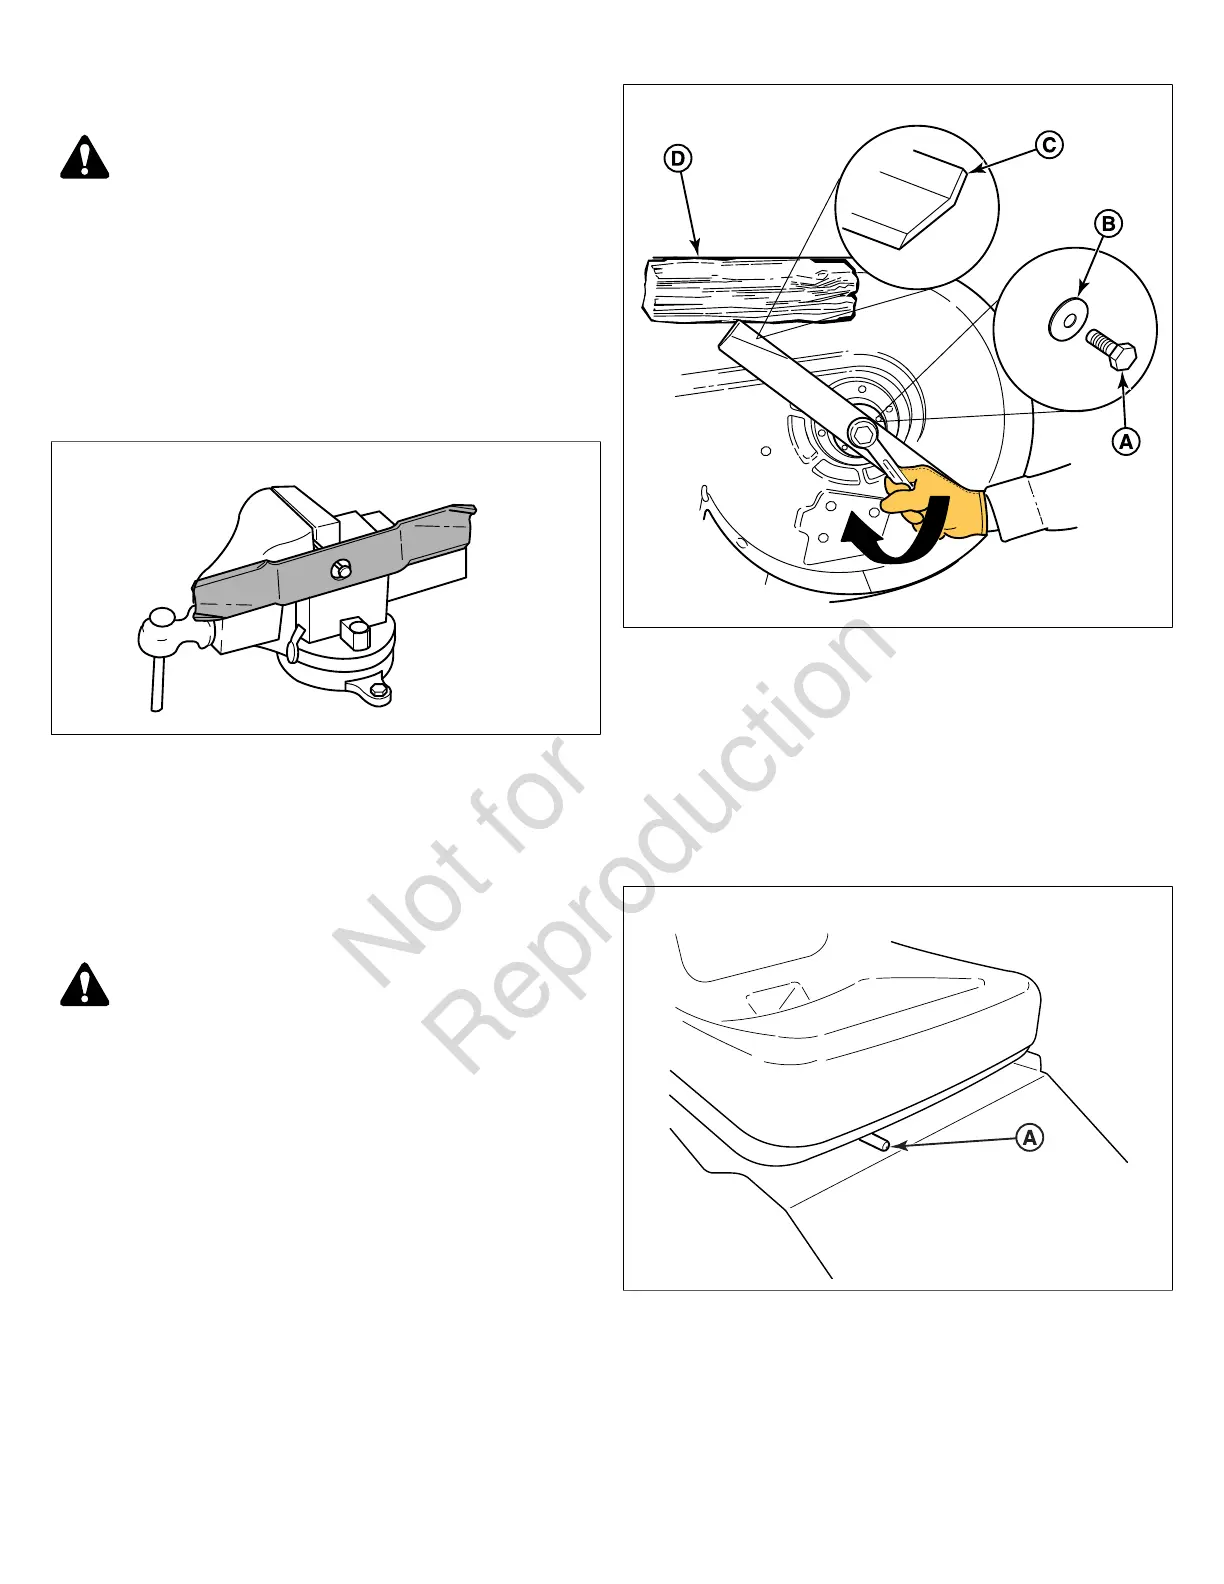
1. Install each mower blade with the air lifts (C, Figure 37)
pointing up towards the mower deck as shown in Figure
37 and secure with the mower blade mounting bolt (A)
and flat washer (B).
37
2. Wedge a wooden block (D) between the mower blade
and the mower deck housing to keep the mower blade
from turning and torque the blade mounting bolt to 120 ft.
lbs (163 Nm).
Seat Adjustment
The seat can be adjusted forward and back. Move the lever
(A, Figure 38) towards the left, position the seat as desired,
and release the lever to lock the seat into position.
38
Ground Speed Control Lever Adjustment
The control levers can be adjusted in three ways. The
alignment of the control levers, the placement of the control
levers (how close the ends are to one another), and the
height of the control levers can be adjusted.
To Adjust the Control Lever Alignment