32
Regular Maintenance
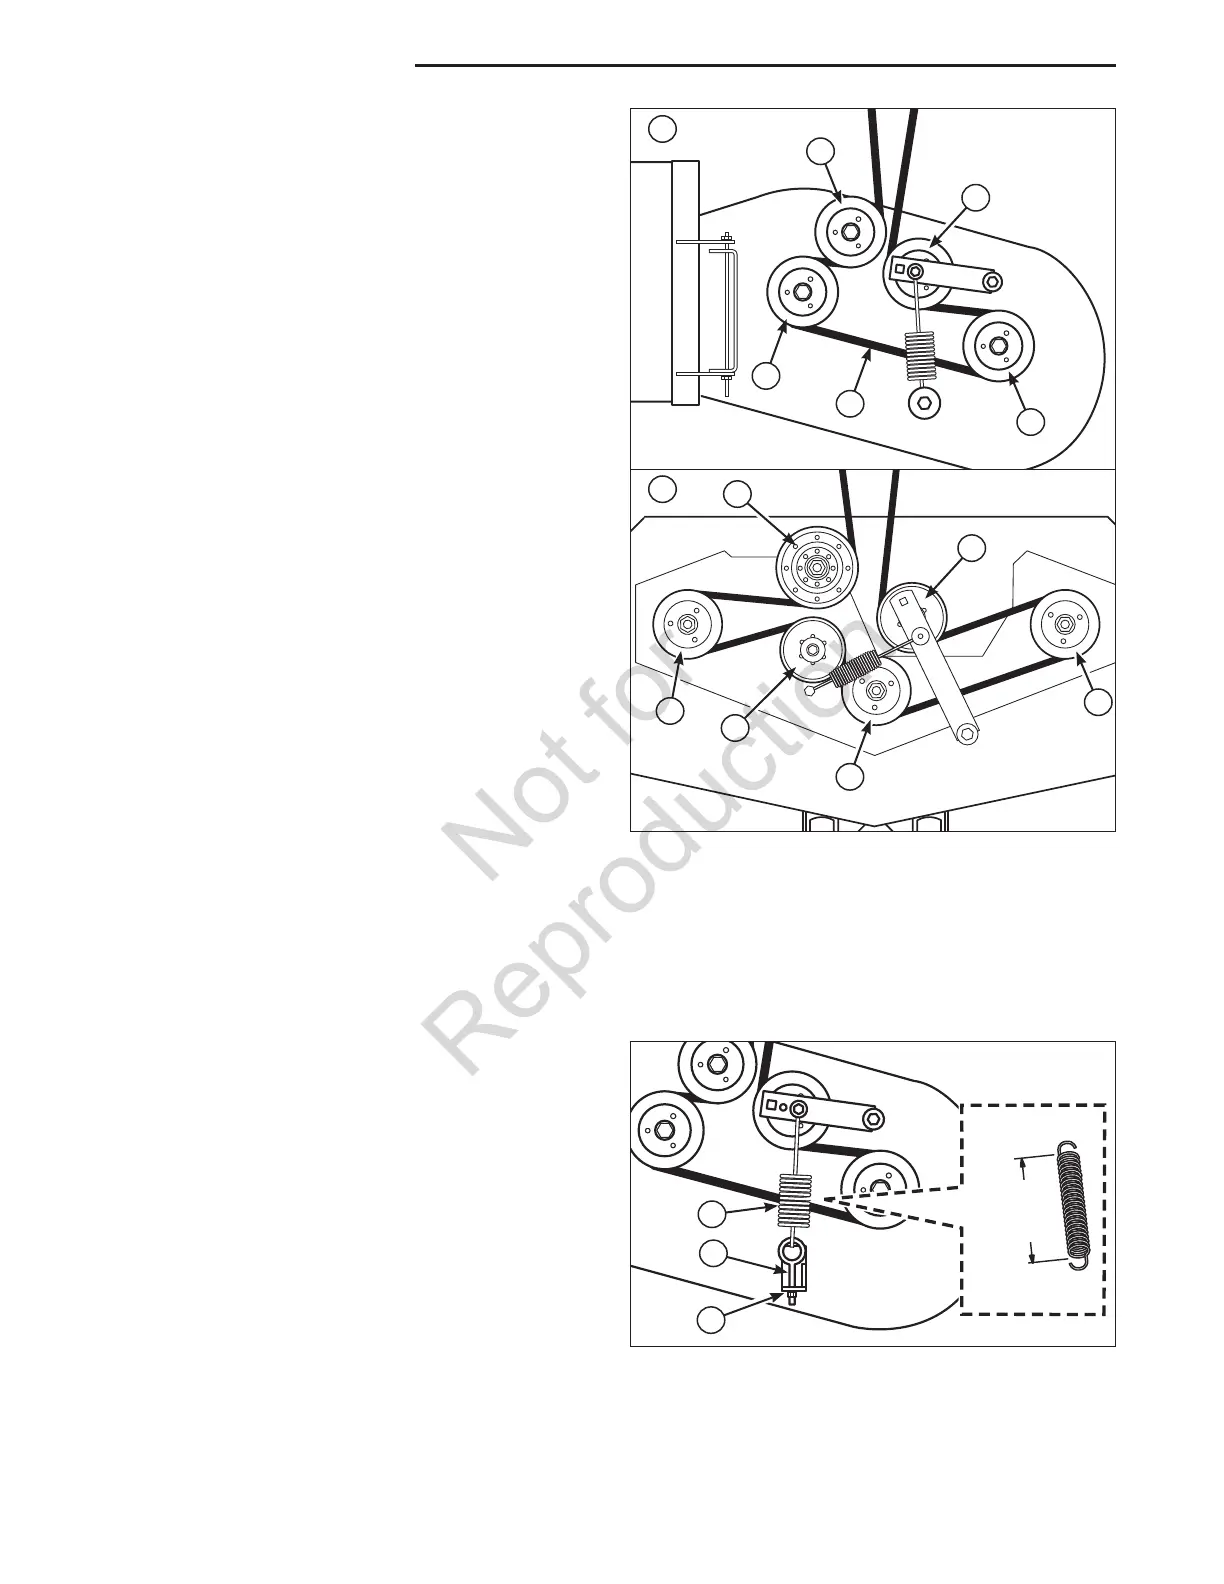
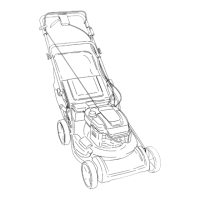
Figure 30. Mower Deck Belt Routing
A. Mower Drive Belt
B. Adjustable Idler Pulley
C. Spindle Pulley
D. Stationary Idler Pulley
E. 36” Mower Deck
F. 48” Mower Deck
A
C
C
D
B
B
D
A
C
C
D
E
F
6-3/8”
(16,2 cm)
Figure 31. Mower Belt Tensioner Spring
Measurement (36” Models)
A. Anchor Eyebolt
B. Adjustment Nut
C. Mower Belt Tensioner Spring
A
B
C
Mower Belt Replacement (continued...)
5. Remove the old belt and replace with a new one. Make
sure the V-side of the belt runs in the pulley grooves
(Figure 30).
6. Install the mower drive belt on the PTO pulley, the
spindle pulleys and all idler pulleys except the stationary
pulley (C, Figure 29). Carefully rotate the breaker bar
counter-clockwise and install the belt on the stationary
idler pulley. Carefully release the tension on the breaker
bar.
7. 36” Models: Using the cutting height adjustment
handles, adjust the cutting height of the mower deck to
1-1/2” (3,8 cm).
NOTE: Make sure that both sides of the deck are
adjusted to the same cutting height.
Measure the mower belt tensioner spring (C, Figure
31). The coil-to-coil measurement should equal 6-3/8”
(16,2 cm). If the measurement does not equal 6-3/8”
(16,2 cm), adjust the anchor eyebolt (A) by turning the
adjustment nut (B) until a measurement of 6-3/8” (16,2
cm) is achieved.
8. Reinstall the mower deck guards.
9. Run the mower under no-load condition for about 5
minutes to break-in the new belt.