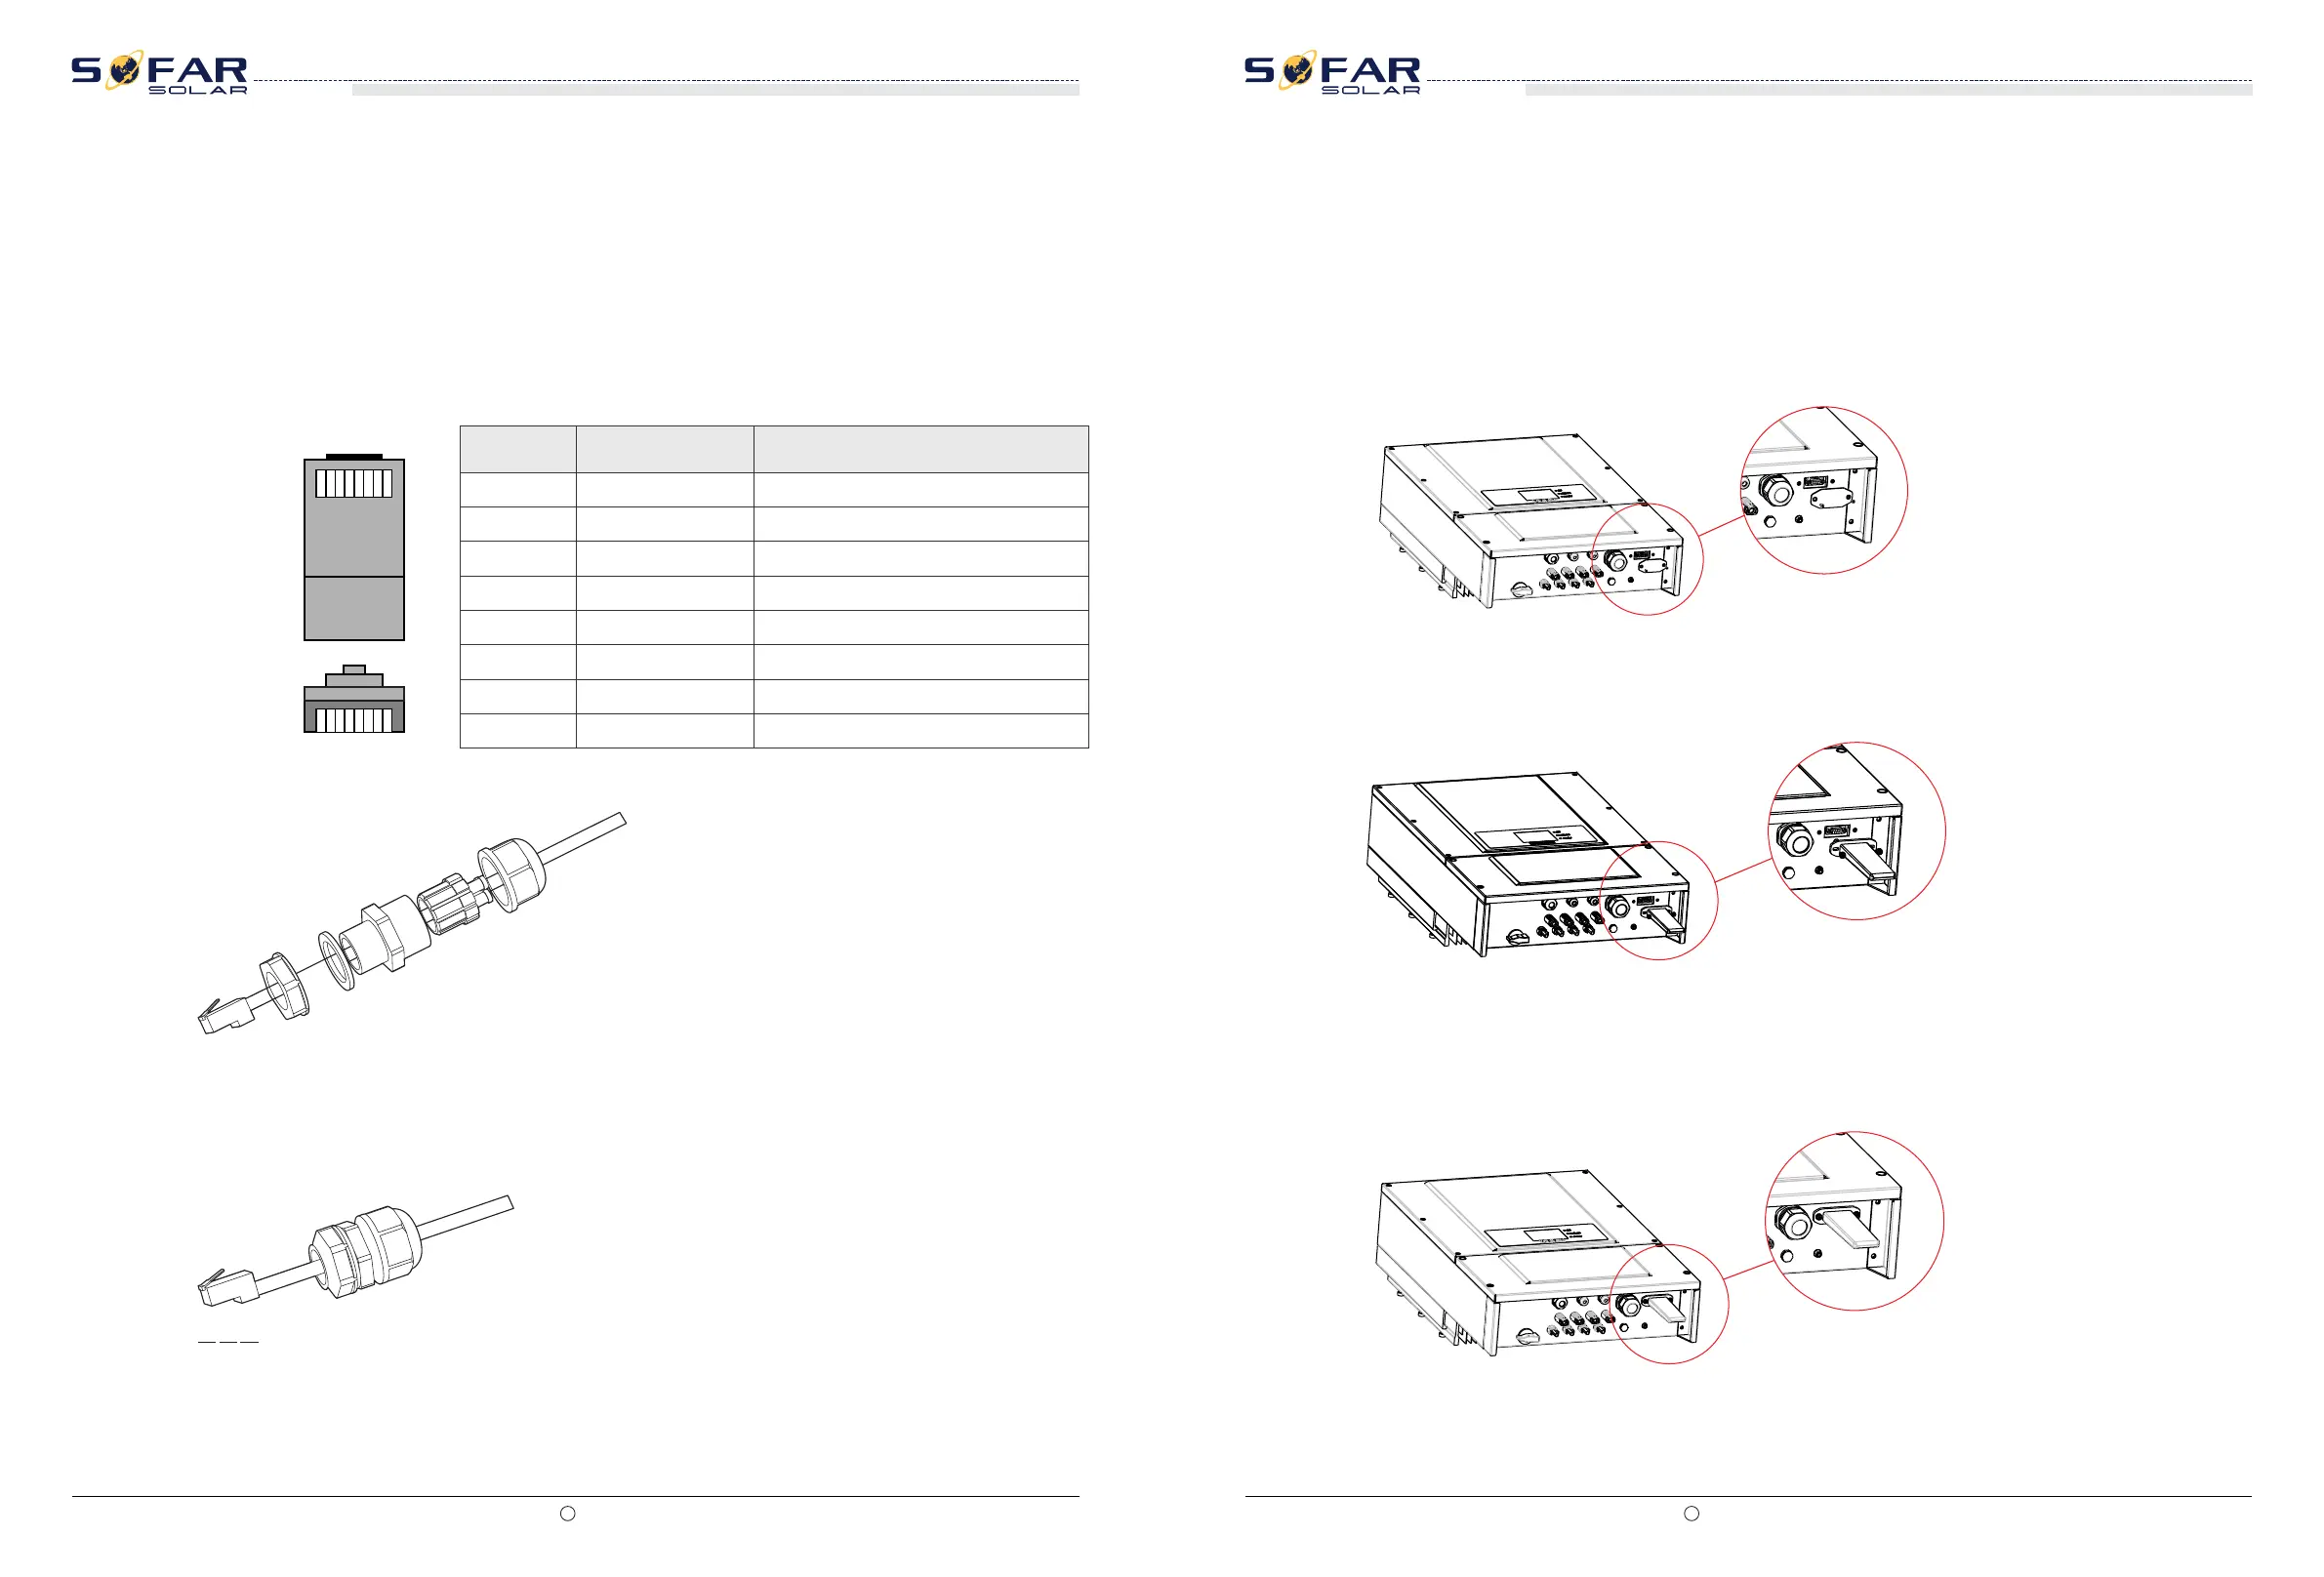
Step 4 Crystal plug with RJ45 crimping tool.
Step 5 Insert the plug into the RS485 port on the SOFAR 10-20KTL.
Step 6 Insert sealing plug into housing, and tighten the screw nut.
Step 1 Remove the insulation layer of an appropriate length from the shielded network cable
using a wire stripper.
Step 2 Open SOFAR 10-20KTL lower cover and insert the shielded network cable into the
cable screw nut, seals, screw nut.
Step 3 Connect the stripped network cable to corresponding pins on the plug, as shown as
follow.
1
8
1
8
TOP
FRONT
ColorNo.
White and orange
1
2
3
4
5
6
7
8
R S485 B
R S485 A
R S485 A
R S485 B
R S485 B
R S485 A
NC
NC
Procedure
Follow-up Procedure
To remove an RJ45 connector from SOFAR 10-20KTL, remove the cable screw nut, press the
clip on the RJ45 connector, and then pull out the shielded RJ45 connector.
End
Function
Orange
White and green
Blue
White and blue
Green
White and brown
Brown
Figure 4-10 RS485 Connecting Communications Cables(1)
Figure 4-11 RS485 Connecting Communications Cables(2)
Figure 4-12RS485 Connecting Communications Cables(3)
All rights reserved Shenzhen SOFARSOLAR Co ., Ltd.
C
29
All rights reserved Shenzhen SOFARSOLAR Co ., Ltd.
C
30
SOFAR 10K~20KTL
User manual
SOFAR 10K~20KTL
User manual
Connect inverter to internet via wifi/GPRS so that you can monitor your solar system
using PC or smart phone.
Procedure
Step 1 Remove the WIFI/GPRS cover using screw driver.
Step 3 Tighten the screws of WIFI/GPRS stick.
WIFI / GPRS Communication
Figure 4-13 WIFI/GPRS communication (1)
Step 2 Connect WIFI/GPRS stick to inverter.
Figure 4-14 WIFI/GPRS communication (2)
Figure 4-15 WIFI/GPRS communication (3)