11
3.6 Grounding
Use 4 mm
2
yellow and green cable to connect any of the positive terminal of
the controller to the ground bus of the system. This can decrease the
electromagnetic interference in a certain value.
3.7 System Expansion
If you want to deploy a bigger system, you can expand the system by
paralleling several sets of the same controller. More controllers can share with
one battery group, but each controller must be connected with the independent
solar panels array and the independent load. (Please contact the local
distributor for further information.)
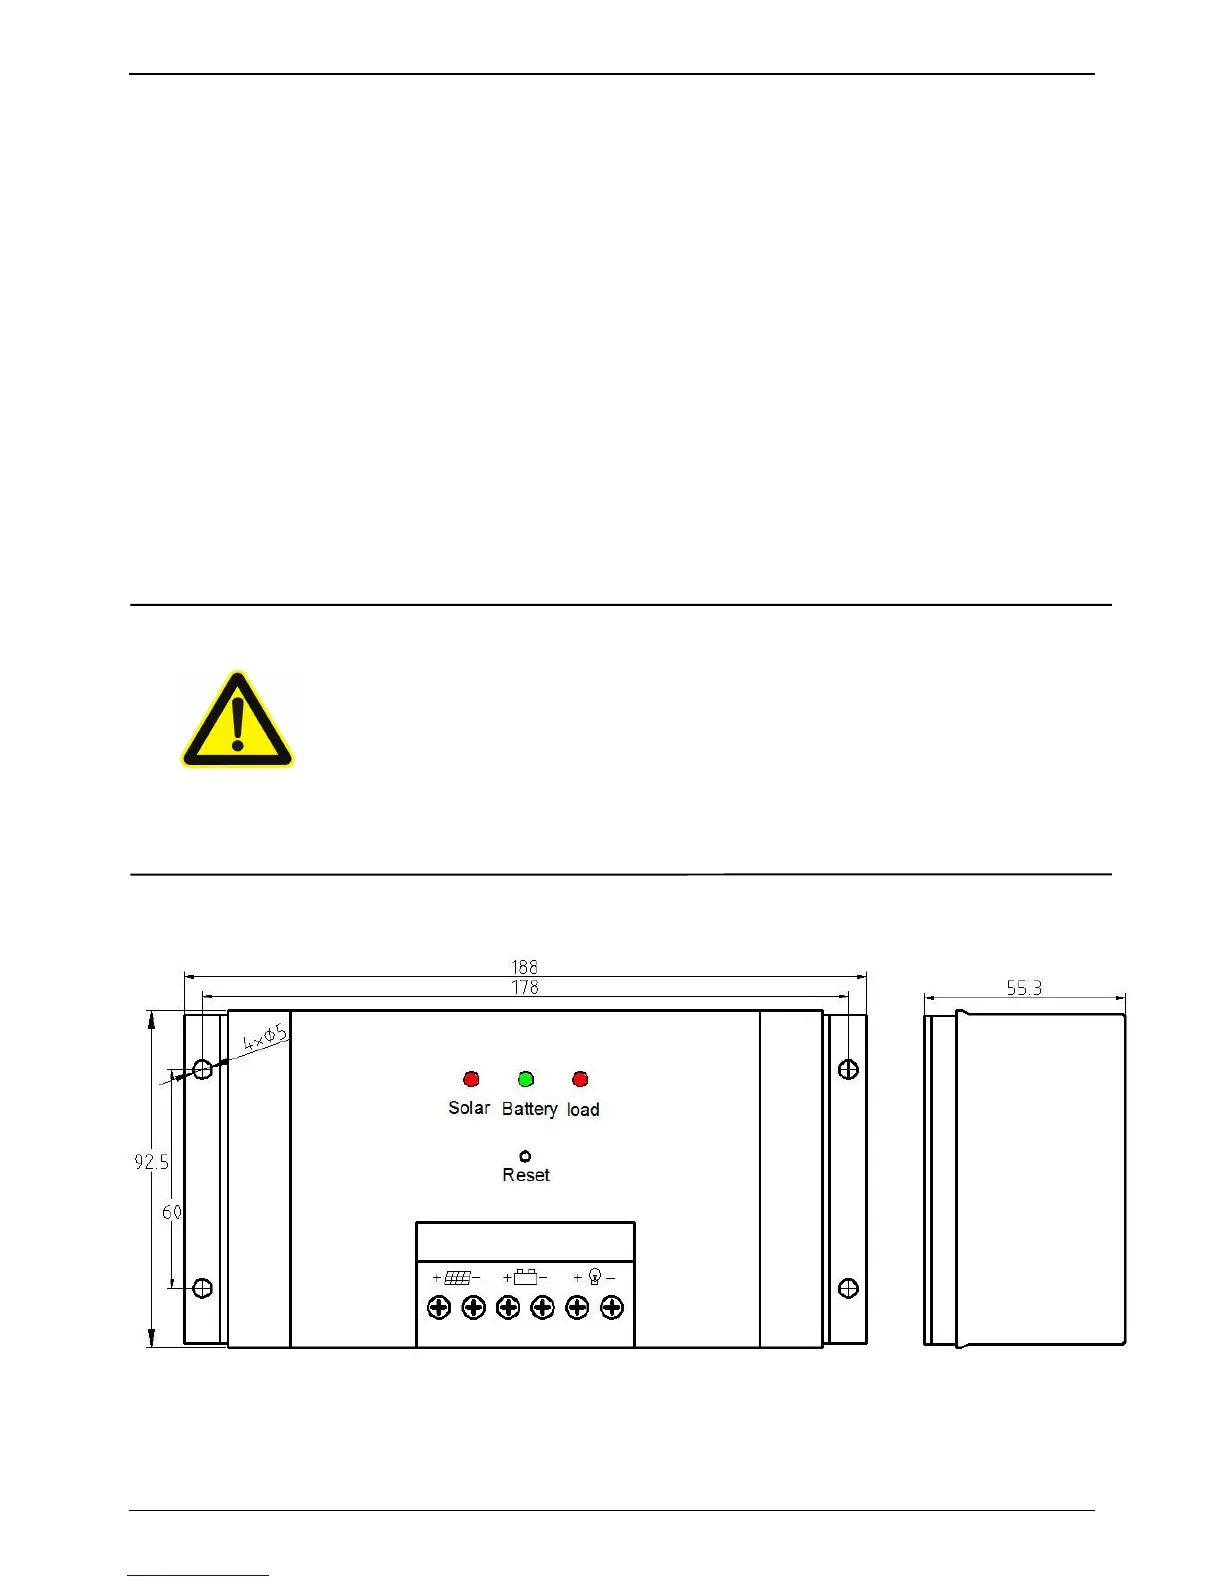
1. Protect the controller from direct sunlight or other source of
heat.
2. Place the controller in a dry environment.
3. A free space of at least 15cm on all side of the controller
must be provided.
4. Mount the controller as close as possible to the batteries.