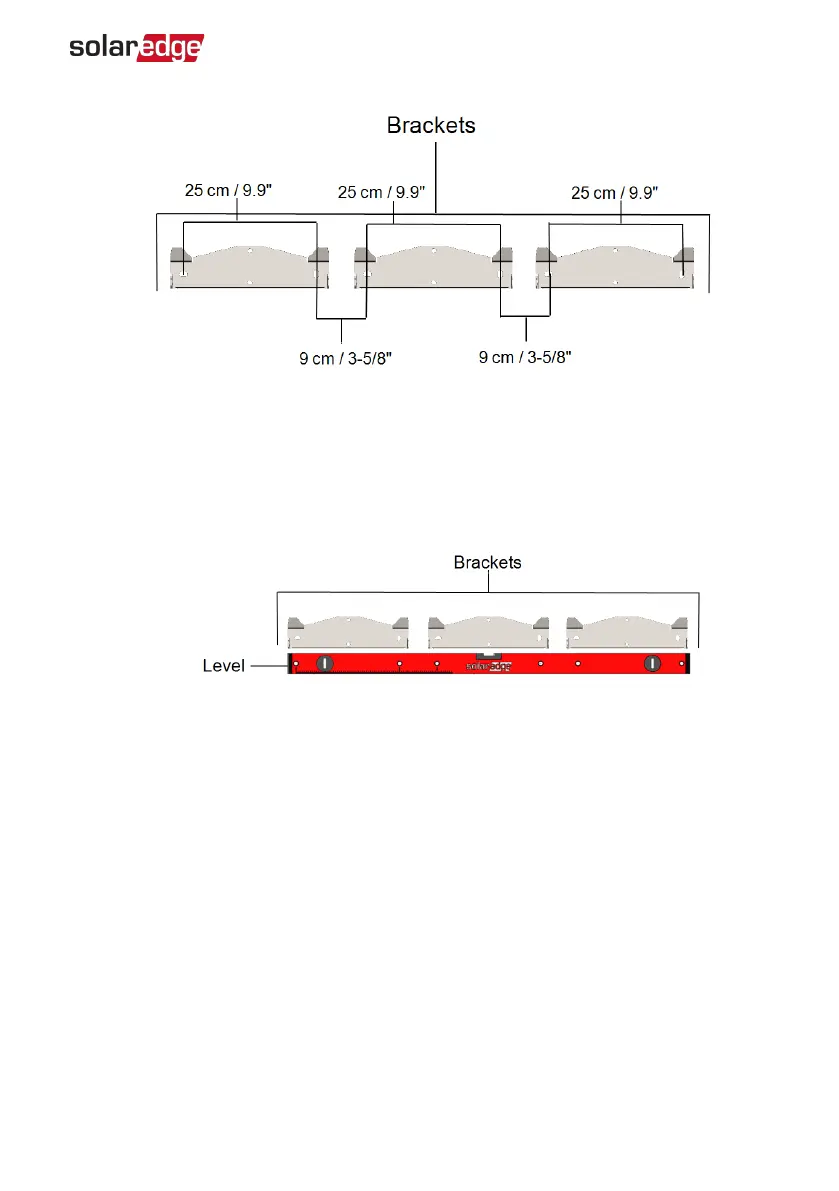
Figure 14: Brackets spacing
If you are using the level:
a. Drill two holes for each bracket and mount the brackets.
b.
Place the level beneath the brackets and align the brackets, tighten the
screws all the way and verify that the brackets are firmly attached to the
mounting surface.
Figure 15: Aligning the brackets
c. Position the mounting brackets against the wall and mark the required drilling
holes locations with the supplied level. The level markings correspond to a
distance of 3 cm between units.
d. Put in the screws without tightening in order to correct positioning.
4. Mount the Primary Unit bracket and put in the screws.
5. Tighten the Primary Unit screws all the way and verify that the bracket is firmly
attached to the mounting surface.
6.
Mount the Primary Unit:
a. Lift the Primary Unit from its sides.
b. Align the two indentations in the enclosure with the two triangular mounting
tabs of the bracket, and lower the unit until it rests on the bracket evenly (see
Figure 16
).
Chapter 3: Installing the Primary and Secondary Unit(s) 31
Three Phase Inverter with Synergy Technology Installation MAN-01-00402-1.2