3.4 Initial Settings Before First Operation
Below operations must be performed by qualified electricians to ensure safety.
To make sure the pump is not reverse running, please refer chapter 2.3 to connect the
wires, and confirm again before first operation, according to the pump type, there are
2 ways to confirm:
Helical rotor pump
Put the water inlet in the water, power on and observe the water outlet.
with the controller.
If there is water yield, keep the correct wiring.
Centrifugal pump
1. Power on when the sunshine is sufficient.
2. Observe the water yield when pump is steady working.
3. Exchange any pair of pump cable connections with the controller.
4. Observe the water yield when pump is steady working.
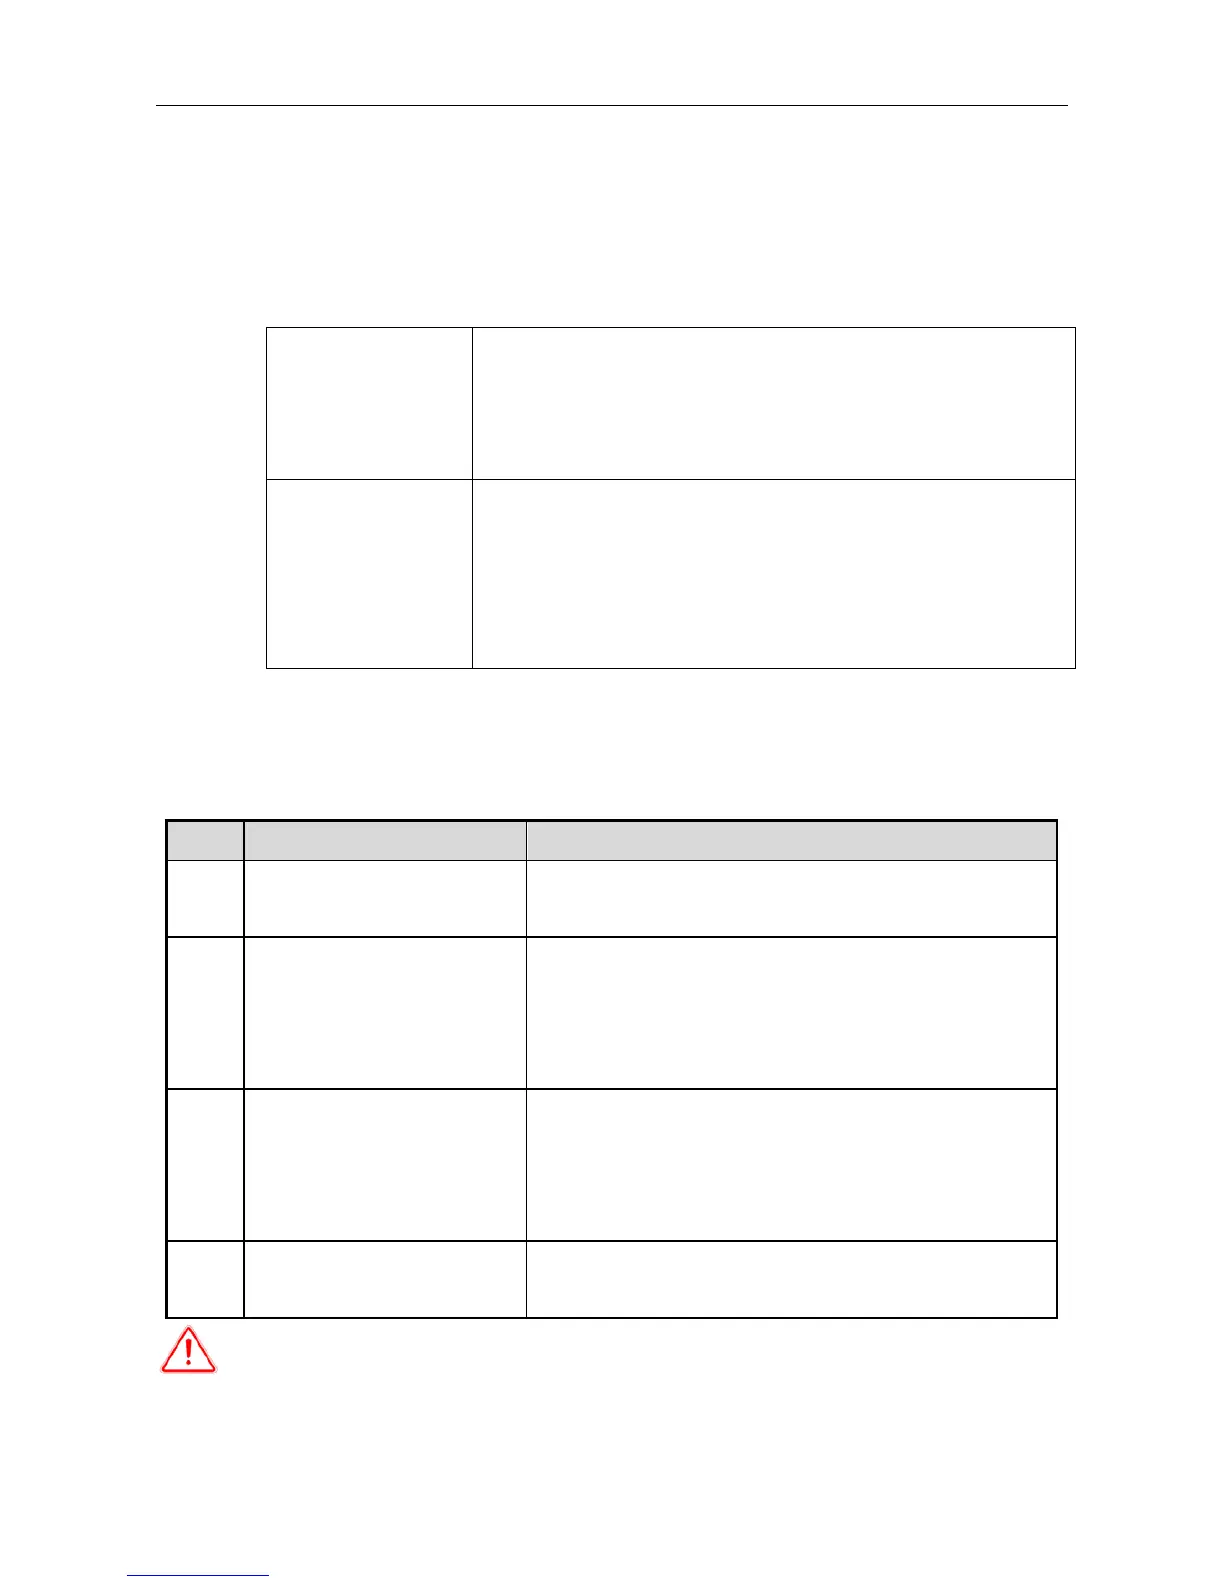
When using water level float, user needs to modify the related control parameter of
the selected water level float type. Below instruction is only for the users who need to
install water level floats.
Step Debugging Content Instruction
1
Modify the control parameter as
read-write parameter
Press “STOP” to stop the operation when power on. Modify
Pr.0 value as 0.
2
Modify the setting of well water
level float
1. Modify Pr.31value as 1 if using Normally-Open type water
level float for well.
2. Modify Pr.31 value as 2 if using Normally-Close type water
level float for well.
3
Modify the setting of tank water
level float
1. Modify Pr.32 value as 1 if using Normally-Open type water
level float for tank.
2. Modify Pr.32 value as 2 if using Normally-Close type water
level float for tank.
4
Modify the control parameter as
read only
Modify the Pr.0 value as 1 before resetting the controller..
Warning
:
Please do not modify the control parameters of the controller freely,
or else it can cause abnormal operation.