SolaStat-Plus Programming Cont.
Note: Immediately after reprogramming please fill out the ‘Installation Adjustable Values’ in the ‘System
Adjustable Values’ table in the user guide. (Page 6.)
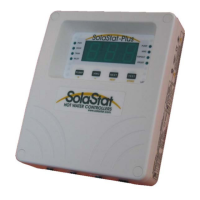
These instructions refer to the small yellow letters/words under the buttons on the SolaStat-Plus.
1. Enter the installer programming access code. Available from distributors.
2. Every 10 seconds the characters ‘PRG’ will flash on the display indicating programming mode.
3. The ‘PUMP’ light will be flashing to indicate the number being displayed is the ‘Pump OFF’ value.
4. The ‘Pump OFF’ can be adjusted using the ‘+’ and ‘-‘.
* Press ‘NEXT’ to move on to the next value.
5. Now the ‘PUMP’ light will be on continuously to indicate the number being displayed is the ‘Pump ON’
value.
6. The ‘Pump ON’ can be adjusted using the ‘+’ and ‘-‘.
* Press ‘NEXT’ to move on to the next value.
7. Now the ‘HWC’ light will be on continuously to indicate the number being displayed is the ‘Holdoff
Timer’ value in hours.
8. The ‘Holdoff Timer’ can be adjusted using the ‘+’ and ‘-‘. Set to ‘OFF’ (>23hrs) for single relay model
or Reheat Mode. Set to ‘thr’ (<1hr) for Thermostat Mode.
* Press ‘NEXT’ to move on to the next value.
9. Now the ‘HWC’ light will be flashing slowly to indicate the number being displayed is the ‘reheat
lower’ value in ºC.
10. The ‘reheat lower’ can be adjusted using the ‘+’ and ‘-‘. Set to ‘OFF’ (<1C) for single relay model. Will
be ‘OFF’ when Holdoff Timer = ‘thr’.
* Press ‘NEXT’ to move on to the next value.
11. Now the ‘HWC’ light will be flashing fast to indicate the number being displayed is the ‘reheat upper’
value in ºC.
12. The ‘reheat upper’ can be adjusted using the ‘+’ and ‘-‘. Set to ‘OFF’ for single relay model.Will be
‘OFF’ when Holdoff Timer = ‘OFF and Reheat Lower = ‘OFF’.
* Press ‘NEXT’ to move on to the next value.
13. Now no status lights will be on to indicate the number being displayed is the ‘BioSafe’ value in ºC.
14. The ‘BioSafe’ can be adjusted using the ‘+’ and ‘-‘. Set to ‘OFF’ (<50C) for single relay model.
* Move onto the next value by pressing ‘Next’.
15. Now the ‘TOPOUT’ light will be on continuously to indicate the number displayed is the ‘topout’ value.
16. The ‘TOPOUT’ can be adjusted using the ‘+’ and ‘-‘.
* Press ‘NEXT’ to move on to the next value.
17. Now the ‘FROST’ light will be on continuously to indicate the number displayed is the ‘frost’ value.
18. The ‘FROST’ can be adjusted using the ‘+’ and ‘-‘.
19. All the values are now entered. The values can be checked by simply pressing ‘NEXT’ to cycle
through all the values noting which light is on and what value is displayed (as per SolaStat-Plus
Programming Table).
20. To store all the values in permanent memory press ‘STORE’ at any stage. The values will be written
to memory and the unit will exit programming mode and return to automatic operation. The unit will
also store the values and exit if no key is pressed for a minute while in the programming mode.
21. Fill out the ‘System Adjustable Values’ in the user guide. (Page 6.)
19.01-11