5. Installation5. Installation
Connection Steps
Connection Steps
a) Turn off the DC switch.
b) Choose 12 AWG wire to connect the PV module.
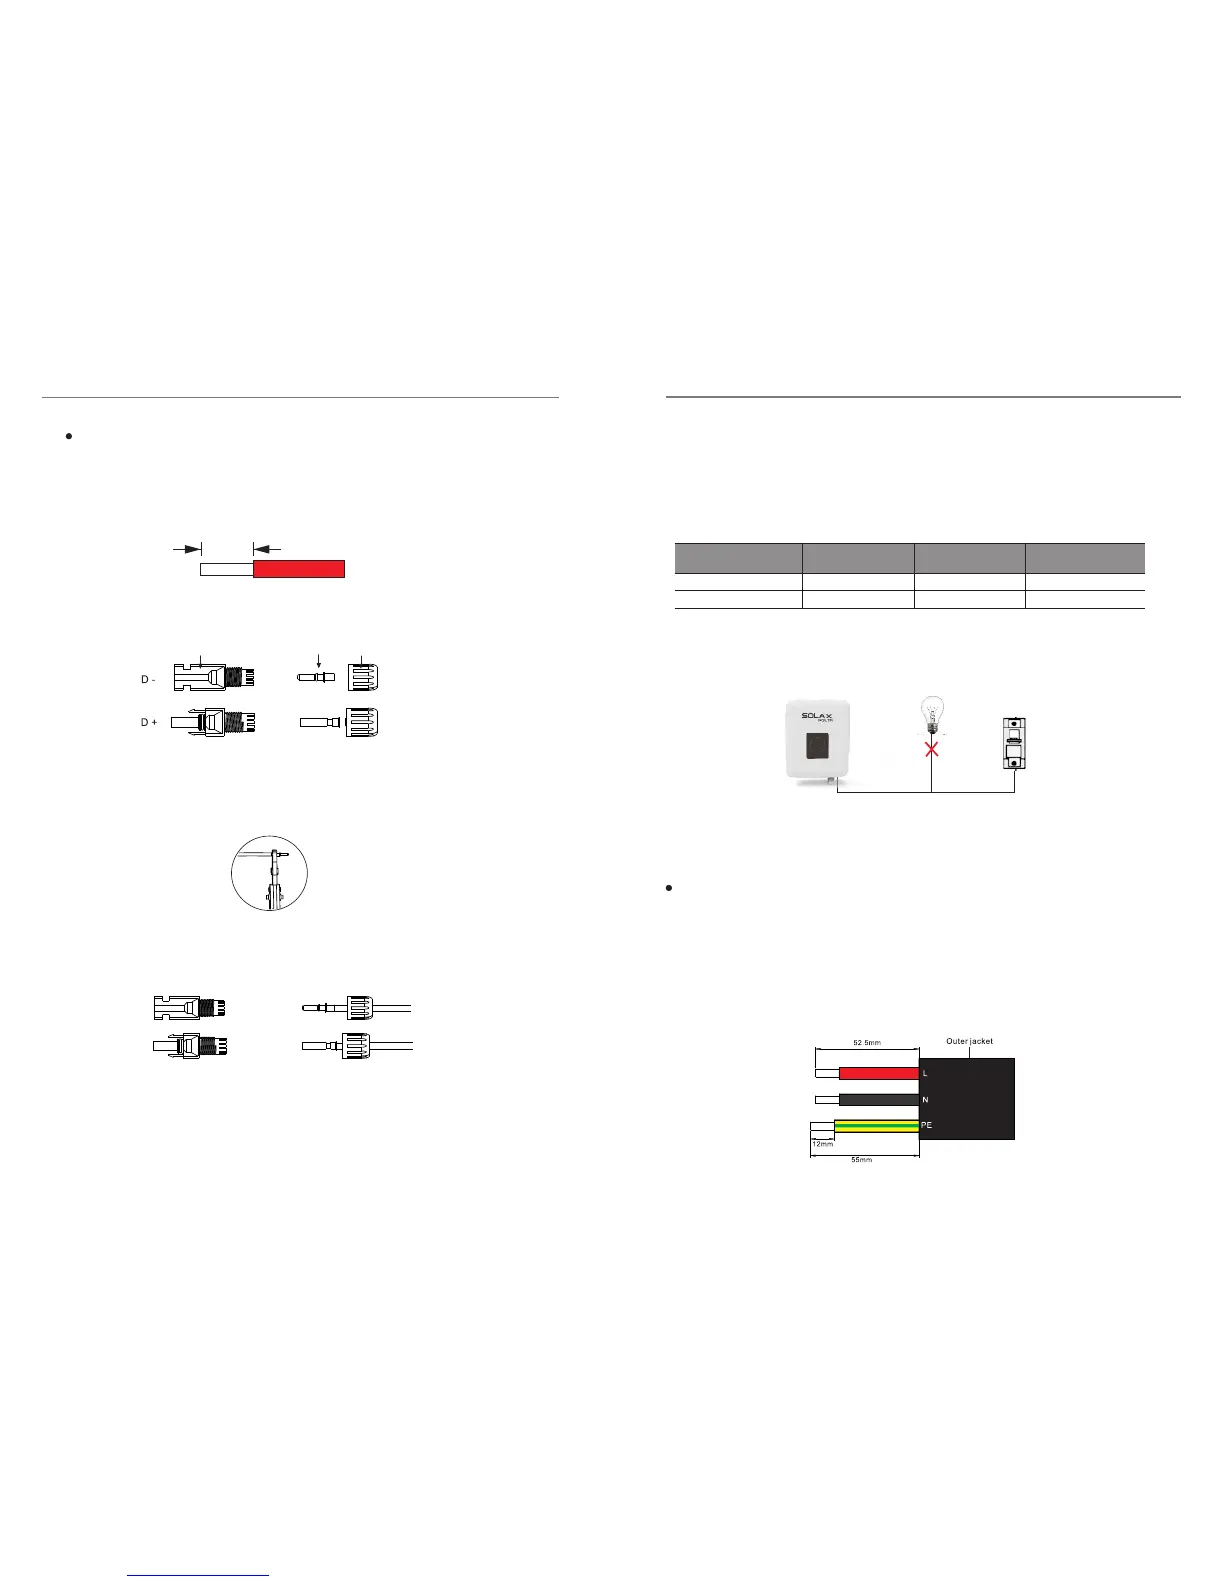
c) Trip 6mm of insulation from the wire end.
d) Separate the DC connector as below.
d) Separate the DC connector as below.
e) Insert striped cable into pin contact and ensure all conductor strand are
captured in the pin contact.
f ) Crimp pin contact by using a crimping pliers. Put the pin contact with striped
cable into the corresponding crimping pliers and crimp the contact.
g) Insert pin contact through the cable nut to assemble into back of the male or
female plug. When you feel or heard a “click” the pin contact assembly is seated
correctly.
h) Separate the DC connetor
- Use the specified wrench tool.
- When separate the DC+ connector, push the tool down from upside.
- When separate the DC - connector, push the tool down from the bottom.
- Separate the connectors by hands.
6.0 mm
12AWG
trip length
plug
pin contact
cable nut
Grid Connection
X1 series inverter are designed for single phase grid. Voltage range is
220/230/240V, frequency is 50/60Hz. Other technical requests should comply with
the requirement of the local public grid.
Micro-breaker should be installed between inverter and grid, any load should not
be connected with inverter directly.
a) Check the grid voltage and compare with the permissive voltage range (refer to
technical data).
b) Disconnect the circuit-bricker from all the phases and secure against re-
connection.
c) Trip the wires:
- Trip all the wires to 52.5mm and the PE wire to 55mm.
- Use the crimping pliers to trip 12mm of insulation from al wire ends as below.
4mm²
20A
20A 20A
4mm² 4mm²
Table 4 Cable and Micro-breaker recommended
Cable
Micro-Breaker
Incorrect Connection between Load and Inverter
1716
Model
X1-2.5-S-D
X1-2.5-S-N
X1-3.0-S-D
X1-3.0-S-N
X1-3.3-S-D
X1-3.3-S-N
 Loading...