Preparing the equipment for use
ENGLISH 10
Model 107L/ 107B
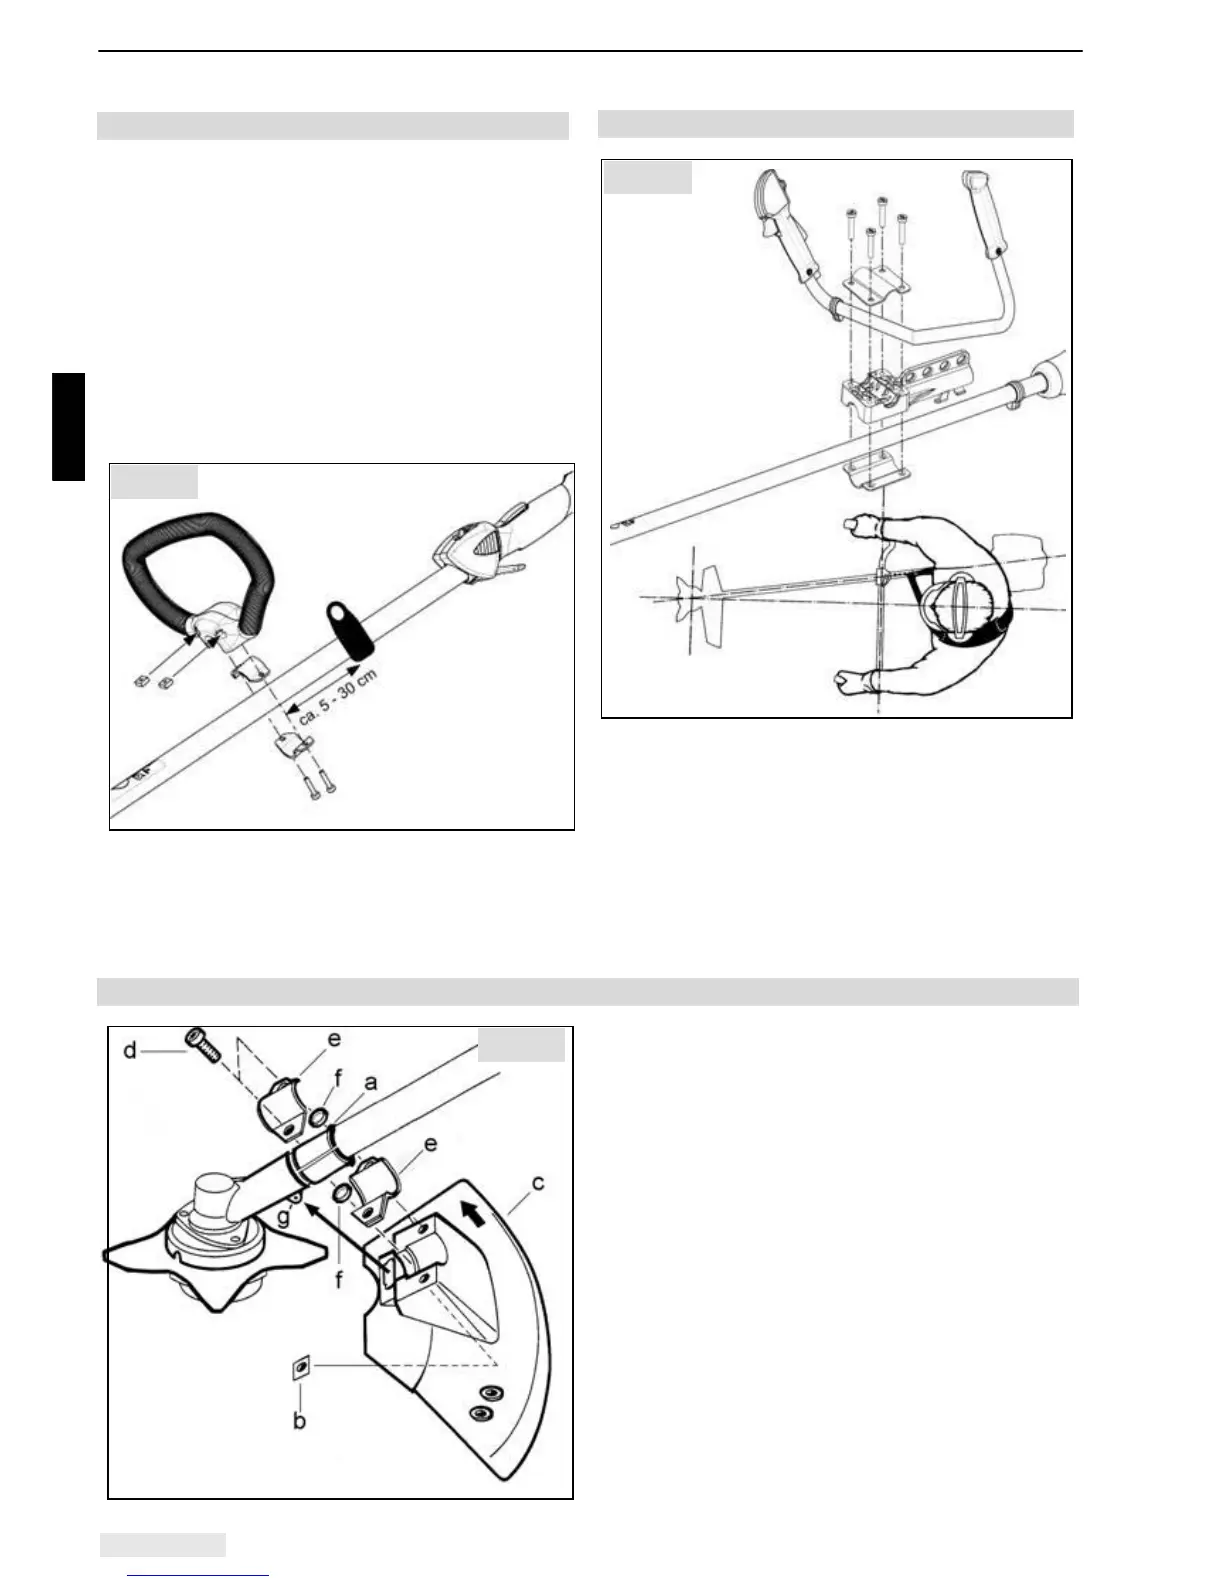
5.4 Completion - Loop handle - model 107L
Attach the "loop" handle approximately 5 cm - 30
cm from the strap attachment according to your
preferred working position. The longer side of the
handle serves as a safety barrier and must
therefore always be on the side of the user:
• If you carry the power tool on the right hand
side of your body when working then the longer
side of the handle must face to the left.
• If, however, you prefer to carry the power tool
on the left hand side of your body when working
(i.e. if you are left-handed) then the longer side
of the handle must face to the right.
• Initially tighten the screws only lightly.
• Push the handle, in accordance with your body
size, into its optimum position.
• Then tighten the screws.
5.5 Installation - Bike handle - model 107B
• The r.h. side of handle should be fitted as near
as possible to the handle support.
Note: You will have achieved an optimum
adjustment, if the centre of the power tool is at the
centre of your body. Your elbow should be slightly
angled in operating position.
Important: Always lead the power tool with the
bicycle handlebar on the r.h. side of the body!
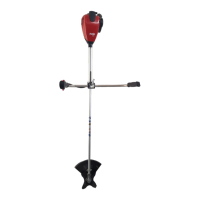
5.6 Shield installation - model 107L/ B
• Pull anti-vibration piece (a) with the bead
uppermost (towards the engine) over the shaft
tube. For this, the anti-vibration piece can be
bent open at the slot.
• Insert both square nuts (b) from the inside into
the contact shield.
• Secure shield (c) with both screws (d), both
semi-shells (e) and spacers (f) around the anti-
vibration piece on the shaft tube.
• The rectangular recess of the shield must be
seated precisely around protrusion (g) on the
gearbox.
• Tighten screws (d) alternately and evenly.
Please note: No other mounting position is
acceptable for the shield!
Fig. 6
Fig. 5
Fig. 7