Operating and maintenance instructions
ENGLISH 14
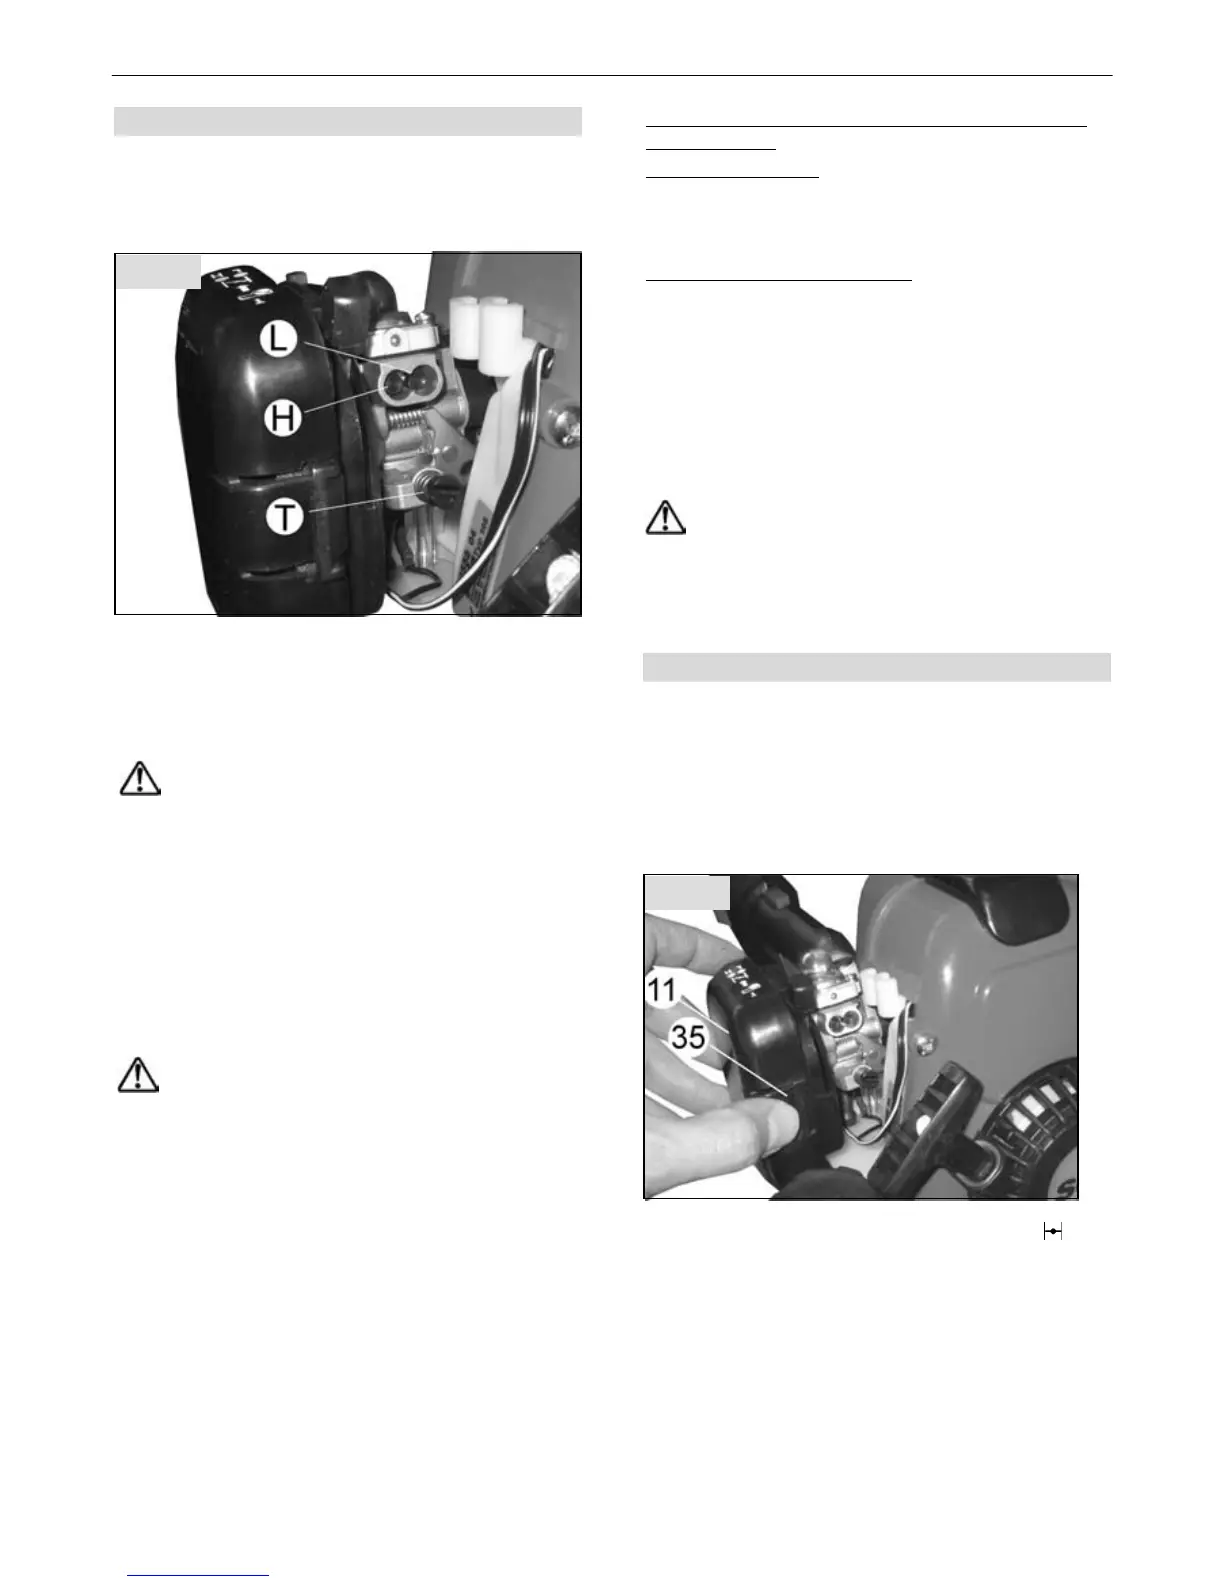
9.4 Carburettor adjustment
The carburettor has been adjusted optimally at the
factory. Subject to the operational altitude
(mountains or low lying areas), the carburettor may
require readjustment.
The carburettor has 3 adjusting screws:
• Idling end-stop screw "T"
• Low speed mixture screw "L"
• High speed mixture screw "H"
Only qualified mechanics must adjust the
regulating screws for idle mixture "L" and
full load mixture "H".
Turn the idling end-stop screw "T" to adjust the
idling speed in accordance with the details provided
in the specification. Use an engine rev counter for
this job.
• If the idling speed is too high, turn the idling
end-stop screw "T" anti-clockwise.
• If the idling speed is too low (engine stops) turn
the idling end-stop screw "T" clockwise until the
engine runs smoothly.
With the throttle set to idle, the cutting tool
must not, under any circumstances, rotate!
If the idling speed cannot be set correctly with the
idling end-stop screw "T", request an authorised
service centre to tune the carburettor.
The following instructions are for authorised
service shops
D-CUT carburettors:
Use the D-CUT carburettor key to adjust the idle
mixture screw "L" and the full load mixture screw
"H".
Carburettors with limiter caps:
The regulating screws for idle mixture and full load
mixture can only be adjusted in a limited range.
Clean the air filter before adjusting the low speed
screw!
Let the engine run warm before adjusting the
engine speed.
The carburettor is tuned for optimum engine
performance. Use a rev counter to tune the
carburettor correctly!
Do not adjust the engine to a higher speed.
Excessive engine speed can lead to major engine
damage!
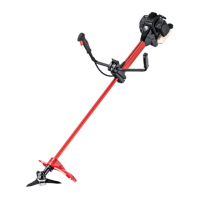
9.5 Air Filter Maintenance
Dirty air filters cause a reduction in engine
performance and increase fuel consumption with
more pollutants in the exhaust gas. Engines are less
likely to start readily with a dirty and soiled air
filter.
The following maintenance jobs should be carried
out frequently.
Before opening the air filter, close the choke
to
prevent dirt entering the carburettor.
Press clip (35), tilt and remove the filter cover (11).
Clean around the filter.
Fig. 13
Fig. 12