16
Auto On Setting Sleep Mode Options Time To Music Ethernet
Audio O Alwayson Alwayson
Audio 15Min 6-8seconds Alwayson
Audio 3Hrs 6-8seconds Alwayson
Auto On Setting Sleep Mode Options Time To Music Ethernet
PowerButton O Alwayson Alwayson
PowerButton 15Min 2-3seconds Alwayson
PowerButton 3Hrs 2-3seconds Alwayson
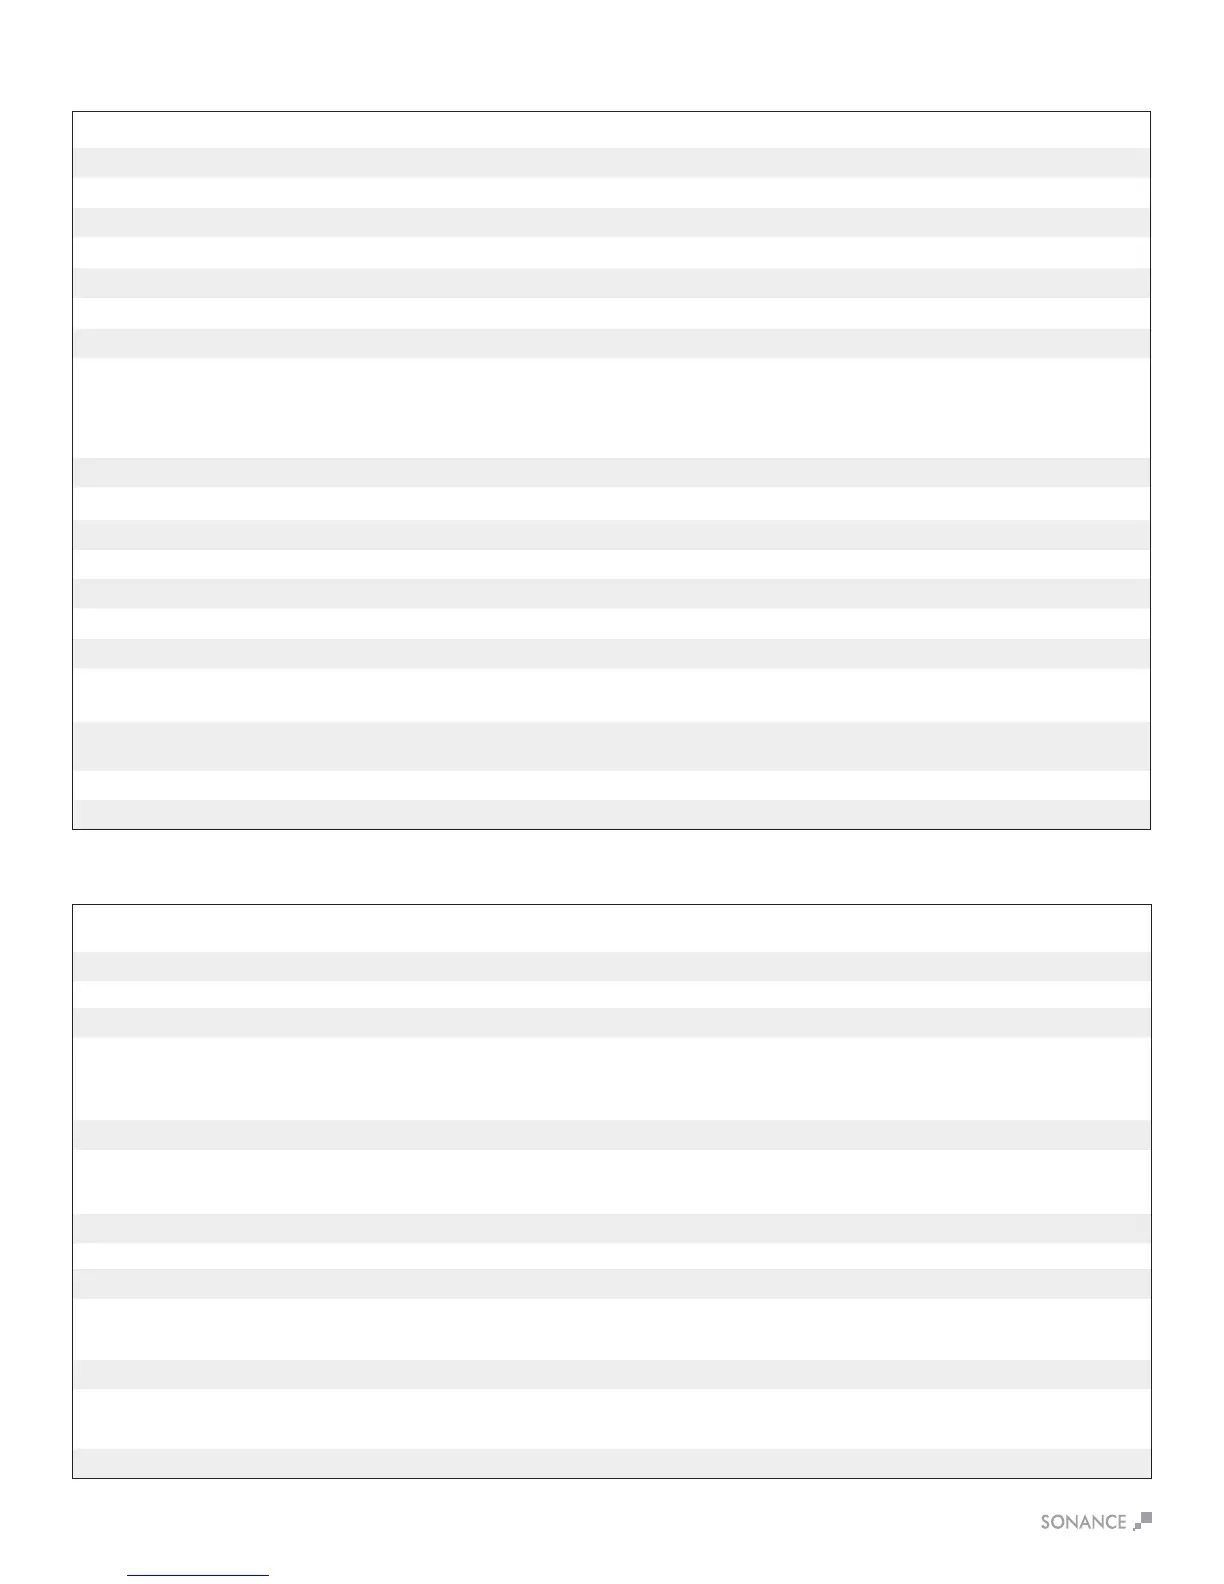
APPENDIX B
DSP 2-750 MKII Amplier - Auto On/Sleep Mode Details
Auto On Setting Sleep Mode Options Time To Music Ethernet
AudioGreen None 6-8seconds Turnsoafter15minswithoutaudio
Auto On Setting Sleep Mode Options Time To Music Ethernet
Voltage None 6-8seconds Alwayson
Auto On Setting Sleep Mode Options Time To Music Ethernet
VoltageGreen None 6-8seconds Turnsoafter15minswithoutvoltage
Dim White Power Button Amplierispluggedinandinstandbymode.
BrightWhitePowerButton Amplierisactive.
Power Button Blinking The amp is in ID Amp Mode (see page 9).
Green LED Signal is present (>1.0mv) on channel.
Blinking Green Signal is going above and below the active level or between songs.
Blinking Red The channel is being over driven.
Solid Red The amp is in protection mode (see page 6).
Power Button Blinking Light Amp temperature exceeds the design maximum.
+LED’sBlinkingRed
Step1 Turnampliero.
Step 2 With light pressure adjust 1L Volume Control full counter clockwise.
Step 3 With light pressure adjust 1R Volume Control full clockwise.
Step4 Poweronamplier(waitforPowerButtontoshowaseriesofashes).
Step5 Turnampliero.
Step 6 Set the 1L Volume Control full clockwise or at desired volume level.
Step7 Poweronamplier.
LED Indicator Explanation
DHCP Reset Step DHCP Reset Steps
APPENDIX A
Amplier Factory Reset Amplier Factory Reset Steps
Step 1 InaURLaddresswindowentertheampliersIPaddresswiththeextension/Update.htm
(ex.192.168.1.100/Update.htm)
Step 2 Ontheupdatepage,locatetheredresetbutton.Usethisbuttontocompletelyresettheamplier.
Step 3 ReturntotheHomePagetosetuptheamplier.Note:EQpresetswillnotbedeleted.

 Loading...