0739P300-E Installation Supercal 739 EN 17-03-2016 3 Sontex SA, 2605 Sonceboz, Switzerland
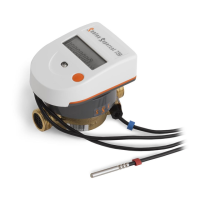
Temperature sensor 6mm, direct mounteing with brass nut M10x1mm – M12x1.5mm
The brass fitting may be mounted in the EAS base of the coaxial multi jet meter M77x1.5 or in a ball valve.
Female nut M12x1.5mm 0460P197
O-ring
Brass fitting M10x1mm – M12x1.5mm 0460A198
Copper gasket 0714P090
1. Place the copper gasket (0714P090) on the brass fitting M10x1mm side.
2. Screw the brass fitting on the EAS base of the coaxial multi jet meter M77x1.5 or in the ball valve.
3. Slide the O-ring along the silicone cable to the metal element.
4. Insert the temperature sensor into the brass fitting. The O-ring must be pressed against the brass fitting and must not go back along the cable.
5. Tighten by hand the M12x1.5 mm female nut until stumbled on the brass fitting.
6. Check the watertightness of the temperature sensor placed under pressure.
7. Seal the temperature sensor.
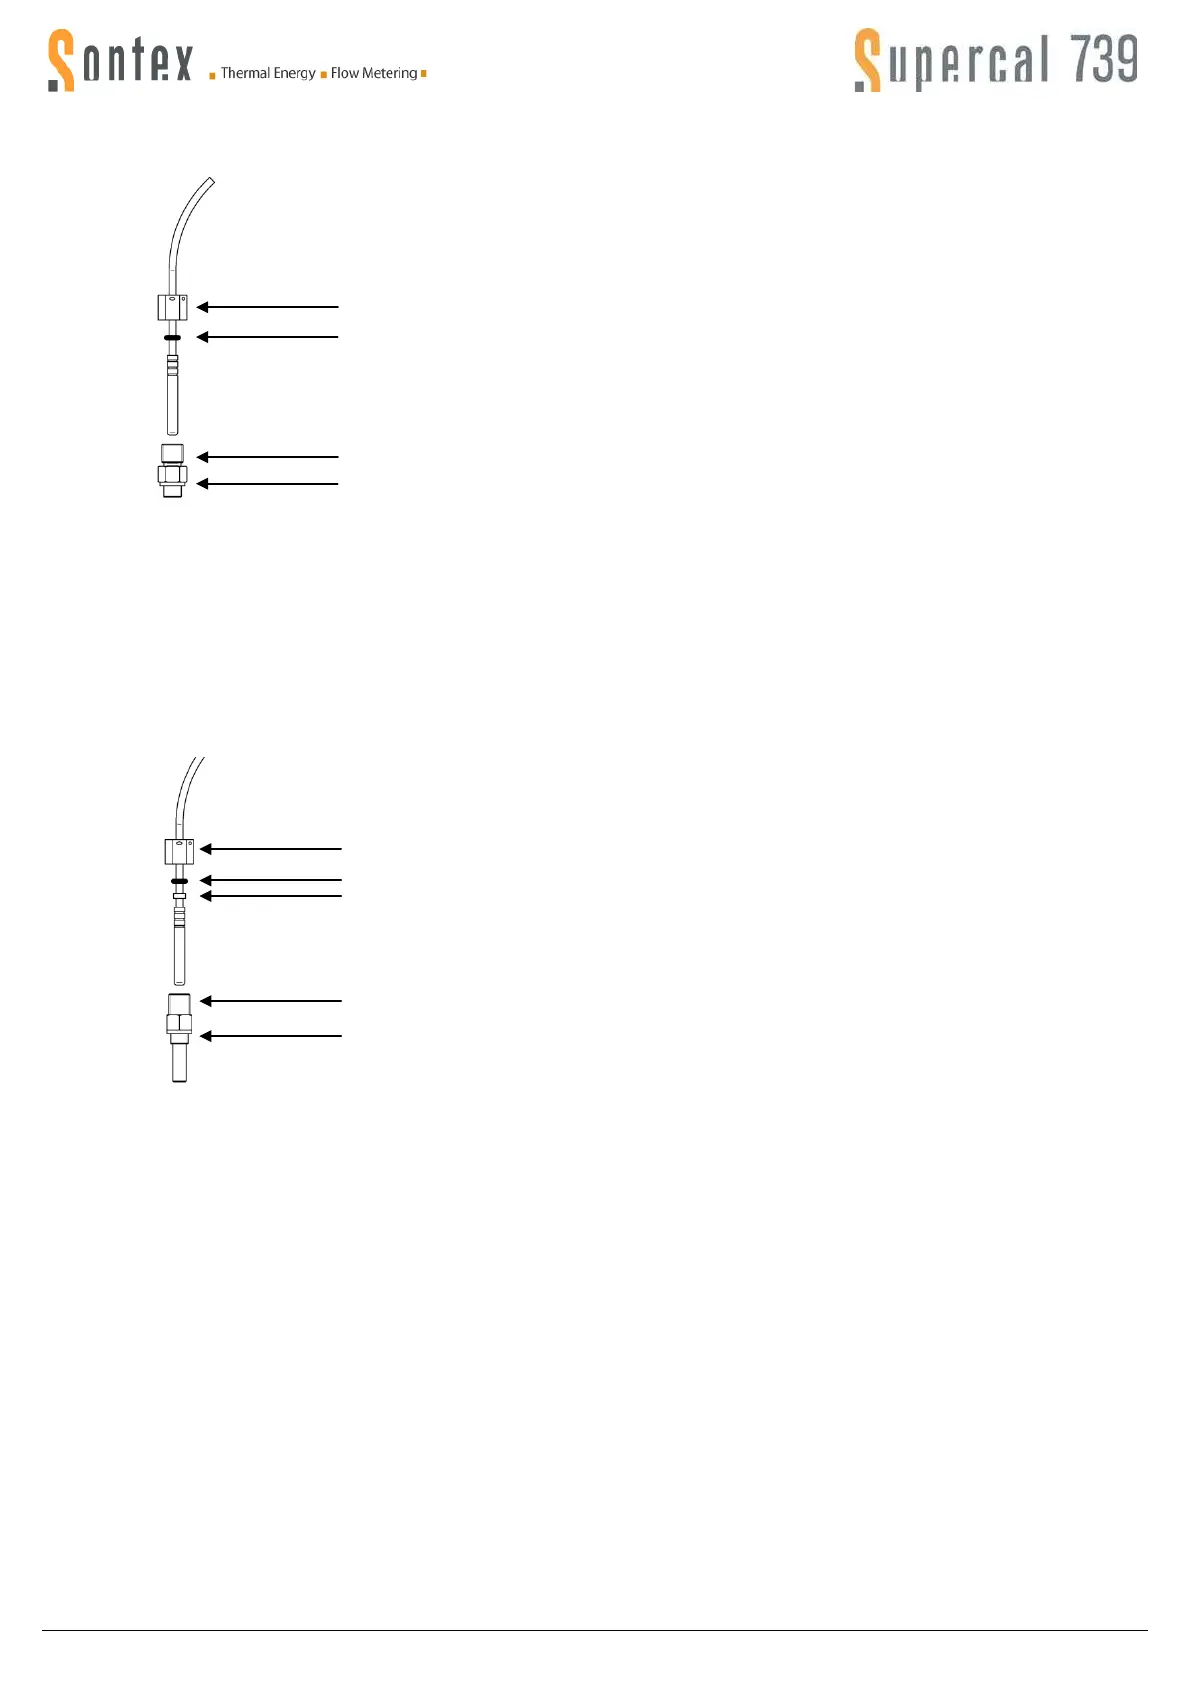
Temperature sensor 6mm, indirect mounting in a pocket
The brass fitting may be replaced by a pocket that can be mounted in the EAS base of the coaxial multi jet meter M77x1.5 or in a ball valve.
Female nut M12x1.5mm: 0460P197
O-ring
Adaptation plastic piece: 0460P202
Pocket M10x1mm – M12x1.5mm: 0460A201
Copper gasket: 0714P090
1. Place the copper gasket (0714P090) on the pocket M10x1 mm side.
2. Screw the pocket on the EAS base of the coaxial multi jet meter M77x1.5 or in the ball valve.
3. Slide the white adaptation plastic piece (0460P202) along the silicone cable to the metal element.
4. Slide the O-ring along the cable to the adaptation plastic piece.
5. Insert the temperature sensor into the pocket. The plastic piece will be positioned in the pocket. The O-ring must be pressed against the pocket
and does not go up along the cable.
6. Tighten by hand the M12x1.5 mm female nut until stumbled on the pocket.
7. Check the watertightness of the temperature sensor placed under pressure.
8. Seal the temperature sensor.
 Loading...