Customizing the equalizer curve
-
EQ7
Setting
"CUSTOM"
of
EQ7 allows you to make your
own equalizer settings.
1 Select a source, then press the select
button.
2 Rotate the
control
dial
until
"EQ7
SETTING" appears, then press it.
3 Rotate
the
control
dial
until
"BASE"
appears, then press it.
You
can select an equalizer curve as a basis
for further customizing.
To
not customize a preset equalizer curve,
skip to step 5.
4 Rotate the
control
dial
to
select the
equalizer curve, then press it.
S Setting the equalizer curve.
oRotate the control dial to select the
frequency range, then press it.
'E
T
,"-;..
-1 I
E~-
,.,.
1'"'
]RfJ]
I
BANDI: 63 Hz
BAND2: 160 Hz
BAND3: 400 Hz
BAND4: I kHz
BAND5: 2.5 kHz
BAND6: 6.3 kHz
BAND7: 16.0 kHz
8 Rotate the control dial to adjust the
volume level, then press it.
The volume level is adjustable in I
dB
steps, from -6 dB to +6 dB.
1JRto'
n
,'.!,;:..
.J]
, "
~
ED:i=':::-
,,'
I +
fid]
Repeat steps 0 and 8 to adjust other
frequency ranges.
6 Press
~
(BACK) twice.
The equalizer curve is stored in "CUSTOM,"
and the display returns to normal reception/
play mode.
Optimizing sound by Time
Alignment - Listening Position
The unit can change the localization
of
sound by
delaying the sound output from each speaker to
suit your position, and simulate a natural sound
field with the feeling
of
being
in
the center
of
it
wherever you sit in the car.
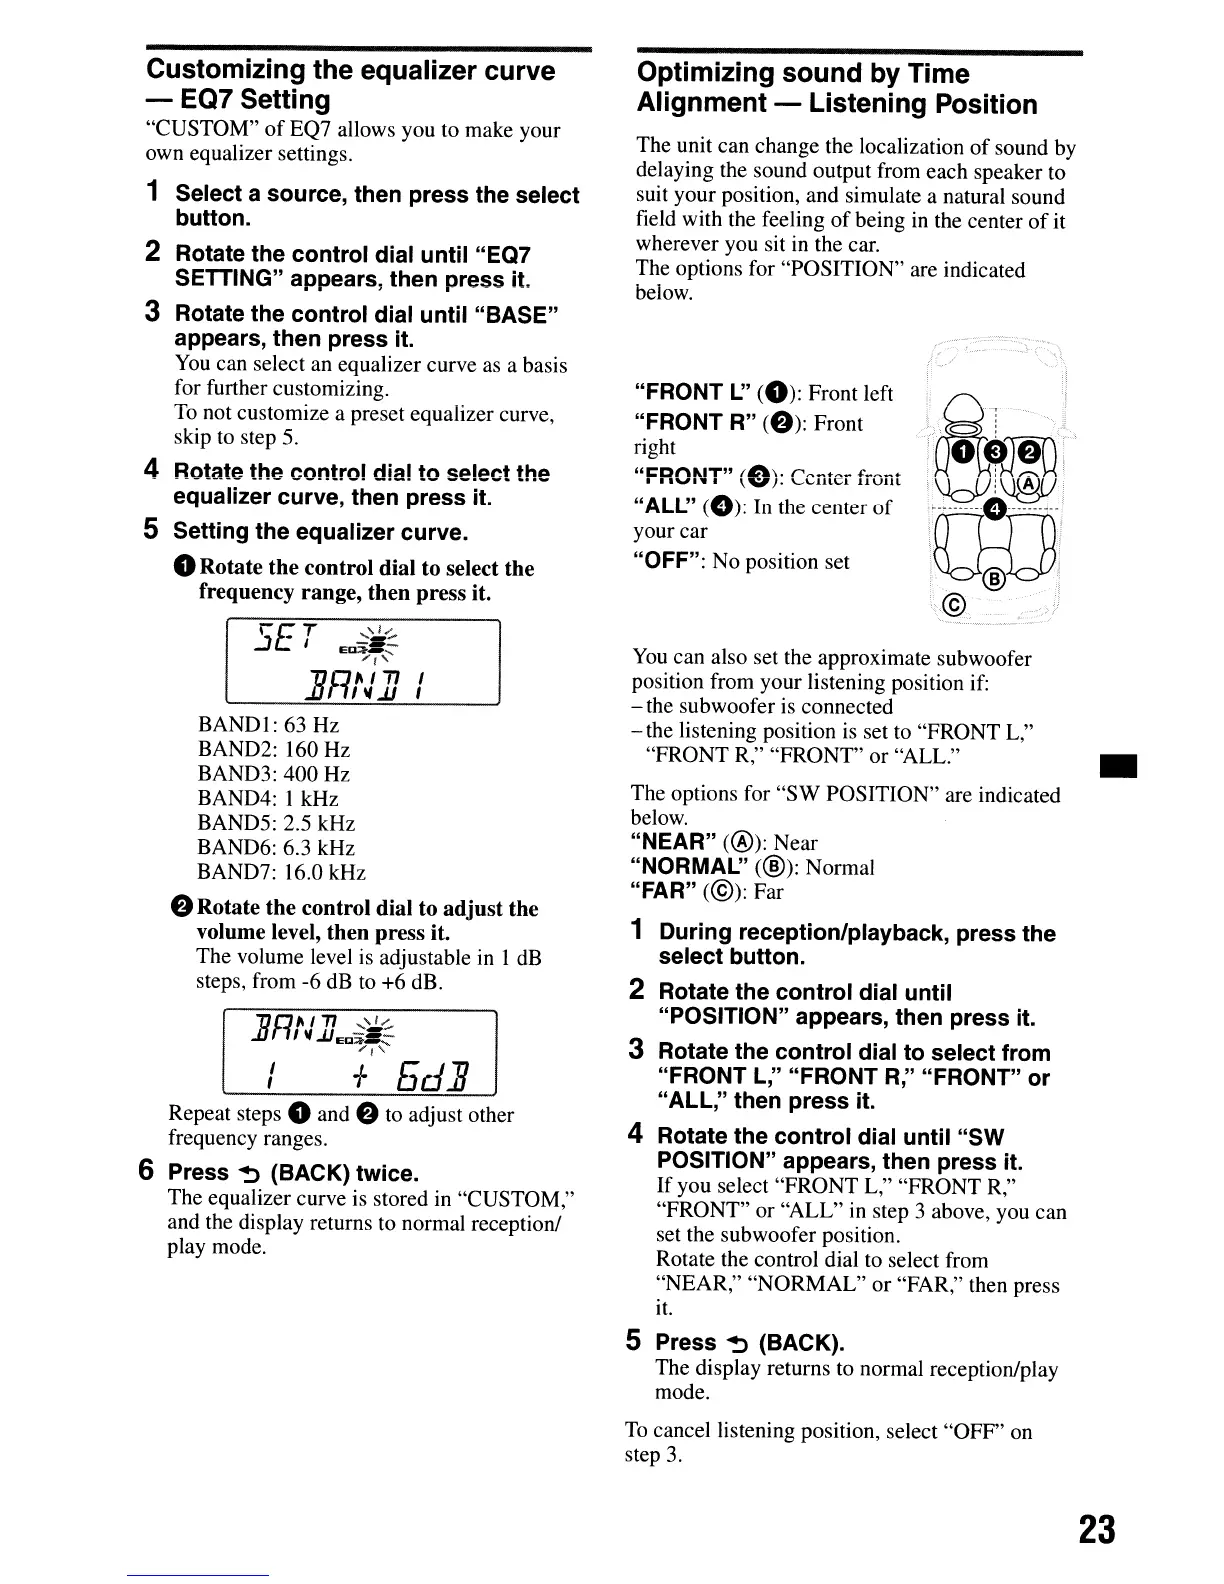
The options for "POSITION" are indicated
below.
;.:,./
,
"FRONT
L"
(0):
Front left
"FRONT
R"
(8):
Front
right
"C'D"MT"
(~tn.
r"~~.~_
I'_~_
•
•
'1"'.'"
\ V J. \
..
A
....
Ulc;l
11UIll
"ALL"
(0):
In the center
of
your car
"OFF": No position set
You
can also set the approximate subwoofer
position from your listening position
if:
- the subwoofer is connected
- the listening position is set to "FRONT L,"
"FRONT R," "FRONT" or "ALL." •
The options for
"SW
POSITION" are indicated
below.
"NEAR"
(@):
Near
"NORMAL"
(@):
Normal
"FAR"
(@):
Far
1 During reception/playback, press the
select button.
2 Rotate
the
control
dial
until
"POSITION" appears, then press it.
3 Rotate the
control
dial to select from
"FRONT L," "FRONT
R,"
"FRONT"
or
"ALL,"
then press it.
4 Rotate the
control
dial
until
"SW
POSITION" appears, then press it.
If
you select "FRONT L," "FRONT R,"
"FRONT" or "ALL"
in
step 3 above, you can
set the subwoofer position.
Rotate the control dial to select from
"NEAR," "NORMAL"
or
"FAR," then press
it.
S Press
~
(BACK).
The display returns to normal reception/play
mode.
To
cancel listening position, select "OFF" on
step
3.
23



 To Next Page