Identifying the
Parts
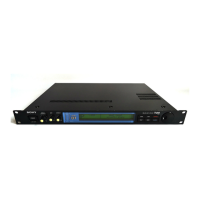
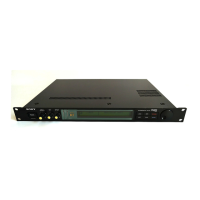
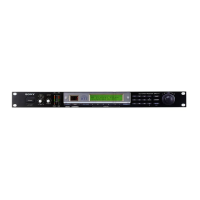
Front panel
m
POWER switch
Turns the unit on and off. When the
power is on. the
back light of the display
window illuminates and the last
indication appears.
For
a
few seconds after
switching
on, the sound being
input will
be
directly output since
the bypass function works.
m
INPUT control
Adjusts the input levels of two
channels independently.
The outside knob controls
channel
1
and the inside
knob controls channel 2. Since they
are linked with
each other, hold
whichever
you do
not use to adjust
for
one channel only.
["3"]
DRY (original sound)
control
Adjusts the output
level of the source signal which is
clear of any effect. Using this
control in conjunction
with
the EFFECT control can adjust the
balance between the
source signal and the effect
signal when mixing them.
To output only the effect
signal,
set
the control to
“0”.
[T1
EFFECT control
Adjust the output level
of the effect signal. Using this
control
in conjunction with the DRY control can
adjust
the balance between the source
signal and the effect
signal when mixing them.
[~5~1
Input level meter
Indicates input level
for both channels
independently.
Adjusts the INPUT control so
that
0
dB is lit when the
signal of the reference
level is input.
0
dB means a head
room of 20 dB.
When the signal exceeds this head
room, “OVER”
illuminates.
This meter does not
work when the BYPASS
button is
pressed.
[~6~|
MIDI indicator
Illuminates when the unit receives the
MIDI program
change signal or
control change signal.
[~7l
REMOTE
indicator
Illuminates
when the unit
receives the
signal from an
optional remote
commander.
[in
Display
window
A display
of 40 characters by
2 lines on
which names of
called
memory,
parameter values
and/or messages are
indicated. Displayed
indication is easy to
read in a
dark
hall or a
studio due to
the back lighting.
m
LOAD
button
Press the
button
to
call up the
memory.
[Tol
HELP
button
Press
the button to
display information
or messages
necessary to proceed
with
operation.
flTI
EDIT
button
Press
the button to change
parameter values in the
memory.
IT
2
I
SAVE
button
Press the
button to save the
effects individually
created
in the user
memory.
Pt3|
BYPASS
button
Press
the button to output
the input
signal directly.
fl4l
ENTER
button
Press
the button
every time you
have finished
selecting
or setting
parameters.
fl5l
Operating dial
Selects preset
numbers
and/or sets
parameters.
8
GETTING STARTED